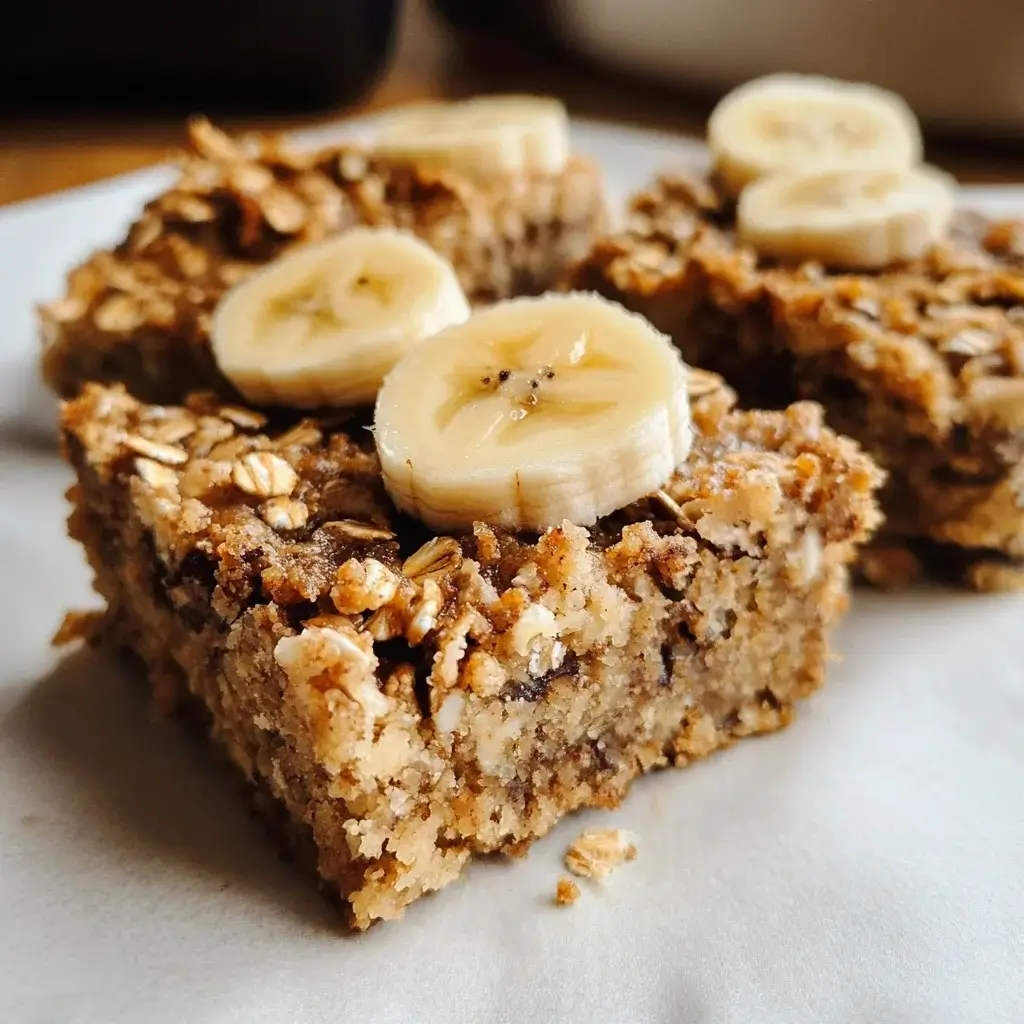
Mornings in our house used to be a whirlwind of rushed breakfasts, often resorting to sugary cereals or plain toast just to get something into bellies before dashing out the door. I craved something easy, nutritious, and genuinely enjoyable – a breakfast that felt like a treat but packed a healthy punch. That’s when I stumbled upon the concept of breakfast bars, specifically ones using ripe bananas and hearty oats. After a few attempts, tweaking ingredients here and there, I landed on this Breakfast Banana Oat Bar recipe, and honestly, it’s been a game-changer. The first time I baked a batch, the warm, comforting aroma of banana and cinnamon filled the kitchen, instantly signaling that this was something special. My kids, usually picky eaters, were drawn in by the smell alone. When they tried them, their eyes lit up! They loved the naturally sweet taste and chewy texture. For me, the best part is the convenience. I bake a batch on Sunday evening, and we have grab-and-go breakfasts or healthy snacks sorted for several days. They are incredibly satisfying, keeping us full and energized until lunchtime, without the sugar crash associated with processed options. They’ve become a staple, requested week after week, and I feel good knowing I’m providing a wholesome start to the day that everyone genuinely loves. They aren’t just food; they’re little squares of morning peace!
Ingredients
Here’s what you’ll need to create these delicious and wholesome breakfast bars:
- Ripe Bananas (3 large): About 1 ½ cups mashed. Overripe bananas with plenty of brown spots work best, providing natural sweetness and moisture.
- Rolled Oats (2 ½ cups): Also known as old-fashioned oats. Use certified gluten-free oats if needed. These provide a chewy texture and are packed with fiber. Avoid steel-cut oats.
- Maple Syrup (¼ cup): A natural liquid sweetener. Honey or agave nectar can be used as substitutes, though honey is not vegan. Adjust sweetness to your preference.
- Melted Coconut Oil (¼ cup): Provides moisture and healthy fats. Melted butter or another neutral oil like avocado oil can be substituted.
- Vanilla Extract (1 teaspoon): Enhances the overall flavor profile, complementing the banana and cinnamon.
- Ground Cinnamon (1 teaspoon): Adds warmth and a classic flavor pairing with oats and banana. Feel free to add other spices like nutmeg or cardamom.
- Baking Powder (1 teaspoon): Helps the bars rise slightly, giving them a lighter texture rather than being overly dense.
- Salt (½ teaspoon): Balances the sweetness and enhances the other flavors.
- Optional Add-ins (½ – 1 cup total): Customize your bars! Consider chocolate chips (dark, semi-sweet, or milk), chopped nuts (walnuts, pecans, almonds), seeds (chia seeds, flax seeds, pumpkin seeds, sunflower seeds), or dried fruit (raisins, cranberries, chopped apricots).
Instructions
Follow these simple steps to bake your perfect batch of Breakfast Banana Oat Bars:
- Preheat and Prep: Preheat your oven to 350°F (175°C). Grease and line an 8×8 inch (or 9×9 inch for thinner bars) square baking pan with parchment paper, leaving some overhang on the sides to easily lift the bars out later. This step is crucial for preventing sticking and ensuring easy removal.
- Mash the Bananas: In a large mixing bowl, peel the ripe bananas and mash them thoroughly with a fork or a potato masher. Aim for a mostly smooth consistency, but a few small lumps are perfectly fine – they add texture. You should have about 1 ½ cups of mashed banana.
- Combine Wet Ingredients: Add the melted coconut oil, maple syrup, and vanilla extract to the mashed bananas. Stir well until everything is evenly combined. The mixture should look smooth and slightly glossy.
- Combine Dry Ingredients: In a separate medium bowl, whisk together the rolled oats, ground cinnamon, baking powder, and salt. Stirring the dry ingredients together first ensures the baking powder and salt are evenly distributed throughout the oats, which helps with consistent texture and rise.
- Mix Wet and Dry: Pour the wet banana mixture into the bowl with the dry oat mixture. Use a spatula or wooden spoon to stir until just combined. Be careful not to overmix; mix only until you no longer see streaks of dry oats. Overmixing can lead to tougher bars.
- Fold in Add-ins: If using any optional add-ins like chocolate chips, nuts, seeds, or dried fruit, gently fold them into the batter now. Distribute them evenly throughout the mixture.
- Transfer to Pan: Spoon the oat mixture into the prepared baking pan. Spread it evenly across the bottom using your spatula or the back of a spoon. Press down gently to create a compact, even layer. This helps the bars hold together after baking.
- Bake: Place the baking pan in the preheated oven. Bake for 25-30 minutes, or until the edges are golden brown and a toothpick inserted into the center comes out clean (or with just a few moist crumbs, no wet batter). The top should feel set to the touch.
- Cool Completely: This is a very important step! Remove the pan from the oven and place it on a wire rack. Let the bars cool completely in the pan before attempting to lift them out or slice them. Cooling allows the bars to firm up properly; slicing them while warm will likely cause them to crumble. This usually takes at least 1-2 hours at room temperature, or you can speed it up slightly in the refrigerator after the initial 30 minutes of cooling.
- Slice and Serve: Once completely cooled, use the parchment paper overhangs to lift the entire slab out of the pan onto a cutting board. Use a sharp knife to cut into squares or rectangles (usually 9 or 12 bars, depending on desired size). Serve immediately or store for later.
Nutrition Facts
(Note: Nutritional values are estimates based on the core ingredients and may vary depending on the specific ingredients used, ripeness of bananas, and optional add-ins. Calculated for 1 serving when cut into 12 bars.)
- Servings: 12 bars
- Calories per serving: Approximately 180-220 kcal (depending on add-ins)
- Fiber (Approx. 3-4g): Primarily from the rolled oats and bananas, fiber aids digestion and promotes feelings of fullness, helping to keep you satisfied longer.
- Potassium (Approx. 150-200mg): Bananas are a good source of potassium, an essential mineral important for maintaining healthy blood pressure and fluid balance.
- Healthy Fats (Approx. 7-9g): Mostly unsaturated fats from coconut oil and any added nuts or seeds, contributing to satiety and supporting overall health.
- Natural Sugars (Approx. 10-14g): Primarily from the bananas and maple syrup, providing energy. These bars offer a more wholesome alternative to breakfasts high in refined sugars.
- Complex Carbohydrates (Approx. 25-30g): Oats provide slow-releasing carbohydrates, offering sustained energy release rather than a quick spike and crash.
Preparation Time
- Preparation Time: 15 minutes (Includes mashing bananas, mixing ingredients, and prepping the pan)
- Cooking Time: 25-30 minutes
- Cooling Time: 1-2 hours (Essential for the bars to set properly)
- Total Time: Approximately 1 hour 40 minutes to 2 hours 45 minutes (mostly hands-off cooling time)
How to Serve
These Breakfast Banana Oat Bars are wonderfully versatile. Here are several ways to enjoy them:
- Plain and Simple:
- Enjoy them as they are – perfect for a quick grab-and-go breakfast or snack.
- Serve at room temperature for a chewy texture.
- Warmed Up:
- Gently warm a bar in the microwave for 10-15 seconds for a softer, more comforting treat, especially nice on cooler mornings. The aroma intensifies beautifully when warm.
- With Toppings:
- Spread a thin layer of peanut butter, almond butter, or sunflower seed butter on top for extra protein and healthy fats.
- Drizzle with a touch more maple syrup or honey if you prefer extra sweetness.
- Add a dollop of Greek yogurt or coconut yogurt for a creamy contrast and added protein.
- As Part of a Larger Breakfast:
- Serve alongside a small bowl of fresh fruit (like berries or sliced banana) for added vitamins and freshness.
- Pair with a glass of milk (dairy or plant-based) or a cup of coffee or tea.
- Crumble a bar over a smoothie bowl or yogurt parfait for added texture and substance.
- For Different Occasions:
- Pack them in lunchboxes for a healthy school or work snack.
- Take them hiking or on road trips for portable energy.
- Serve them as a healthier dessert option, perhaps with a small scoop of banana “nice cream.”
Additional Tips
Elevate your Breakfast Banana Oat Bar game with these helpful tips:
- The Riper, The Better: Don’t shy away from bananas that look past their prime (lots of brown or black spots). Overripe bananas are significantly sweeter and mash much more easily, contributing essential moisture and reducing the need for added sugar. Green or barely yellow bananas won’t provide the same flavor or binding properties.
- Oat Selection Matters: Stick to rolled oats (old-fashioned) for the best chewy texture. Quick-cooking oats can sometimes result in a mushier bar, as they absorb liquid differently. Steel-cut oats are not suitable for this recipe as they require much longer cooking times and more liquid. If you need gluten-free bars, ensure you use certified gluten-free rolled oats to avoid cross-contamination.
- Customize Your Sweetness: This recipe uses ¼ cup of maple syrup, relying heavily on the bananas for sweetness. Taste your mashed banana mixture before adding other ingredients. If your bananas aren’t super sweet, or if you prefer a sweeter bar, you can slightly increase the maple syrup (up to ⅓ cup). Alternatively, for less sweetness, reduce it slightly or rely solely on very ripe bananas. You could also experiment with date paste for a whole-food sweetener option.
- Get Creative with Add-ins: This recipe is a fantastic base for customization. Think beyond chocolate chips and nuts! Consider shredded unsweetened coconut, pumpkin seeds, sunflower seeds, hemp seeds, chia seeds (add up to 1-2 tbsp), dried cranberries, raisins, chopped dates, or even a pinch of ground ginger or cardamom alongside the cinnamon. Aim for about ½ to 1 cup total add-ins so the bars still hold together well.
- Make Them Vegan Easily: This recipe is easily made vegan! Simply ensure you are using maple syrup (not honey) and coconut oil (or another plant-based oil/butter). The bananas act as a natural binder, so no egg substitute is typically required. Double-check that any chocolate chips used are dairy-free.
- Press Firmly for Structure: When spreading the mixture in the pan, press it down firmly and evenly with the back of a spoon or a spatula. This compaction helps the bars bind together during baking and prevents them from becoming too crumbly after cooling and slicing. Ensure the corners and edges are just as compacted as the center.
- Storage Savvy: Store cooled bars in an airtight container. They will keep at room temperature for about 3-4 days. For longer storage, keep them in the refrigerator for up to a week (they will be firmer straight from the fridge). For long-term storage, freeze the bars. Flash freeze them first by placing sliced bars on a baking sheet in the freezer until solid (about 1 hour), then transfer them to a freezer-safe bag or container, separating layers with parchment paper if needed. They can be frozen for up to 3 months. Thaw at room temperature or gently microwave.
- Troubleshooting Crumbliness: If your bars turned out too crumbly, a few things might be happening. Ensure you cooled them completely before slicing – this is the most common culprit. Check if you used enough mashed banana (aim for 1.5 cups). Make sure you pressed the mixture firmly into the pan before baking. Using too many dry add-ins without slightly increasing the binder (banana or liquid sweetener) can also lead to crumbling. Finally, ensure you didn’t overbake them, as this can dry them out.
FAQ
Here are answers to some frequently asked questions about these Breakfast Banana Oat Bars:
- Can I use unripe or just yellow bananas for this recipe?
It’s strongly recommended to use very ripe bananas with plenty of brown spots. Unripe or just-yellow bananas lack the necessary sweetness and moisture content. Ripe bananas mash easily, provide natural sugar (reducing the need for added sweeteners), and contribute significantly to the binding and overall flavor profile of the bars. Using less ripe bananas will likely result in drier, less flavorful, and potentially crumbly bars. - Can I substitute quick-cooking oats for rolled oats?
You can technically use quick-cooking oats, but it will change the texture of the bars. Quick oats are thinner and more processed, so they absorb liquid faster and can result in a softer, sometimes mushier texture compared to the distinct chewiness provided by rolled oats. If using quick oats, the bars might also be slightly more prone to crumbling. Rolled (old-fashioned) oats are generally preferred for the best texture in this recipe. Avoid steel-cut oats entirely. - Are these Breakfast Banana Oat Bars gluten-free?
These bars can easily be made gluten-free, but only if you use certified gluten-free rolled oats. Oats themselves are naturally gluten-free, but they are often processed in facilities that also handle wheat, barley, and rye, leading to cross-contamination. If you or someone you are baking for has celiac disease or gluten sensitivity, it is crucial to purchase oats specifically labeled as “certified gluten-free.” All other standard ingredients in this recipe (bananas, maple syrup, coconut oil, spices, baking powder, salt) are typically gluten-free, but always double-check labels if severe allergies are a concern. - How long do these oat bars stay fresh?
When stored properly in an airtight container, these Breakfast Banana Oat Bars will stay fresh at room temperature for about 3 to 4 days. If you live in a very warm or humid climate, or if you prefer a firmer texture, storing them in the refrigerator is recommended, where they will last for up to a week. Keep in mind they will be harder straight from the fridge but soften slightly as they come to room temperature. - Can I freeze these banana oat bars for later?
Yes, absolutely! These bars freeze very well, making them perfect for meal prepping. First, ensure the bars are completely cooled and sliced. For best results, place the individual bars on a baking sheet lined with parchment paper and freeze until solid (about 1 hour) – this is called flash freezing and prevents them from sticking together. Once solid, transfer the bars to a freezer-safe zip-top bag or airtight container. You can place parchment paper between layers if stacking. They can be stored in the freezer for up to 3 months. To thaw, simply leave them out at room temperature for an hour or two, or gently warm one in the microwave for about 20-30 seconds. - Are these bars actually healthy?
“Healthy” can be subjective, but these bars offer significant nutritional benefits compared to many processed breakfast options or pastries. They are made with whole-food ingredients like rolled oats (high in fiber and complex carbohydrates for sustained energy) and bananas (providing potassium and natural sweetness). Using natural sweeteners like maple syrup in moderation and healthy fats from coconut oil (or nuts/seeds if added) makes them a more wholesome choice. They provide fiber, some protein (especially if nuts/seeds are added), and essential nutrients. However, they still contain calories and natural sugars, so portion control is key, especially if you add high-calorie ingredients like chocolate chips or large amounts of nuts. Overall, they are a nutritious and satisfying option for breakfast or a snack. - Can I make these bars nut-free?
Yes, easily! The base recipe as written (without optional nuts) is already nut-free. Just ensure your vanilla extract and any other flavorings don’t have hidden nut ingredients (rare, but worth checking if allergies are severe). If you want to include add-ins but need to avoid nuts, opt for seeds like pumpkin seeds, sunflower seeds, chia seeds, or hemp seeds. Chocolate chips (check labels for nut cross-contamination warnings if necessary) and dried fruits are also great nut-free additions. If substituting oil, ensure you use a nut-free oil like coconut, avocado, or even canola oil. - My bars came out too wet or gummy in the center. What went wrong?
Gummy or overly wet centers usually indicate they were underbaked or there was too much moisture. Ensure your oven temperature is accurate (use an oven thermometer if unsure). Bake until the edges are golden and a toothpick inserted into the center comes out clean or with only dry crumbs. If it comes out with wet batter, it needs more time. Also, measure your mashed banana accurately – using significantly more than 1.5 cups can add too much moisture. Finally, ensure you allowed the bars to cool completely in the pan. They continue to set as they cool, and slicing them warm can make the center seem wetter than it actually is once fully set.