Okay, let’s get baking (or rather, no-baking!) with these incredible Chocolate-Coconut Energy Bars. I have to tell you, these bars have become an absolute staple in our household. My kids, who can be notoriously picky about “healthy” snacks, actually ask for these by name! They see them as a treat, and I see them as a powerhouse of goodness. I first whipped up a batch when I was looking for a healthier alternative to store-bought granola bars, which are often packed with refined sugars and unpronounceable ingredients. I wanted something quick, easy, and made with whole foods that would give us sustained energy for busy afternoons, pre-sport fuel, or even a quick breakfast bite on chaotic mornings. The combination of rich chocolate and tropical coconut is simply divine, and the chewy, satisfying texture makes them irresistible. What I love most is how customizable they are – you can truly make them your own. But this classic chocolate-coconut version? It’s a clear winner, every single time. They disappear from the container almost as quickly as I can make them, and I feel so good knowing my family is enjoying a snack that’s both delicious and nourishing. Get ready, because these bars are about to become your new obsession too!
Ingredients: Crafting Your Chocolate-Coconut Masterpiece
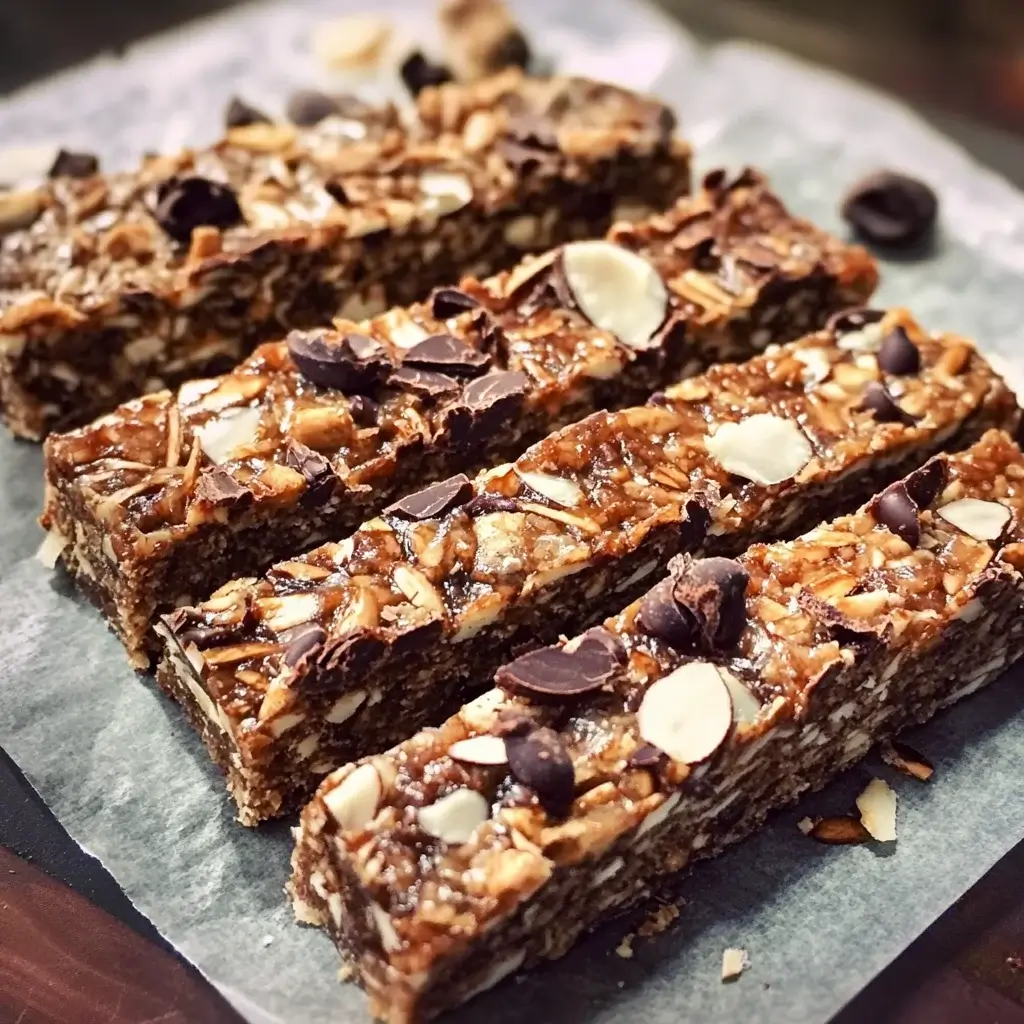
This recipe focuses on wholesome ingredients that not only taste fantastic together but also provide a good balance of nutrients for sustained energy. Each component plays a crucial role in the final texture and flavor profile of these delightful bars.
- 1 ½ cups (150g) Old-Fashioned Rolled Oats (Gluten-Free if needed): These form the hearty base of our bars, providing excellent texture and slow-releasing carbohydrates for energy. Old-fashioned oats offer a chewier bite compared to quick oats.
- 1 cup (80g) Unsweetened Shredded Coconut: This is where the tropical magic happens! Unsweetened coconut ensures we control the sugar content while delivering that distinct, beloved coconut flavor and a pleasant chewiness.
- ½ cup (60g) Chopped Almonds or Walnuts (or a mix): Nuts add a delightful crunch, healthy fats, and protein. Almonds offer a milder flavor, while walnuts provide a richer, earthier note. Feel free to use your favorite or what you have on hand.
- ¼ cup (30g) Ground Flaxseed (Flaxseed Meal): A nutritional powerhouse! Ground flaxseed adds omega-3 fatty acids, fiber, and acts as a subtle binder.
- ¼ cup (20g) Unsweetened Cocoa Powder (or Cacao Powder): For that deep, rich chocolate flavor. Cacao powder is less processed and can offer more antioxidants, but good quality unsweetened cocoa powder works wonderfully too.
- ¼ teaspoon Fine Sea Salt: Salt is a flavor enhancer; it balances the sweetness and brings out the richness of the chocolate and coconut.
- 1 cup (240g, about 12-15) Pitted Medjool Dates, packed: These are the primary sweetener and binder. Medjool dates are large, soft, and caramel-like, making them ideal. If your dates are dry, soak them in hot water for 10-15 minutes, then drain well.
- ½ cup (120g) Almond Butter (or other nut/seed butter): Adds creaminess, healthy fats, protein, and helps bind the bars. Ensure it’s a natural, runny variety where the only ingredient is almonds (and maybe salt).
- ¼ cup (60ml) Pure Maple Syrup or Honey: Provides additional sweetness and helps with binding. Maple syrup keeps it vegan. The amount can be adjusted slightly based on the sweetness of your dates and personal preference.
- 1 teaspoon Vanilla Extract: Enhances all the other flavors, especially the chocolate and coconut.
- ⅓ cup (60g) Dark Chocolate Chips or Chunks (dairy-free if needed): Because more chocolate is always a good idea! These add pockets of melty chocolate goodness throughout the bars.
Instructions: Your Step-by-Step Guide to Energy Bar Perfection
Follow these simple steps to create your batch of delicious and energizing Chocolate-Coconut Energy Bars. The process is straightforward and requires no baking, making it a perfect activity for even novice kitchen enthusiasts.
- Prepare the Pan: Line an 8×8 inch (20×20 cm) square baking pan with parchment paper, leaving some overhang on two sides. This will make it easy to lift the bars out later for cutting. Lightly grease the parchment if you’re concerned about sticking, though it’s often not necessary.
- Process the Dry Ingredients (Excluding Chocolate Chips): In the bowl of a large food processor, combine the rolled oats, shredded coconut, chopped nuts (almonds/walnuts), ground flaxseed, cocoa powder, and sea salt. Pulse 5-7 times until the nuts are slightly more broken down and everything is well combined. Be careful not to over-process into a flour; you still want some texture. Transfer this dry mixture to a large mixing bowl.
- Process the Wet Ingredients (Dates First): Add the pitted Medjool dates to the now-empty food processor. Process them until they break down and form a sticky, paste-like ball. This might take a minute or two, and you may need to scrape down the sides of the processor a couple of times. The dates are crucial for binding the bars.
- Add Remaining Wet Ingredients to Dates: To the date paste in the food processor, add the almond butter, maple syrup (or honey), and vanilla extract. Process again until everything is smooth and well combined, forming a thick, sticky mixture. Scrape down the sides as needed.
- Combine Wet and Dry Mixtures: Add the wet date-almond butter mixture from the food processor to the large bowl containing the dry oat mixture.
- Mix Thoroughly: Using a sturdy spoon or your clean hands (this is often easiest!), mix everything together until thoroughly combined. It will be a thick, somewhat sticky dough. Make sure there are no dry patches of oats or cocoa powder remaining.
- Fold in Chocolate Chips: Gently fold in the dark chocolate chips until they are evenly distributed throughout the mixture.
- Press into Pan: Transfer the mixture to the prepared baking pan. Using the back of a spoon, an offset spatula, or your hands (you can lightly wet your hands or cover them with a piece of parchment paper to prevent sticking), press the mixture firmly and evenly into the pan. The firmer you press, the better the bars will hold together. Aim for a compact, level surface.
- Chill for Firmness: Cover the pan with plastic wrap or foil and place it in the refrigerator for at least 1-2 hours, or in the freezer for 30-45 minutes. This chilling step is crucial for the bars to firm up properly, making them much easier to cut.
- Cut into Bars: Once chilled and firm, use the parchment paper overhangs to lift the slab out of the pan and onto a cutting board. Using a large, sharp knife, cut into bars or squares. You can typically get 12-16 bars, depending on your preferred size. For cleaner cuts, you can wipe the knife clean with a damp cloth between slices.
- Store and Enjoy: Store the Chocolate-Coconut Energy Bars in an airtight container in the refrigerator for up to one week, or in the freezer for up to 3 months (see FAQ for more storage tips).
Nutrition Facts: A Glimpse into the Goodness
These bars are designed to be a healthier snack option. While nutritional values can vary based on specific ingredient brands and exact portion sizes, here’s an approximate breakdown for understanding their benefits.
- Servings: This recipe typically yields 12-16 bars.
- Calories per serving (approximate, based on 16 bars): Around 180-220 calories.
- Fiber (approx. 3-5g per bar): Primarily from oats, dates, flaxseed, and nuts, fiber aids digestion, helps you feel full, and can contribute to stable blood sugar levels.
- Protein (approx. 4-6g per bar): Sourced from nuts, nut butter, and oats, protein is essential for muscle repair and satiety, making these bars more satisfying than sugary snacks.
- Healthy Fats (approx. 9-12g per bar): Coming from nuts, nut butter, coconut, and flaxseed, these are largely unsaturated fats and omega-3s, which are beneficial for heart health and brain function.
- Carbohydrates (approx. 20-25g per bar): Mainly complex carbohydrates from oats and natural sugars from dates and maple syrup, providing sustained energy release rather than a quick sugar crash.
- Iron (significant percentage of DV): Cocoa powder, oats, and nuts contribute iron, which is vital for oxygen transport in the body and preventing fatigue.
Disclaimer: These are estimates. For precise nutritional information, using a recipe nutrition calculator with your specific ingredients is recommended.
Preparation Time: Quick to Make, Long to Enjoy
One of the beauties of these Chocolate-Coconut Energy Bars is how little active time they require, making them a perfect recipe for busy schedules.
- Active Preparation Time: Approximately 20-25 minutes. This includes gathering ingredients, processing, mixing, and pressing into the pan.
- Chilling Time: At least 1-2 hours in the refrigerator (or 30-45 minutes in the freezer). This is essential for the bars to firm up before cutting.
- Total Time: Roughly 1 hour 20 minutes to 2 hours 25 minutes, with most of that being hands-off chilling time.
These bars are a fantastic make-ahead snack. Spend a short amount of time prepping on a Sunday, and you’ll have delicious, healthy energy boosters ready for the entire week!
How to Serve: Versatile Ways to Enjoy Your Energy Bars
These Chocolate-Coconut Energy Bars are incredibly versatile. They’re not just for a quick grab-and-go snack; their delicious flavor and satisfying texture lend themselves to various enjoyable moments. Here are some ideas:
- The Classic On-the-Go Snack:
- Individually wrap bars in parchment paper or reusable beeswax wraps for an easy snack to toss into lunchboxes, gym bags, or purses.
- Perfect for staving off hunger during commutes or long meetings.
- Pre-Workout Power-Up:
- Consume a bar about 30-60 minutes before exercise for a sustained energy release thanks to the complex carbs and healthy fats.
- Post-Workout Recovery:
- The protein and carbohydrates can help replenish energy stores and aid muscle recovery after a workout. Pair with a glass of milk or a protein shake for an extra boost.
- Healthy Dessert Alternative:
- Enjoy a bar after dinner to satisfy your sweet tooth in a more wholesome way. The rich chocolate and coconut flavors make it feel like an indulgent treat.
- Crumble a bar over a scoop of nice cream (banana-based ice cream) or Greek yogurt for added texture and flavor.
- Breakfast Boost:
- On busy mornings, a bar can be a quick and convenient part of your breakfast alongside a piece of fruit or a smoothie.
- Crumble over oatmeal or yogurt for an extra layer of flavor and crunch.
- With a Hot Beverage:
- Pair a bar with your morning coffee or afternoon tea for a delightful pick-me-up. The chocolate notes complement coffee beautifully.
- Hiking and Outdoor Adventures:
- Their portable nature and energy-boosting ingredients make them ideal fuel for hikes, bike rides, or any outdoor activity.
- Kid-Friendly Treat:
- Cut them into smaller, bite-sized pieces for children. They make a great addition to school lunchboxes or as an after-school snack.
Additional Tips: Elevating Your Energy Bar Game
Want to take your Chocolate-Coconut Energy Bars from great to absolutely phenomenal? Here are eight additional tips to help you customize, perfect, and store your homemade creations:
- Date Check & Prep: For the best binding and sweetness, use soft, sticky Medjool dates. If your dates feel a bit dry, soak them in hot water for 10-15 minutes, then drain them thoroughly before processing. This rehydrates them and makes them easier to blend into a smooth paste.
- Nut Butter Variations: While almond butter is fantastic, feel free to experiment! Peanut butter will give a classic chocolate-peanut butter vibe (like a healthy Reese’s!). Cashew butter offers a milder, creamier taste. For a nut-free version, try sunflower seed butter or tahini (though tahini will impart a more distinct, slightly bitter flavor that some love).
- Boost the Protein: If you’re looking for an extra protein punch, you can add 1-2 tablespoons of your favorite unflavored or chocolate-flavored protein powder to the dry ingredients. You might need to add an extra tablespoon of liquid (water or more maple syrup) if the mixture seems too dry.
- Spice It Up: Don’t be afraid to add a pinch of spice for complexity. A ¼ teaspoon of ground cinnamon, a pinch of cardamom, or even a tiny dash of cayenne pepper for a subtle kick can beautifully complement the chocolate and coconut.
- Press Firmly for Cohesion: The key to bars that don’t crumble is pressing the mixture very firmly into the pan. Use the bottom of a flat glass or measuring cup, or really put some muscle into it with your hands (covered with parchment). The more compressed, the better they’ll hold.
- Chocolate Drizzle for Decadence: For an extra touch of elegance and chocolatey goodness, melt an additional ¼ cup of dark chocolate chips (with ½ teaspoon of coconut oil for smoothness) and drizzle it over the top of the bars after they’ve been pressed into the pan but before chilling. Let the drizzle set before cutting.
- Customize Your Add-Ins: Feel free to get creative with other add-ins! A quarter cup of dried cranberries or cherries can add a tart chewiness, while chia seeds or hemp seeds can further boost the nutritional profile. Just be mindful not to add too many dry ingredients without adjusting the wet binders.
- Clean Cutting Technique: For perfectly neat bars, use a large, sharp knife. After the bars are thoroughly chilled, run the knife under hot water and wipe it dry before each cut, or simply wipe it clean with a damp cloth between cuts. This prevents sticking and dragging.
FAQ Section: Your Chocolate-Coconut Energy Bar Queries Answered
Have questions about making, storing, or customizing your energy bars? Here are answers to some frequently asked questions:
- Q: How long do these Chocolate-Coconut Energy Bars last?
A: Stored in an airtight container in the refrigerator, these bars will stay fresh and delicious for up to 1 week. For longer storage, you can freeze them. - Q: Can I freeze these energy bars?
A: Yes, absolutely! These bars freeze wonderfully. Once cut, you can wrap them individually in plastic wrap or parchment paper and then place them in a freezer-safe bag or container. They will last for up to 3 months in the freezer. Thaw them in the refrigerator or at room temperature for about 15-20 minutes before enjoying. - Q: Are these energy bars gluten-free?
A: They can be easily made gluten-free! The key is to use certified gluten-free rolled oats. Oats are naturally gluten-free but are often processed in facilities that also handle wheat, leading to cross-contamination. Always check the packaging if gluten is a concern. All other listed ingredients are typically gluten-free, but it’s wise to check labels. - Q: Can I make these energy bars vegan?
A: Yes! To ensure they are vegan, use pure maple syrup instead of honey as your liquid sweetener and choose dairy-free dark chocolate chips. The rest of the ingredients in the base recipe are typically plant-based. - Q: My bars are too crumbly. What did I do wrong?
A: Crumbly bars usually mean there wasn’t enough binder or the mixture wasn’t pressed firmly enough. Ensure your dates are soft and processed into a good paste. If the mixture seems too dry before pressing, you can add a tablespoon or two of extra nut butter, maple syrup, or even just a little water until it comes together better. Also, make sure to press the mixture very firmly into the pan before chilling. - Q: Can I use quick oats instead of old-fashioned rolled oats?
A: You can, but it will change the texture. Old-fashioned rolled oats provide a chewier, more substantial texture. Quick oats are more processed and will result in a softer, slightly mushier bar. For the best texture as intended by this recipe, old-fashioned oats are recommended. - Q: What if I don’t have a food processor?
A: A food processor is highly recommended, especially for breaking down the dates into a paste. However, if you don’t have one, you can try to finely chop the dates by hand (this will be labor-intensive) or buy pre-made date paste. For the dry ingredients, you can just mix them well in a bowl. The nut butter and syrup can be warmed slightly to make them easier to mix by hand. The texture might not be as uniform, but it can still work. - Q: Can I substitute the nuts with seeds for a nut-free version?
A: Yes, for a nut-free version, you can replace the chopped almonds/walnuts with an equivalent amount of seeds like pumpkin seeds or sunflower seeds. Also, ensure you use a seed butter like sunflower seed butter (SunButter) or tahini instead of almond butter. Always double-check all your ingredient labels to ensure they are processed in nut-free facilities if allergies are a severe concern.