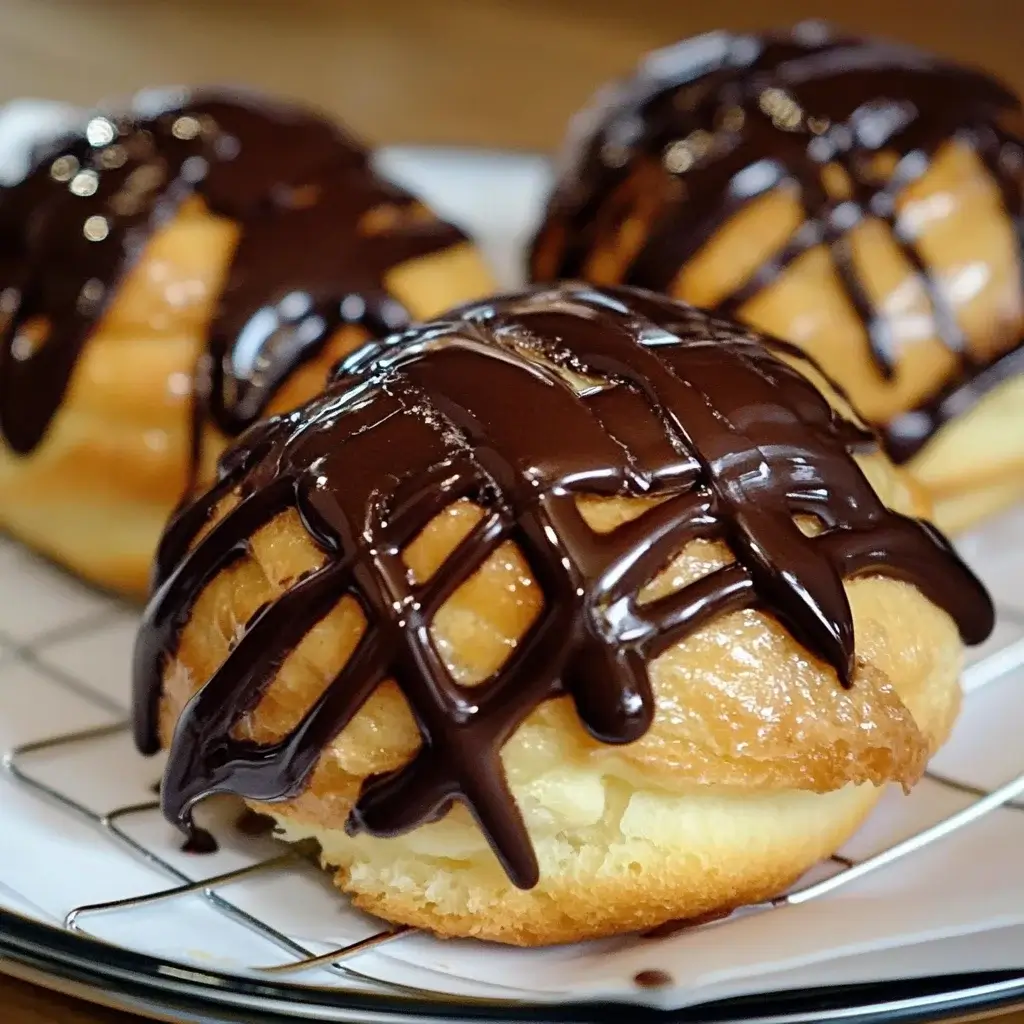
There’s something utterly enchanting about biting into a cream puff. That delicate, airy shell giving way to a cloud of sweet cream, all finished with a luscious drizzle of chocolate – it’s pure dessert magic. My family absolutely adores these Chocolate Drizzle Cream Puffs, and they’ve become a staple for celebrations, casual gatherings, and even just a special weekend treat. The first time I made them, I was a bit intimidated by the choux pastry, but with a little patience and this fantastic recipe, I discovered it’s much easier than it looks! The delighted faces around the table as everyone devoured them, reaching for seconds and even thirds, made all the effort worthwhile. From the satisfying crackle of the pastry to the rich chocolatey finish, these cream puffs are a guaranteed crowd-pleaser. Whether you’re a seasoned baker or just starting out, this recipe will guide you through creating perfect Chocolate Drizzle Cream Puffs that will impress everyone you share them with. Prepare to be amazed at how simple ingredients can transform into such an elegant and irresistible dessert.
Ingredients for Perfect Chocolate Drizzle Cream Puffs
To create these delightful Chocolate Drizzle Cream Puffs, you’ll need a handful of simple, high-quality ingredients. Each plays a crucial role in achieving the perfect light and airy pastry shell and the luscious creamy filling. Here’s a breakdown of what you’ll need:
- For the Choux Pastry (Pâte à Choux):
- Water: 1 cup (240ml) – The base liquid for the pastry, it helps create steam essential for puffing.
- Unsalted Butter: ½ cup (113g), cut into cubes – Adds richness, flavor, and crucial fat for the pastry’s structure and tenderness. Unsalted butter allows you to control the salt content precisely.
- Granulated Sugar: 1 teaspoon – Just a touch to slightly sweeten the pastry and aid in browning.
- Salt: ¼ teaspoon – Enhances the flavors and balances the sweetness. Salt is also important for gluten development in the dough.
- All-Purpose Flour: 1 cup (125g), sifted – Provides structure to the pastry. Sifting ensures no lumps and lighter texture. Measure accurately for best results.
- Large Eggs: 4 large – Bind the dough together, add richness, and contribute to the rise and puff of the pastry. Eggs are added gradually to achieve the right consistency.
- For the Cream Filling:
- Heavy Cream: 2 cups (480ml), cold – The foundation for the creamy filling. Cold heavy cream whips up to a light and fluffy consistency. Look for heavy cream with at least 36% milkfat for optimal whipping.
- Powdered Sugar: ¼ cup (30g), sifted – Sweetens the cream filling and helps stabilize it. Sifting prevents lumps and ensures a smooth texture.
- Vanilla Extract: 1 teaspoon – Enhances the flavor of the cream filling, adding a warm and aromatic note. Pure vanilla extract is recommended for the best flavor.
- For the Chocolate Drizzle:
- Semi-Sweet Chocolate Chips: ½ cup (85g) – Provides the rich chocolate flavor for the drizzle. Semi-sweet balances sweetness and bitterness perfectly. You can also use dark or milk chocolate based on your preference.
- Vegetable Oil or Coconut Oil: 1 teaspoon – Thins the melted chocolate, making it easier to drizzle and preventing it from becoming too hard and brittle. Coconut oil adds a subtle flavor and shine.
Step-by-Step Instructions for Making Chocolate Drizzle Cream Puffs
Creating these exquisite Chocolate Drizzle Cream Puffs is a rewarding process. Follow these detailed instructions carefully for success:
Part 1: Making the Choux Pastry (Pâte à Choux)
- Prepare the Base: In a medium saucepan, combine the water, butter, sugar, and salt. Place the saucepan over medium heat.
- Melt and Boil: Heat the mixture, stirring occasionally, until the butter is completely melted and the mixture comes to a rolling boil. It’s crucial that it reaches a full boil, not just simmering, to ensure proper hydration of the flour.
- Add Flour and Cook: Remove the saucepan from the heat. Immediately add all the sifted all-purpose flour to the boiling mixture. Using a wooden spoon or spatula, vigorously stir the flour into the liquid until a smooth dough forms and pulls away from the sides of the pan. This is called a “panade.” Continue to stir and cook the dough over low heat for about 1-2 minutes. This step is essential to dry out the dough slightly, which helps in creating light and airy puffs. The dough is ready when a thin film forms on the bottom of the pan.
- Cool Slightly: Transfer the dough to a mixing bowl. Let it cool slightly for about 5-10 minutes. This is important so that the eggs don’t cook when added. You want the dough to be warm, not hot.
- Incorporate Eggs Gradually: Crack one egg into a small bowl and lightly beat it. Add about one-third of the beaten egg to the slightly cooled dough. Mix thoroughly with a wooden spoon or electric mixer (on low speed) until the egg is fully incorporated and the dough becomes smooth again. Repeat this process, adding the remaining beaten egg in two more additions, mixing well after each addition. The dough should be smooth, glossy, and slowly fall from a spoon in a thick ribbon or form a “V” shape. The consistency is key here; you may not need all of the fourth egg, or you might need a little more if your eggs are smaller. The goal is a dough that is pipeable but not too runny.
- Preheat Oven and Prepare Baking Sheet: Preheat your oven to 400°F (200°C). Line a baking sheet with parchment paper or a silicone baking mat.
- Pipe or Spoon the Pastry: Transfer the choux pastry dough into a piping bag fitted with a large round tip (or a star tip for a more decorative look, though round is recommended for even puffing). Pipe mounds of dough onto the prepared baking sheet, about 1 ½ inches in diameter and about 2 inches apart to allow room for expansion. If you don’t have a piping bag, you can use two spoons to scoop and shape the dough into mounds.
- Bake: Place the baking sheet in the preheated oven and bake for 20-25 minutes, or until the cream puffs are puffed up, golden brown, and sound hollow when tapped lightly on the bottom. Do not open the oven door during the first 15 minutes of baking, as this can cause the puffs to deflate.
- Cool Completely: Once baked, turn off the oven and slightly open the oven door, leaving the cream puffs inside for another 10 minutes to dry out further. This helps prevent them from collapsing. Then, remove the baking sheet from the oven and let the cream puffs cool completely on a wire rack. Cooling completely is crucial before filling them with cream.
Part 2: Making the Cream Filling
- Chill Bowl and Whisk: Place your mixing bowl and whisk attachment (or beaters if using a hand mixer) in the freezer for about 15-20 minutes. This ensures the heavy cream stays cold, which is essential for proper whipping.
- Whip the Cream: Pour the cold heavy cream into the chilled bowl. Beat with an electric mixer on medium speed until soft peaks begin to form.
- Add Sugar and Vanilla: Gradually add the sifted powdered sugar and vanilla extract to the whipped cream. Continue to beat on medium-high speed until stiff peaks form. Be careful not to overwhip, or you’ll end up with butter! You want stiff peaks that hold their shape but are still smooth and creamy.
- Transfer to Piping Bag (Optional): If desired, transfer the whipped cream into a piping bag fitted with a star or round tip for easier and neater filling of the cream puffs.
Part 3: Assembling and Drizzling
- Prepare Cream Puffs for Filling: Once the cream puffs are completely cool, use a serrated knife to carefully slice them in half horizontally. Alternatively, you can use a small paring knife to poke a hole in the bottom of each puff.
- Fill with Cream: Fill each cream puff with the prepared whipped cream. If you sliced them in half, spoon or pipe the cream onto the bottom half and then replace the top half. If you made a hole in the bottom, pipe the cream into the hole until the puff feels nicely filled.
- Make the Chocolate Drizzle: Place the semi-sweet chocolate chips and vegetable oil (or coconut oil) in a microwave-safe bowl. Microwave in 30-second intervals, stirring after each interval, until the chocolate is melted and smooth. Be careful not to overheat the chocolate. You can also melt the chocolate in a double boiler over simmering water.
- Drizzle with Chocolate: Once the chocolate is melted and smooth, let it cool slightly for a minute or two (if it’s too hot, it will melt the cream). Drizzle the melted chocolate over the filled cream puffs in a decorative pattern. You can use a spoon, a fork, or a piping bag with a small tip for drizzling.
- Set and Serve: Allow the chocolate drizzle to set for a few minutes before serving. This allows the chocolate to firm up slightly and become less messy.
Nutrition Facts for Chocolate Drizzle Cream Puffs
(Note: Nutritional values are estimates and can vary based on specific ingredients and portion sizes.)
Serving Size: 1 Cream Puff
Servings per Recipe: Approximately 12-15 cream puffs (depending on size)
- Calories: Approximately 250-300 kcal per serving
- Fat: 18-22g
These Chocolate Drizzle Cream Puffs are a delicious treat, but as with any dessert, moderation is key. They are relatively high in fat and calories due to the butter, heavy cream, and chocolate. Enjoy them as an occasional indulgence!
Preparation Time: Get Ready to Bake Deliciousness
Making Chocolate Drizzle Cream Puffs requires a bit of time and attention, but the result is well worth the effort. Here’s a breakdown of the preparation time:
- Prep Time: 30-40 minutes (This includes measuring ingredients, making the choux pastry dough, and preparing the cream filling.)
- Cook Time: 20-25 minutes (Baking the choux pastry shells.)
- Cooling Time: 45-60 minutes (Allowing the pastry shells to cool completely and the chocolate drizzle to set.)
- Total Time: Approximately 1 hour 35 minutes – 2 hours
While it might seem like a longer process, much of the time is hands-off, like baking and cooling. You can even break up the process by making the choux pastry shells ahead of time and filling them later, making it more manageable for busy schedules. The active time spent actually working on the recipe is less than an hour, making it a very achievable baking project for a rewarding dessert.
How to Serve Your Chocolate Drizzle Cream Puffs
Chocolate Drizzle Cream Puffs are incredibly versatile and can be served in numerous delightful ways. Here are some ideas to elevate your serving presentation and enjoyment:
- Classic Dessert: Serve them as a standalone dessert after dinner. They are elegant enough for special occasions yet comforting enough for a casual treat.
- Tea Time Treat: Pair them with a cup of hot tea or coffee for a sophisticated afternoon snack. The lightness of the cream puff complements the warmth of the beverage perfectly.
- Dessert Platter Centerpiece: Include them on a dessert platter alongside other sweets like cookies, brownies, and fruit tarts for a visually stunning and varied spread.
- Party Appetizers (Sweet): While traditionally a dessert, smaller cream puffs can be served as delightful sweet appetizers at parties. Just make them smaller when piping.
- With Fresh Fruit: Arrange them on a plate with fresh berries (strawberries, raspberries, blueberries) or sliced fruits like peaches or kiwi for added freshness and color.
- Ice Cream Sundae Addition: Crumble a cream puff over a scoop of vanilla or chocolate ice cream for an extra layer of texture and flavor in your sundae.
- Chocolate Fondue Accompaniment: Serve unfilled cream puffs as dippers for chocolate fondue. The neutral pastry shell is perfect for soaking up rich chocolate.
- Elegant Dessert Buffet: Feature them on a dessert buffet at events like weddings or parties. Their elegant appearance makes them a crowd-pleasing choice.
Additional Tips for Perfect Cream Puffs Every Time
Achieving perfect Chocolate Drizzle Cream Puffs is all about attention to detail and technique. Here are 8 expert tips to ensure your success:
- Measure Ingredients Accurately: Baking is a science, especially choux pastry. Use measuring cups and spoons correctly, and level off dry ingredients. For flour, spoon it into the measuring cup and level it off, rather than scooping it directly from the bag, which can pack it down.
- Boil the Liquid Properly: Ensure the water, butter, sugar, and salt mixture comes to a full rolling boil before adding the flour. This step is crucial for proper hydration of the flour and the subsequent texture of the pastry.
- Cook the Panade Thoroughly: After adding the flour, cook the dough (panade) for 1-2 minutes over low heat, stirring constantly. This step dries out the dough slightly, which helps in creating light and airy puffs. You’ll know it’s ready when a thin film forms on the bottom of the pan.
- Cool the Dough Before Adding Eggs: Let the panade cool slightly before adding the eggs. If the dough is too hot, it will cook the eggs, and you won’t achieve the right consistency. It should be warm, not hot to the touch.
- Add Eggs Gradually and Check Consistency: Add the beaten eggs gradually, mixing well after each addition. The dough should be smooth, glossy, and slowly fall from a spoon in a thick ribbon or form a “V” shape. Adjust the amount of egg as needed to achieve this consistency.
- Don’t Open the Oven Door Too Early: Resist the temptation to open the oven door during the first 15 minutes of baking. Opening the oven can cause a temperature drop, which can lead to the cream puffs deflating.
- Bake Until Golden Brown and Hollow: Bake the cream puffs until they are puffed up, golden brown, and sound hollow when tapped lightly on the bottom. This indicates they are cooked through and will hold their shape.
- Cool Completely Before Filling: Make sure the cream puffs are completely cooled before filling them with whipped cream. Warm pastry will cause the whipped cream to melt and become soggy. Cooling them on a wire rack allows air to circulate and helps them cool evenly.
Frequently Asked Questions About Chocolate Drizzle Cream Puffs (FAQ)
Here are some common questions and answers to help you master making Chocolate Drizzle Cream Puffs:
Q1: Why did my cream puffs deflate after baking?
A: Deflation can happen for several reasons. The most common is not baking them long enough. Ensure they are golden brown and sound hollow when tapped. Also, opening the oven door too early can cause deflation due to temperature fluctuations. Make sure to cool them in the oven with the door slightly ajar to further dry them out.
Q2: Can I make the choux pastry dough ahead of time?
A: Yes, you can make the choux pastry dough ahead of time. After making the dough, transfer it to a piping bag, seal the end tightly, and store it in the refrigerator for up to 24 hours. Let it come to room temperature slightly before piping and baking.
Q3: Can I freeze cream puffs?
A: Yes, you can freeze baked, unfilled cream puff shells. Once completely cooled, place them in a freezer-safe bag or container and freeze for up to 2 months. To thaw, let them sit at room temperature until defrosted and crisp them up in a low oven (300°F/150°C) for a few minutes if needed before filling. Filled cream puffs are not recommended for freezing as the cream texture can change.
Q4: What if my choux pastry dough is too runny?
A: If your dough is too runny, it’s likely due to adding too much egg. Unfortunately, there’s no easy way to fix runny dough. It’s best to start over and be more cautious with the egg addition next time. To avoid this, add the egg gradually and check the consistency after each addition.
Q5: Can I use different types of chocolate for the drizzle?
A: Absolutely! You can use milk chocolate for a sweeter drizzle, dark chocolate for a more intense flavor, or even white chocolate for a contrasting look and taste. Experiment with your favorite chocolates.
Q6: What can I use instead of heavy cream for the filling?
A: If you want a lighter option, you can use whipped coconut cream (from chilled full-fat coconut milk) or a stabilized whipped cream made with cream cheese. Pastry cream is also a classic filling for cream puffs.
Q7: How do I prevent my chocolate drizzle from hardening too quickly?
A: Adding a teaspoon of vegetable oil or coconut oil to the melting chocolate helps to thin it out and keeps it slightly softer, making it easier to drizzle and preventing it from becoming too brittle once hardened.
Q8: Can I add flavorings to the choux pastry or cream filling?
A: Yes, you can! For the pastry, you can add a pinch of spices like cinnamon or nutmeg to the dough. For the cream filling, you can incorporate different extracts like almond, peppermint, or citrus zest for various flavor profiles. You could also add a liqueur to the cream for an adult twist.
With these tips and answers, you’re well-equipped to create stunning and delicious Chocolate Drizzle Cream Puffs that will impress everyone. Happy baking!
Print
Chocolate Drizzle Cream Puffs
Ingredients
To create these delightful Chocolate Drizzle Cream Puffs, you’ll need a handful of simple, high-quality ingredients. Each plays a crucial role in achieving the perfect light and airy pastry shell and the luscious creamy filling. Here’s a breakdown of what you’ll need:
- For the Choux Pastry (Pâte à Choux):
- Water: 1 cup (240ml) – The base liquid for the pastry, it helps create steam essential for puffing.
- Unsalted Butter: ½ cup (113g), cut into cubes – Adds richness, flavor, and crucial fat for the pastry’s structure and tenderness. Unsalted butter allows you to control the salt content precisely.
- Granulated Sugar: 1 teaspoon – Just a touch to slightly sweeten the pastry and aid in browning.
- Salt: ¼ teaspoon – Enhances the flavors and balances the sweetness. Salt is also important for gluten development in the dough.
- All-Purpose Flour: 1 cup (125g), sifted – Provides structure to the pastry. Sifting ensures no lumps and lighter texture. Measure accurately for best results.
- Large Eggs: 4 large – Bind the dough together, add richness, and contribute to the rise and puff of the pastry. Eggs are added gradually to achieve the right consistency.
- For the Cream Filling:
- Heavy Cream: 2 cups (480ml), cold – The foundation for the creamy filling. Cold heavy cream whips up to a light and fluffy consistency. Look for heavy cream with at least 36% milkfat for optimal whipping.
- Powdered Sugar: ¼ cup (30g), sifted – Sweetens the cream filling and helps stabilize it. Sifting prevents lumps and ensures a smooth texture.
- Vanilla Extract: 1 teaspoon – Enhances the flavor of the cream filling, adding a warm and aromatic note. Pure vanilla extract is recommended for the best flavor.
- For the Chocolate Drizzle:
- Semi-Sweet Chocolate Chips: ½ cup (85g) – Provides the rich chocolate flavor for the drizzle. Semi-sweet balances sweetness and bitterness perfectly. You can also use dark or milk chocolate based on your preference.
- Vegetable Oil or Coconut Oil: 1 teaspoon – Thins the melted chocolate, making it easier to drizzle and preventing it from becoming too hard and brittle. Coconut oil adds a subtle flavor and shine.
Instructions
Creating these exquisite Chocolate Drizzle Cream Puffs is a rewarding process. Follow these detailed instructions carefully for success:
Part 1: Making the Choux Pastry (Pâte à Choux)
- Prepare the Base: In a medium saucepan, combine the water, butter, sugar, and salt. Place the saucepan over medium heat.
- Melt and Boil: Heat the mixture, stirring occasionally, until the butter is completely melted and the mixture comes to a rolling boil. It’s crucial that it reaches a full boil, not just simmering, to ensure proper hydration of the flour.
- Add Flour and Cook: Remove the saucepan from the heat. Immediately add all the sifted all-purpose flour to the boiling mixture. Using a wooden spoon or spatula, vigorously stir the flour into the liquid until a smooth dough forms and pulls away from the sides of the pan. This is called a “panade.” Continue to stir and cook the dough over low heat for about 1-2 minutes. This step is essential to dry out the dough slightly, which helps in creating light and airy puffs. The dough is ready when a thin film forms on the bottom of the pan.
- Cool Slightly: Transfer the dough to a mixing bowl. Let it cool slightly for about 5-10 minutes. This is important so that the eggs don’t cook when added. You want the dough to be warm, not hot.
- Incorporate Eggs Gradually: Crack one egg into a small bowl and lightly beat it. Add about one-third of the beaten egg to the slightly cooled dough. Mix thoroughly with a wooden spoon or electric mixer (on low speed) until the egg is fully incorporated and the dough becomes smooth again. Repeat this process, adding the remaining beaten egg in two more additions, mixing well after each addition. The dough should be smooth, glossy, and slowly fall from a spoon in a thick ribbon or form a “V” shape. The consistency is key here; you may not need all of the fourth egg, or you might need a little more if your eggs are smaller. The goal is a dough that is pipeable but not too runny.
- Preheat Oven and Prepare Baking Sheet: Preheat your oven to 400°F (200°C). Line a baking sheet with parchment paper or a silicone baking mat.
- Pipe or Spoon the Pastry: Transfer the choux pastry dough into a piping bag fitted with a large round tip (or a star tip for a more decorative look, though round is recommended for even puffing). Pipe mounds of dough onto the prepared baking sheet, about 1 ½ inches in diameter and about 2 inches apart to allow room for expansion. If you don’t have a piping bag, you can use two spoons to scoop and shape the dough into mounds.
- Bake: Place the baking sheet in the preheated oven and bake for 20-25 minutes, or until the cream puffs are puffed up, golden brown, and sound hollow when tapped lightly on the bottom. Do not open the oven door during the first 15 minutes of baking, as this can cause the puffs to deflate.
- Cool Completely: Once baked, turn off the oven and slightly open the oven door, leaving the cream puffs inside for another 10 minutes to dry out further. This helps prevent them from collapsing. Then, remove the baking sheet from the oven and let the cream puffs cool completely on a wire rack. Cooling completely is crucial before filling them with cream.
Part 2: Making the Cream Filling
- Chill Bowl and Whisk: Place your mixing bowl and whisk attachment (or beaters if using a hand mixer) in the freezer for about 15-20 minutes. This ensures the heavy cream stays cold, which is essential for proper whipping.
- Whip the Cream: Pour the cold heavy cream into the chilled bowl. Beat with an electric mixer on medium speed until soft peaks begin to form.
- Add Sugar and Vanilla: Gradually add the sifted powdered sugar and vanilla extract to the whipped cream. Continue to beat on medium-high speed until stiff peaks form. Be careful not to overwhip, or you’ll end up with butter! You want stiff peaks that hold their shape but are still smooth and creamy.
- Transfer to Piping Bag (Optional): If desired, transfer the whipped cream into a piping bag fitted with a star or round tip for easier and neater filling of the cream puffs.
Part 3: Assembling and Drizzling
- Prepare Cream Puffs for Filling: Once the cream puffs are completely cool, use a serrated knife to carefully slice them in half horizontally. Alternatively, you can use a small paring knife to poke a hole in the bottom of each puff.
- Fill with Cream: Fill each cream puff with the prepared whipped cream. If you sliced them in half, spoon or pipe the cream onto the bottom half and then replace the top half. If you made a hole in the bottom, pipe the cream into the hole until the puff feels nicely filled.
- Make the Chocolate Drizzle: Place the semi-sweet chocolate chips and vegetable oil (or coconut oil) in a microwave-safe bowl. Microwave in 30-second intervals, stirring after each interval, until the chocolate is melted and smooth. Be careful not to overheat the chocolate. You can also melt the chocolate in a double boiler over simmering water.
- Drizzle with Chocolate: Once the chocolate is melted and smooth, let it cool slightly for a minute or two (if it’s too hot, it will melt the cream). Drizzle the melted chocolate over the filled cream puffs in a decorative pattern. You can use a spoon, a fork, or a piping bag with a small tip for drizzling.
- Set and Serve: Allow the chocolate drizzle to set for a few minutes before serving. This allows the chocolate to firm up slightly and become less messy.
Nutrition
- Serving Size: one normal portion
- Calories: 300
- Fat: 22g