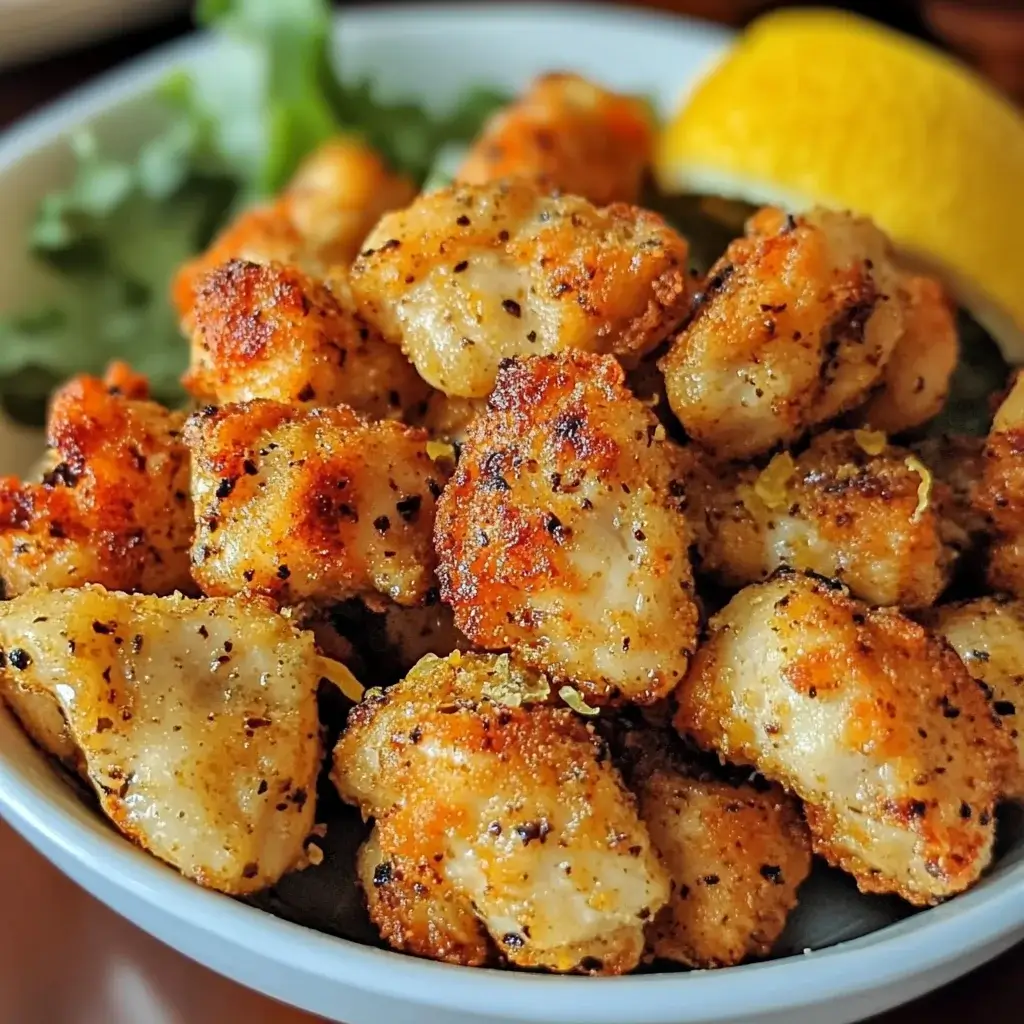
Let me tell you, weeknight dinners at our place can sometimes feel like a culinary tightrope walk. Balancing speed, flavor, and something the whole family will actually eat? It’s a challenge! That’s why discovering these Crispy Lemon Pepper Chicken Bites felt like striking gold. From the first bite, the tangy lemon and peppery kick just exploded in our mouths, and the incredible crispiness? Forget about it! Even my notoriously picky eater, who usually approaches chicken with a healthy dose of suspicion, devoured these like they were going out of style. The best part? They’re surprisingly easy to make. Whether you’re looking for a crowd-pleasing appetizer, a fun family dinner, or just a flavor-packed snack, these lemon pepper chicken bites are guaranteed to become a new favorite. Trust me, your taste buds (and your family!) will thank you.
Ingredients: Simple Goodness for Maximum Flavor
Here’s what you’ll need to create these irresistible Crispy Lemon Pepper Chicken Bites. We keep it simple, focusing on fresh, quality ingredients to let the lemon pepper flavor really shine.
- Chicken Breasts: (1.5 lbs, boneless, skinless) – The star of the show! We’ll cut these into bite-sized pieces for quick cooking and maximum crispiness. Choose good quality chicken for the best flavor and texture.
- All-Purpose Flour: (1 cup) – Forms the base of our crispy coating, helping to create that golden-brown crunch we all crave.
- Cornstarch: (1/4 cup) – The secret weapon for extra crispiness! Cornstarch helps to create a light and airy coating that fries up beautifully.
- Lemon Pepper Seasoning: (3 tablespoons) – The flavor powerhouse! Use a good quality lemon pepper seasoning for that bright, zesty, and peppery punch. You can adjust the amount to your spice preference.
- Garlic Powder: (1 tablespoon) – Adds a savory depth and aroma that complements the lemon and pepper perfectly.
- Onion Powder: (1 tablespoon) – Enhances the savory notes and adds a subtle sweetness to the overall flavor profile.
- Paprika: (1 teaspoon) – Adds a touch of warmth and color to the coating, making the chicken bites visually appealing.
- Salt: (1 teaspoon, or to taste) – Essential for seasoning the chicken and enhancing all the other flavors.
- Black Pepper: (1/2 teaspoon, or to taste) – A little extra black pepper boosts the peppery notes and adds a bit more spice.
- Eggs: (2 large) – Acts as a binder, helping the breading adhere to the chicken and adding richness to the coating.
- Milk: (1/4 cup) – Thins out the egg wash slightly, making it easier to coat the chicken evenly and contributing to a lighter texture.
- Vegetable Oil (or Canola Oil) for frying: (Enough for deep frying, about 3-4 cups) – For achieving that perfect golden-brown crisp. Choose an oil with a high smoke point.
- Fresh Lemon Wedges (for serving): (Optional but highly recommended) – A squeeze of fresh lemon juice just before serving elevates the flavor even further, adding a final burst of freshness.
Instructions: Step-by-Step to Crispy Perfection
Follow these simple steps to create your own batch of mouthwatering Crispy Lemon Pepper Chicken Bites. We’ll break down each step to ensure even beginner cooks can achieve restaurant-quality results at home.
Step 1: Prepare the Chicken
- Cut the Chicken: Start by rinsing your chicken breasts under cold water and pat them dry thoroughly with paper towels. This is crucial for getting a crispy coating, as excess moisture will hinder browning. Using a sharp knife, cut the chicken breasts into bite-sized pieces, about 1-inch to 1.5-inch cubes. Aim for uniform sizes so they cook evenly. Smaller pieces will cook faster and crisp up more, but don’t make them too small, or they might dry out.
Step 2: Set up the Breading Stations
- Dry Breading Station: In a shallow bowl or dish, whisk together the all-purpose flour, cornstarch, lemon pepper seasoning, garlic powder, onion powder, paprika, salt, and black pepper. Mix these dry ingredients thoroughly to ensure the spices are evenly distributed throughout the flour mixture. This flavorful blend is what will give our chicken bites their signature taste and crispy texture.
- Wet Breading Station: In a separate shallow bowl, whisk together the eggs and milk until well combined. The egg wash will help the dry breading adhere to the chicken and create a golden-brown crust during frying.
Step 3: Bread the Chicken Bites
- First Dip (Dry): Take a piece of chicken and dredge it in the dry flour mixture, ensuring it’s fully coated on all sides. Use your fingers to press the flour mixture onto the chicken to help it adhere. Shake off any excess flour. This first layer of dry breading helps the egg wash stick to the chicken.
- Second Dip (Wet): Dip the floured chicken piece into the egg wash, making sure it’s completely submerged. Let any excess egg wash drip off.
- Third Dip (Dry): Return the chicken to the dry flour mixture and coat it again, pressing gently to ensure the breading adheres well. This double coating is key to achieving that extra crispy crust. Make sure every piece is evenly coated.
- Repeat: Repeat this breading process for all the chicken pieces. As you bread the chicken, place the breaded bites on a clean plate or baking sheet lined with parchment paper. This prevents them from sticking and makes for easier transfer to the hot oil.
Step 4: Fry the Chicken Bites
- Heat the Oil: Pour vegetable oil (or canola oil) into a deep fryer or a large, heavy-bottomed pot until it reaches a depth of about 3-4 inches. Heat the oil over medium-high heat to 350°F (175°C). Use a kitchen thermometer to ensure the oil is at the correct temperature. If the oil is too cold, the chicken will absorb too much oil and become greasy. If it’s too hot, the outside will brown too quickly before the inside is cooked through.
- Fry in Batches: Carefully add the breaded chicken bites to the hot oil in batches, being careful not to overcrowd the pot. Overcrowding will lower the oil temperature and result in soggy chicken. Fry in batches of about 6-8 pieces at a time, depending on the size of your pot.
- Fry Until Golden Brown and Cooked Through: Fry the chicken bites for about 4-6 minutes per batch, turning them occasionally to ensure even browning. They are ready when they are golden brown and crispy on all sides and cooked through. The internal temperature of the chicken should reach 165°F (74°C).
- Remove and Drain: Using a slotted spoon or tongs, remove the fried chicken bites from the oil and place them on a wire rack lined with paper towels to drain excess oil. The wire rack helps to keep the chicken crispy by allowing air to circulate underneath.
Step 5: Serve and Enjoy!
- Season (Optional): If desired, you can sprinkle a little extra lemon pepper seasoning or a pinch of salt over the hot chicken bites immediately after frying for an extra flavor boost.
- Serve Immediately: Crispy Lemon Pepper Chicken Bites are best served hot and fresh for maximum crispiness and flavor.
- Garnish: Garnish with fresh lemon wedges for squeezing over the chicken just before serving. The fresh lemon juice brightens the flavors and adds a final zing.
- Serve with Dipping Sauces (Optional): Serve with your favorite dipping sauces. Ranch dressing, honey mustard, BBQ sauce, or a creamy lemon aioli are all excellent choices. (See “How to Serve” section for more dipping sauce ideas!)
Alternative Cooking Methods (Optional)
- Air Fryer: For a healthier option with less oil, you can air fry the chicken bites. Preheat your air fryer to 400°F (200°C). Spray the breaded chicken bites lightly with cooking spray and air fry for 12-15 minutes, flipping halfway through, until golden brown and cooked through. Air frying will still give you a crispy result, though perhaps not quite as intensely crispy as deep frying.
- Baking: You can also bake the chicken bites, although they will be less crispy than fried or air-fried. Preheat your oven to 425°F (220°C). Place the breaded chicken bites on a baking sheet lined with parchment paper. Spray lightly with cooking spray and bake for 20-25 minutes, flipping halfway through, until golden brown and cooked through.
Nutrition Facts: A Delicious Treat in Moderation
(Per Serving – approximately 4 bites)
- Servings: Approximately 6 (recipe yields about 24 bites)
- Calories: Approximately 280 kcal
- Protein: 20g
(Note: Nutritional values are estimates and can vary based on specific ingredients and portion sizes. Deep-frying will increase fat content compared to air frying or baking.)
Preparation Time: Quick and Easy Flavor
- Prep Time: 20 minutes (includes cutting chicken and breading)
- Cook Time: 20 minutes (frying in batches)
- Total Time: 40 minutes
This recipe is perfect for a weeknight meal or when you need a quick and flavorful appetizer. The active cooking time is relatively short, making it manageable even on busy days.
How to Serve: Versatile Bites for Any Occasion
Crispy Lemon Pepper Chicken Bites are incredibly versatile and can be served in a variety of ways. Here are some ideas to get you started:
- Appetizer/Party Snack:
- Dipping Platter: Arrange the chicken bites on a platter with an assortment of dipping sauces. Consider:
- Ranch Dressing
- Honey Mustard
- BBQ Sauce
- Lemon Aioli
- Sweet Chili Sauce
- Spicy Mayo
- Mini Skewers: Thread chicken bites onto small skewers with cherry tomatoes, cucumber slices, or olives for an elegant appetizer.
- Game Day Spread: Perfect for game day gatherings! Serve them alongside other snack favorites like sliders, nachos, and wings.
- Dipping Platter: Arrange the chicken bites on a platter with an assortment of dipping sauces. Consider:
- Main Course:
- Chicken Bite Bowls: Create customizable bowls with a base of rice, quinoa, or couscous, topped with Crispy Lemon Pepper Chicken Bites and your favorite veggies. Consider adding:
- Steamed broccoli
- Roasted bell peppers
- Avocado slices
- Corn kernels
- Black beans
- A drizzle of lemon vinaigrette
- Chicken Bite Salad: Top a fresh garden salad with Crispy Lemon Pepper Chicken Bites for a flavorful and satisfying meal.
- Chicken Bite Tacos or Wraps: Fill tortillas or wraps with chicken bites, shredded lettuce, salsa, and a dollop of sour cream or guacamole.
- Chicken Bite Bowls: Create customizable bowls with a base of rice, quinoa, or couscous, topped with Crispy Lemon Pepper Chicken Bites and your favorite veggies. Consider adding:
- Kids’ Meals/Lunch Boxes:
- Fun Shapes: Use cookie cutters to shape the chicken breasts into fun shapes before breading for extra kid appeal (stars, hearts, etc.).
- Lunchbox Treat: Pack a few chicken bites in a lunchbox with carrot sticks, celery sticks, and a small container of dipping sauce for a protein-packed and tasty lunch.
Additional Tips for Crispy Lemon Pepper Perfection
Here are 8 essential tips to ensure your Crispy Lemon Pepper Chicken Bites are a resounding success every time:
- Pat the Chicken Dry: This cannot be stressed enough! Thoroughly patting the chicken dry with paper towels before breading is crucial for achieving a crispy coating. Excess moisture will steam the chicken rather than allowing it to crisp up in the hot oil. Dry chicken = crispy chicken!
- Double Breading is Key: The double breading process – flour, egg wash, flour – is what creates that extra crispy and substantial crust. Don’t skip this step! It’s worth the extra effort for the superior texture.
- Don’t Overcrowd the Pan: Frying in batches is essential for maintaining the oil temperature and ensuring even cooking and crispiness. Overcrowding the pan will lower the oil temperature, causing the chicken to steam and become soggy instead of frying properly. Be patient and fry in smaller batches.
- Maintain Oil Temperature: Use a kitchen thermometer to monitor the oil temperature and keep it consistently around 350°F (175°C). If the oil gets too hot, the outside of the chicken will brown too quickly before the inside is cooked. If it’s too cold, the chicken will absorb too much oil and become greasy. Adjust the heat as needed to maintain the ideal temperature.
- Season Generously: Don’t be shy with the lemon pepper seasoning and other spices in the breading. These are the flavor drivers of the dish. Taste the dry breading mixture before you start breading the chicken and adjust seasonings to your liking. You can always add more, but you can’t take it away!
- Let the Oil Drain Properly: After frying, place the chicken bites on a wire rack lined with paper towels to drain excess oil. This allows air to circulate around the chicken and keeps the bottom from getting soggy. Don’t place them directly on paper towels, as this will trap steam and make them less crispy.
- Serve Immediately for Maximum Crispiness: Crispy Lemon Pepper Chicken Bites are best enjoyed immediately after frying when they are at their peak crispiness. While they can be reheated, they will never be quite as crispy as they are fresh out of the fryer. Plan to serve them as soon as they are ready for the best results.
- Experiment with Dipping Sauces: While these chicken bites are delicious on their own, dipping sauces can elevate them to the next level. Don’t be afraid to get creative and try different sauces to find your favorites. Homemade sauces, like a lemon aioli or a spicy sriracha mayo, can add a special touch.
FAQ: Your Crispy Chicken Bite Questions Answered
Here are 8 frequently asked questions to help you master the art of Crispy Lemon Pepper Chicken Bites:
Q1: Can I make these chicken bites ahead of time?
A: While Crispy Lemon Pepper Chicken Bites are best served fresh and crispy, you can prepare them ahead of time to a certain extent. You can bread the chicken bites and store them in the refrigerator for up to 2 hours before frying. However, for optimal crispiness, it’s best to fry them just before serving. If you need to make them further in advance, frying them and reheating is possible (see Q2), but the texture will be slightly less crispy.
Q2: How do I reheat leftover Crispy Lemon Pepper Chicken Bites?
A: To reheat leftover chicken bites and try to regain some crispiness, the best method is to use an oven or an air fryer. Preheat your oven or air fryer to 350°F (175°C). Place the chicken bites in a single layer on a baking sheet and reheat in the oven for about 10-15 minutes, or in the air fryer for about 5-7 minutes, until heated through and slightly crispy again. Microwaving is not recommended as it will make them soggy.
Q3: Can I bake or air fry these chicken bites instead of deep frying?
A: Yes, absolutely! Baking and air frying are healthier alternatives to deep frying. For air frying, preheat your air fryer to 400°F (200°C) and cook for 12-15 minutes, flipping halfway through. For baking, preheat your oven to 425°F (220°C) and bake for 20-25 minutes, flipping halfway through. While baking and air frying will result in a crispier texture than simply baking, deep frying will still give you the ultimate level of crispiness.
Q4: Can I use different cuts of chicken for this recipe?
A: While chicken breasts are recommended for their lean texture and even cooking, you can use boneless, skinless chicken thighs as well. Chicken thighs will be more moist and flavorful but may take slightly longer to cook. Avoid using bone-in chicken or chicken with skin as it will not work well for bite-sized pieces and crispy frying.
Q5: What are some good dipping sauce options for these chicken bites?
A: The dipping sauce possibilities are endless! Some popular and delicious options include: Ranch dressing, honey mustard, BBQ sauce, lemon aioli (made with mayonnaise, lemon juice, garlic, and herbs), sweet chili sauce, sriracha mayo, buffalo sauce, or even a simple marinara sauce. Get creative and try different sauces to find your personal favorites!
Q6: Can I make these chicken bites gluten-free?
A: Yes, you can easily make these chicken bites gluten-free by substituting the all-purpose flour with a gluten-free all-purpose flour blend. Ensure that the blend you choose is designed for baking and frying and contains xanthan gum or another binder for optimal texture. Double-check that your lemon pepper seasoning and other spices are also gluten-free.
Q7: How can I adjust the spice level of these chicken bites?
A: You can easily adjust the spice level to your preference. For less spice, reduce the amount of lemon pepper seasoning and black pepper. For more spice, you can add a pinch of cayenne pepper or red pepper flakes to the dry breading mixture. You can also use a spicier lemon pepper seasoning blend if available.
Q8: Can I marinate the chicken before breading it?
A: While not necessary for this recipe, you can marinate the chicken for extra flavor and tenderness. A simple marinade of lemon juice, olive oil, garlic, and herbs would complement the lemon pepper flavor nicely. Marinate the chicken in the refrigerator for at least 30 minutes or up to 2 hours before breading and frying. Just be sure to pat the marinated chicken very dry before breading to ensure the coating adheres properly and crisps up.
Print
Crispy Lemon Pepper Chicken Bites
Ingredients
Here’s what you’ll need to create these irresistible Crispy Lemon Pepper Chicken Bites. We keep it simple, focusing on fresh, quality ingredients to let the lemon pepper flavor really shine.
- Chicken Breasts: (1.5 lbs, boneless, skinless) – The star of the show! We’ll cut these into bite-sized pieces for quick cooking and maximum crispiness. Choose good quality chicken for the best flavor and texture.
- All-Purpose Flour: (1 cup) – Forms the base of our crispy coating, helping to create that golden-brown crunch we all crave.
- Cornstarch: (1/4 cup) – The secret weapon for extra crispiness! Cornstarch helps to create a light and airy coating that fries up beautifully.
- Lemon Pepper Seasoning: (3 tablespoons) – The flavor powerhouse! Use a good quality lemon pepper seasoning for that bright, zesty, and peppery punch. You can adjust the amount to your spice preference.
- Garlic Powder: (1 tablespoon) – Adds a savory depth and aroma that complements the lemon and pepper perfectly.
- Onion Powder: (1 tablespoon) – Enhances the savory notes and adds a subtle sweetness to the overall flavor profile.
- Paprika: (1 teaspoon) – Adds a touch of warmth and color to the coating, making the chicken bites visually appealing.
- Salt: (1 teaspoon, or to taste) – Essential for seasoning the chicken and enhancing all the other flavors.
- Black Pepper: (1/2 teaspoon, or to taste) – A little extra black pepper boosts the peppery notes and adds a bit more spice.
- Eggs: (2 large) – Acts as a binder, helping the breading adhere to the chicken and adding richness to the coating.
- Milk: (1/4 cup) – Thins out the egg wash slightly, making it easier to coat the chicken evenly and contributing to a lighter texture.
- Vegetable Oil (or Canola Oil) for frying: (Enough for deep frying, about 3-4 cups) – For achieving that perfect golden-brown crisp. Choose an oil with a high smoke point.
- Fresh Lemon Wedges (for serving): (Optional but highly recommended) – A squeeze of fresh lemon juice just before serving elevates the flavor even further, adding a final burst of freshness.
Instructions
Follow these simple steps to create your own batch of mouthwatering Crispy Lemon Pepper Chicken Bites. We’ll break down each step to ensure even beginner cooks can achieve restaurant-quality results at home.
Step 1: Prepare the Chicken
- Cut the Chicken: Start by rinsing your chicken breasts under cold water and pat them dry thoroughly with paper towels. This is crucial for getting a crispy coating, as excess moisture will hinder browning. Using a sharp knife, cut the chicken breasts into bite-sized pieces, about 1-inch to 1.5-inch cubes. Aim for uniform sizes so they cook evenly. Smaller pieces will cook faster and crisp up more, but don’t make them too small, or they might dry out.
Step 2: Set up the Breading Stations
- Dry Breading Station: In a shallow bowl or dish, whisk together the all-purpose flour, cornstarch, lemon pepper seasoning, garlic powder, onion powder, paprika, salt, and black pepper. Mix these dry ingredients thoroughly to ensure the spices are evenly distributed throughout the flour mixture. This flavorful blend is what will give our chicken bites their signature taste and crispy texture.
- Wet Breading Station: In a separate shallow bowl, whisk together the eggs and milk until well combined. The egg wash will help the dry breading adhere to the chicken and create a golden-brown crust during frying.
Step 3: Bread the Chicken Bites
- First Dip (Dry): Take a piece of chicken and dredge it in the dry flour mixture, ensuring it’s fully coated on all sides. Use your fingers to press the flour mixture onto the chicken to help it adhere. Shake off any excess flour. This first layer of dry breading helps the egg wash stick to the chicken.
- Second Dip (Wet): Dip the floured chicken piece into the egg wash, making sure it’s completely submerged. Let any excess egg wash drip off.
- Third Dip (Dry): Return the chicken to the dry flour mixture and coat it again, pressing gently to ensure the breading adheres well. This double coating is key to achieving that extra crispy crust. Make sure every piece is evenly coated.
- Repeat: Repeat this breading process for all the chicken pieces. As you bread the chicken, place the breaded bites on a clean plate or baking sheet lined with parchment paper. This prevents them from sticking and makes for easier transfer to the hot oil.
Step 4: Fry the Chicken Bites
- Heat the Oil: Pour vegetable oil (or canola oil) into a deep fryer or a large, heavy-bottomed pot until it reaches a depth of about 3-4 inches. Heat the oil over medium-high heat to 350°F (175°C). Use a kitchen thermometer to ensure the oil is at the correct temperature. If the oil is too cold, the chicken will absorb too much oil and become greasy. If it’s too hot, the outside will brown too quickly before the inside is cooked through.
- Fry in Batches: Carefully add the breaded chicken bites to the hot oil in batches, being careful not to overcrowd the pot. Overcrowding will lower the oil temperature and result in soggy chicken. Fry in batches of about 6-8 pieces at a time, depending on the size of your pot.
- Fry Until Golden Brown and Cooked Through: Fry the chicken bites for about 4-6 minutes per batch, turning them occasionally to ensure even browning. They are ready when they are golden brown and crispy on all sides and cooked through. The internal temperature of the chicken should reach 165°F (74°C).
- Remove and Drain: Using a slotted spoon or tongs, remove the fried chicken bites from the oil and place them on a wire rack lined with paper towels to drain excess oil. The wire rack helps to keep the chicken crispy by allowing air to circulate underneath.
Step 5: Serve and Enjoy!
- Season (Optional): If desired, you can sprinkle a little extra lemon pepper seasoning or a pinch of salt over the hot chicken bites immediately after frying for an extra flavor boost.
- Serve Immediately: Crispy Lemon Pepper Chicken Bites are best served hot and fresh for maximum crispiness and flavor.
- Garnish: Garnish with fresh lemon wedges for squeezing over the chicken just before serving. The fresh lemon juice brightens the flavors and adds a final zing.
- Serve with Dipping Sauces (Optional): Serve with your favorite dipping sauces. Ranch dressing, honey mustard, BBQ sauce, or a creamy lemon aioli are all excellent choices. (See “How to Serve” section for more dipping sauce ideas!)
Alternative Cooking Methods (Optional)
- Air Fryer: For a healthier option with less oil, you can air fry the chicken bites. Preheat your air fryer to 400°F (200°C). Spray the breaded chicken bites lightly with cooking spray and air fry for 12-15 minutes, flipping halfway through, until golden brown and cooked through. Air frying will still give you a crispy result, though perhaps not quite as intensely crispy as deep frying.
- Baking: You can also bake the chicken bites, although they will be less crispy than fried or air-fried. Preheat your oven to 425°F (220°C). Place the breaded chicken bites on a baking sheet lined with parchment paper. Spray lightly with cooking spray and bake for 20-25 minutes, flipping halfway through, until golden brown and cooked through.
Nutrition
- Serving Size: one normal portion
- Calories: 280
- Protein: 20g