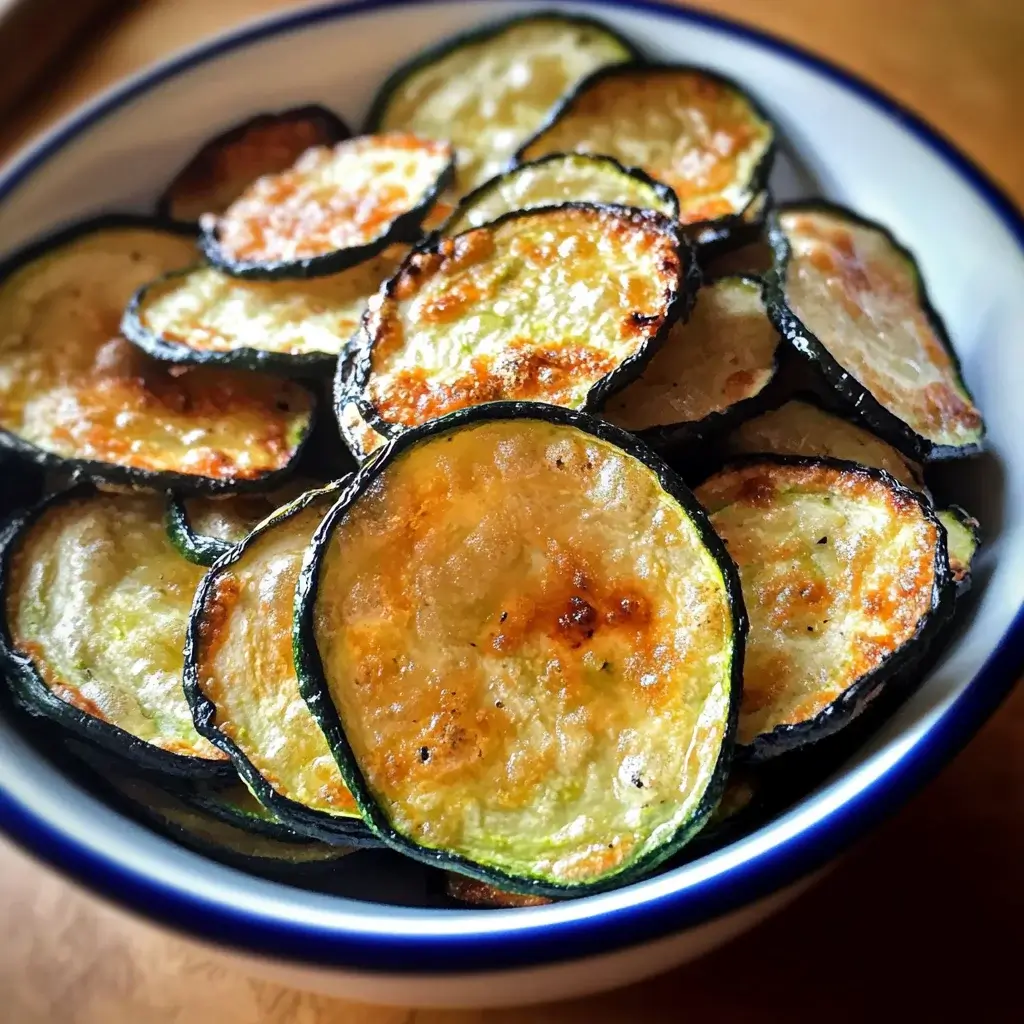
In our house, getting everyone to agree on a snack can sometimes feel like navigating a diplomatic crisis. My kids, bless their hearts, have very specific opinions, and vegetables are often met with a level of suspicion usually reserved for mythical creatures. So, imagine my surprise when these Crispy Zucchini Chips with Cool Ranch Dip became an instant, unanimous hit! From the first batch, the chips disappeared faster than I could bake them. The satisfying crunch, the subtle sweetness of the zucchini, and the cool, tangy ranch dip created a flavor and texture combination that had everyone reaching for more. Even my husband, who usually prefers more “substantial” snacks, confessed to loving them. These zucchini chips are now a regular request, proving that sometimes, the simplest recipes are truly the most magical. If you’re looking for a healthy, delicious, and surprisingly addictive snack that even vegetable skeptics will devour, look no further. This recipe is a game-changer!
Ingredients for Crispy Zucchini Chips
- Fresh Zucchini: 2 medium-sized zucchini, the star of the show! Choose firm zucchini for the best texture.
- All-Purpose Flour: ½ cup, helps to create a light coating for crispiness. You can also use gluten-free blends.
- Breadcrumbs: 1 cup, panko breadcrumbs are highly recommended for extra crunch, but regular breadcrumbs work too.
- Grated Parmesan Cheese: ½ cup, adds a savory, cheesy flavor and contributes to browning and crispiness.
- Italian Seasoning: 1 tablespoon, a blend of herbs that enhances the flavor profile.
- Garlic Powder: 1 teaspoon, for a subtle garlicky kick.
- Salt: ½ teaspoon, enhances the flavors and balances the sweetness of the zucchini.
- Black Pepper: ¼ teaspoon, adds a touch of spice.
- Eggs: 2 large, acts as a binder and helps the coating adhere to the zucchini.
- Olive Oil Spray: For spraying the baking sheet, prevents sticking and promotes even browning.
Ingredients for Cool Ranch Dip
- Sour Cream: 1 cup, the creamy base of our dip, providing richness and tang. Full-fat or low-fat works well.
- Mayonnaise: ½ cup, adds creaminess and a slight tang, complementing the sour cream.
- Buttermilk: ¼ cup, thins the dip to the perfect consistency and adds a signature ranch tang.
- Dried Dill: 1 tablespoon, a classic ranch flavor, bringing a fresh, herbaceous note.
- Dried Chives: 1 tablespoon, adds a mild oniony flavor and visual appeal.
- Dried Parsley: 1 tablespoon, contributes a fresh, green flavor and balances the other herbs.
- Garlic Powder: 1 teaspoon, enhances the savory depth of the dip.
- Onion Powder: 1 teaspoon, for a classic ranch oniony flavor.
- Salt: ½ teaspoon, enhances all the flavors and balances the tanginess.
- Black Pepper: ¼ teaspoon, adds a touch of spice.
- Lemon Juice: 1 teaspoon (freshly squeezed is best), brightens the dip and adds a subtle citrus note.
Instructions for Making Crispy Zucchini Chips and Cool Ranch Dip
Step 1: Prepare the Zucchini
- Wash and Trim: Thoroughly wash the zucchini under cold water and pat them dry. Trim off the stem and blossom ends.
- Slice the Zucchini: The key to crispy chips is thin, even slices. You can use a mandoline for perfectly uniform slices (be careful!), or slice them thinly by hand, about ⅛-inch to ¼-inch thick. Aim for consistent thickness for even cooking. If the zucchini are very wide, you can halve them lengthwise before slicing into half-moons.
Step 2: Set Up the Breading Station
- Three Bowls: Prepare three shallow bowls for your breading station.
- Bowl 1: Flour Mixture: In the first bowl, whisk together the all-purpose flour, salt, and black pepper. This seasoned flour will be the first layer of coating, helping the egg adhere.
- Bowl 2: Egg Wash: In the second bowl, whisk the eggs until they are lightly beaten and the yolks and whites are fully combined. This egg wash will act as the glue for the breadcrumb mixture.
- Bowl 3: Breadcrumb Mixture: In the third bowl, combine the breadcrumbs, grated Parmesan cheese, Italian seasoning, and garlic powder. Mix well to ensure all ingredients are evenly distributed. This flavorful breadcrumb mixture is what will give our chips their crispy exterior.
Step 3: Bread the Zucchini Slices
- Dredge in Flour: Take a zucchini slice and dredge it in the flour mixture, ensuring both sides are evenly coated. Shake off any excess flour. This step is crucial for achieving a good coating.
- Dip in Egg Wash: Dip the floured zucchini slice into the egg wash, making sure it’s fully submerged and coated with egg. Let any excess egg drip off.
- Coat in Breadcrumbs: Finally, dredge the egg-coated zucchini slice in the breadcrumb mixture, pressing gently to ensure the breadcrumbs adhere well to both sides. Make sure the entire slice is covered in breadcrumbs for maximum crispiness.
- Repeat: Repeat the breading process for all the zucchini slices, working in batches if necessary to avoid overcrowding your breading station.
Step 4: Bake the Zucchini Chips
- Preheat Oven: Preheat your oven to 425°F (220°C). High heat is essential for achieving crispy chips.
- Prepare Baking Sheet: Line a large baking sheet with parchment paper for easy cleanup. Lightly spray the parchment paper with olive oil spray to prevent sticking and encourage browning.
- Arrange Zucchini Chips: Arrange the breaded zucchini slices in a single layer on the prepared baking sheet. Make sure they are not overcrowded, as overcrowding can lead to steaming instead of baking, resulting in soggy chips. If needed, use two baking sheets or bake in batches.
- Spray with Olive Oil: Lightly spray the tops of the breaded zucchini chips with olive oil spray. This helps them become golden brown and extra crispy.
- Bake: Bake in the preheated oven for 15-20 minutes, flipping the chips halfway through, until they are golden brown and crispy. The exact baking time may vary depending on your oven and the thickness of your zucchini slices, so keep an eye on them.
Step 5: Prepare the Cool Ranch Dip (While Chips are Baking)
- Combine Ingredients: In a medium-sized bowl, combine the sour cream, mayonnaise, and buttermilk. Whisk together until smooth and well combined.
- Add Seasonings: Add the dried dill, dried chives, dried parsley, garlic powder, onion powder, salt, and black pepper to the bowl.
- Stir and Mix: Stir all the seasonings into the sour cream mixture until they are evenly distributed.
- Add Lemon Juice: Stir in the lemon juice. This brightens the flavors and adds a touch of acidity that balances the richness of the dip.
- Chill (Optional but Recommended): For the best flavor, cover the bowl and refrigerate the ranch dip for at least 30 minutes, or even better, for an hour or two. Chilling allows the flavors to meld and deepen.
Step 6: Serve and Enjoy!
- Remove Chips from Oven: Once the zucchini chips are golden brown and crispy, remove them from the oven.
- Cool Slightly: Let the chips cool on the baking sheet for a few minutes before serving. They will crisp up even more as they cool.
- Serve with Dip: Transfer the crispy zucchini chips to a serving platter and serve immediately with the cool ranch dip on the side. Enjoy the delicious combination of crunchy chips and creamy, tangy dip!
Nutrition Facts (Per Serving)
(Estimated, based on typical ingredients and recipe, may vary)
- Serving Size: Approximately 6-8 chips with 2 tablespoons of dip
- Calories: 200-250 kcal
- Fat: 12-15g
(Note: These are estimates and can vary based on specific ingredient brands and portion sizes. For precise nutritional information, use a nutrition calculator with the exact brands and quantities of ingredients used.)
Preparation Time
- Prep Time: 20 minutes (including slicing zucchini, setting up breading station, and making dip)
- Cook Time: 15-20 minutes
- Total Time: 35-40 minutes
(This recipe is relatively quick to make, perfect for a weeknight snack or a last-minute appetizer.)
How to Serve Crispy Zucchini Chips
- Classic Appetizer: Arrange the crispy zucchini chips on a platter alongside a bowl of cool ranch dip. This is a perfect starter for parties, gatherings, or casual get-togethers.
- Healthy Snack: Enjoy as a healthier alternative to traditional potato chips. The zucchini provides some nutrients and fiber, making it a more wholesome snack option.
- Side Dish: Serve alongside burgers, sandwiches, or grilled chicken for a lighter and crispier side dish option than fries.
- Kids’ Snack: A great way to sneak in some vegetables for kids (and adults!) who might be hesitant to eat zucchini. The crispy texture and delicious dip make them incredibly appealing.
- Movie Night Treat: Perfect for movie nights at home! They are easy to eat while watching a film and offer a satisfying crunch.
- Lunchbox Addition: Pack cooled zucchini chips and ranch dip in separate containers for a fun and healthy lunchbox treat (ensure dip is kept cool).
- Game Day Snack: A crowd-pleasing snack for game day gatherings. They are easy to make in large batches and are always a hit.
Additional Tips for Perfect Crispy Zucchini Chips
- Remove Excess Moisture from Zucchini: Zucchini has a high water content. To ensure extra crispy chips, you can draw out some of the moisture before breading. After slicing, lay the zucchini slices on paper towels, sprinkle with salt, and let them sit for about 15-20 minutes. The salt will draw out moisture. Pat them dry with paper towels before proceeding with breading.
- Don’t Overcrowd the Baking Sheet: Overcrowding the baking sheet will cause the zucchini chips to steam instead of bake, resulting in soggy chips. Bake in batches if necessary to ensure each chip has space and can crisp up properly.
- Use Panko Breadcrumbs: Panko breadcrumbs are larger and coarser than regular breadcrumbs, resulting in a much crispier texture. If you can find panko breadcrumbs, they are highly recommended for this recipe.
- Make Sure Oil is Hot Enough (If Frying): While this recipe is baked, if you choose to fry them for an even crispier result (not recommended for health reasons), ensure your oil is heated to the correct temperature (around 350-375°F or 175-190°C) before adding the breaded zucchini. Frying too low will result in greasy chips.
- Experiment with Seasonings: Feel free to customize the seasonings in both the chips and the dip to your liking. For the chips, try adding paprika, chili powder, or onion powder. For the dip, consider adding fresh herbs like cilantro or chives, or a pinch of cayenne pepper for a little heat.
- Serve Immediately for Best Crispness: Crispy zucchini chips are best enjoyed immediately after baking when they are at their peak crispness. While they can be reheated, they may lose some of their initial crunch. If you need to make them ahead, bake them just before serving for the best texture.
Frequently Asked Questions (FAQ) About Crispy Zucchini Chips and Cool Ranch Dip
Q1: Can I make these zucchini chips in an air fryer?
A: Yes, absolutely! Air frying is an excellent way to make crispy zucchini chips even faster and with less oil. Preheat your air fryer to 400°F (200°C). Arrange the breaded zucchini chips in a single layer in the air fryer basket (you may need to work in batches). Air fry for 8-12 minutes, flipping halfway through, until golden brown and crispy. Air frying often results in even crispier chips than oven baking.
Q2: Can I use gluten-free flour and breadcrumbs?
A: Yes, you can easily make this recipe gluten-free. Simply substitute the all-purpose flour with a gluten-free all-purpose flour blend and use gluten-free breadcrumbs. Ensure that all other ingredients, like Italian seasoning and parmesan cheese, are also certified gluten-free if you have strict dietary requirements.
Q3: Can I make the ranch dip ahead of time?
A: Yes, the cool ranch dip can be made ahead of time and actually tastes even better after the flavors have had time to meld. You can prepare the dip up to 2-3 days in advance and store it in an airtight container in the refrigerator. Just give it a good stir before serving.
Q4: My zucchini chips are not crispy, what did I do wrong?
A: There are a few reasons why your zucchini chips might not be crispy. Common culprits include:
* Too much moisture in the zucchini: Make sure to pat the zucchini slices dry before breading, or try salting them to draw out excess moisture as mentioned in the tips.
* Overcrowding the baking sheet: Ensure the chips are in a single layer with space between them to allow for proper baking and crisping.
* Oven temperature too low: Make sure your oven is preheated to the correct temperature (425°F/220°C) and that your oven is accurately calibrated.
* Not baking long enough: Bake the chips until they are golden brown and visibly crispy, which may take slightly longer depending on your oven and zucchini thickness.
Q5: Can I freeze zucchini chips?
A: Freezing cooked zucchini chips is not recommended as they tend to become soggy and lose their crispness upon thawing. For the best texture and flavor, it’s best to enjoy them fresh. However, you can prepare the breaded zucchini slices ahead of time and freeze them before baking. Lay the breaded slices in a single layer on a baking sheet lined with parchment paper, freeze until solid, and then transfer them to a freezer-safe bag. Bake directly from frozen, adding a few extra minutes to the baking time.
Q6: Can I use dried ranch dressing mix instead of making the dip from scratch?
A: While homemade ranch dip is undeniably delicious, you can use a packet of dried ranch dressing mix for a quicker option. Simply mix the ranch dressing mix with sour cream, mayonnaise, and buttermilk according to the package directions. However, for the best and freshest flavor, making the dip from scratch with individual herbs is highly recommended and only takes a few extra minutes.
Print
Crispy Zucchini Chips with Cool Ranch Dip
Ingredients
- Fresh Zucchini: 2 medium-sized zucchini, the star of the show! Choose firm zucchini for the best texture.
- All-Purpose Flour: ½ cup, helps to create a light coating for crispiness. You can also use gluten-free blends.
- Breadcrumbs: 1 cup, panko breadcrumbs are highly recommended for extra crunch, but regular breadcrumbs work too.
- Grated Parmesan Cheese: ½ cup, adds a savory, cheesy flavor and contributes to browning and crispiness.
- Italian Seasoning: 1 tablespoon, a blend of herbs that enhances the flavor profile.
- Garlic Powder: 1 teaspoon, for a subtle garlicky kick.
- Salt: ½ teaspoon, enhances the flavors and balances the sweetness of the zucchini.
- Black Pepper: ¼ teaspoon, adds a touch of spice.
- Eggs: 2 large, acts as a binder and helps the coating adhere to the zucchini.
- Olive Oil Spray: For spraying the baking sheet, prevents sticking and promotes even browning.
Instructions
-
Step 1: Prepare the Zucchini
- Wash and Trim: Thoroughly wash the zucchini under cold water and pat them dry. Trim off the stem and blossom ends.
- Slice the Zucchini: The key to crispy chips is thin, even slices. You can use a mandoline for perfectly uniform slices (be careful!), or slice them thinly by hand, about ⅛-inch to ¼-inch thick. Aim for consistent thickness for even cooking. If the zucchini are very wide, you can halve them lengthwise before slicing into half-moons.
Step 2: Set Up the Breading Station
- Three Bowls: Prepare three shallow bowls for your breading station.
- Bowl 1: Flour Mixture: In the first bowl, whisk together the all-purpose flour, salt, and black pepper. This seasoned flour will be the first layer of coating, helping the egg adhere.
- Bowl 2: Egg Wash: In the second bowl, whisk the eggs until they are lightly beaten and the yolks and whites are fully combined. This egg wash will act as the glue for the breadcrumb mixture.
- Bowl 3: Breadcrumb Mixture: In the third bowl, combine the breadcrumbs, grated Parmesan cheese, Italian seasoning, and garlic powder. Mix well to ensure all ingredients are evenly distributed. This flavorful breadcrumb mixture is what will give our chips their crispy exterior.
Step 3: Bread the Zucchini Slices
- Dredge in Flour: Take a zucchini slice and dredge it in the flour mixture, ensuring both sides are evenly coated. Shake off any excess flour. This step is crucial for achieving a good coating.
- Dip in Egg Wash: Dip the floured zucchini slice into the egg wash, making sure it’s fully submerged and coated with egg. Let any excess egg drip off.
- Coat in Breadcrumbs: Finally, dredge the egg-coated zucchini slice in the breadcrumb mixture, pressing gently to ensure the breadcrumbs adhere well to both sides. Make sure the entire slice is covered in breadcrumbs for maximum crispiness.
- Repeat: Repeat the breading process for all the zucchini slices, working in batches if necessary to avoid overcrowding your breading station.
Step 4: Bake the Zucchini Chips
- Preheat Oven: Preheat your oven to 425°F (220°C). High heat is essential for achieving crispy chips.
- Prepare Baking Sheet: Line a large baking sheet with parchment paper for easy cleanup. Lightly spray the parchment paper with olive oil spray to prevent sticking and encourage browning.
- Arrange Zucchini Chips: Arrange the breaded zucchini slices in a single layer on the prepared baking sheet. Make sure they are not overcrowded, as overcrowding can lead to steaming instead of baking, resulting in soggy chips. If needed, use two baking sheets or bake in batches.
- Spray with Olive Oil: Lightly spray the tops of the breaded zucchini chips with olive oil spray. This helps them become golden brown and extra crispy.
- Bake: Bake in the preheated oven for 15-20 minutes, flipping the chips halfway through, until they are golden brown and crispy. The exact baking time may vary depending on your oven and the thickness of your zucchini slices, so keep an eye on them.
Step 5: Prepare the Cool Ranch Dip (While Chips are Baking)
- Combine Ingredients: In a medium-sized bowl, combine the sour cream, mayonnaise, and buttermilk. Whisk together until smooth and well combined.
- Add Seasonings: Add the dried dill, dried chives, dried parsley, garlic powder, onion powder, salt, and black pepper to the bowl.
- Stir and Mix: Stir all the seasonings into the sour cream mixture until they are evenly distributed.
- Add Lemon Juice: Stir in the lemon juice. This brightens the flavors and adds a touch of acidity that balances the richness of the dip.
- Chill (Optional but Recommended): For the best flavor, cover the bowl and refrigerate the ranch dip for at least 30 minutes, or even better, for an hour or two. Chilling allows the flavors to meld and deepen.
Step 6: Serve and Enjoy!
- Remove Chips from Oven: Once the zucchini chips are golden brown and crispy, remove them from the oven.
- Cool Slightly: Let the chips cool on the baking sheet for a few minutes before serving. They will crisp up even more as they cool.
- Serve with Dip: Transfer the crispy zucchini chips to a serving platter and serve immediately with the cool ranch dip on the side. Enjoy the delicious combination of crunchy chips and creamy, tangy dip!
Nutrition
- Serving Size: one normal portion
- Calories: 250
- Fat: 15g