Of all the culinary adventures I’ve embarked on in my own kitchen, none has been as surprisingly simple and rewarding as mastering homemade sushi. For years, I viewed sushi-making as a complex art form reserved for highly trained chefs. The idea of getting the rice just right, of rolling it perfectly without everything falling apart, felt completely out of reach. That all changed with this Cucumber Avocado Vegetarian Sushi Roll recipe. The first time I made it, I roped my entire family into the process. We laid out all the fresh ingredients, the vibrant green of the cucumber and avocado a beautiful promise of the flavors to come. The kids, initially skeptical, were fascinated by the rolling process. There was laughter, a few misshapen first attempts, and a collective sense of accomplishment when we sliced into that first, perfect-looking roll. The taste was a revelation—so much cleaner, fresher, and more vibrant than any store-bought vegetarian roll we’d ever had. The creamy avocado, the crisp cucumber, and the perfectly seasoned, slightly sweet rice created a symphony of textures and flavors. It has since become our go-to for a fun weekend dinner, a healthy lunch, and even a fancy-looking appetizer for guests. This recipe didn’t just teach me how to make sushi; it created a joyful kitchen tradition.
Ingredients
Here is the complete list of ingredients you will need to create these delightfully fresh and creamy vegetarian sushi rolls. Each component is chosen for its specific flavor and texture, contributing to the perfect final product.
- Sushi Rice: 2 cups (approx. 400g) – It is crucial to use Japanese short-grain rice, specifically labeled “sushi rice.” Its high starch content is what makes it sticky and perfect for holding the roll’s shape.
- Water: 2 ¼ cups (approx. 530ml) – For cooking the rice to the perfect fluffy, yet firm, consistency.
- Rice Vinegar: ¼ cup (60ml) – Unseasoned rice vinegar is the base for the sushi seasoning. It adds a subtle, tangy flavor that is characteristic of authentic sushi rice.
- Granulated Sugar: 2 tablespoons – This dissolves into the vinegar to balance the tanginess, adding a hint of sweetness that enhances the overall flavor profile of the rice.
- Salt: 1 teaspoon – A small amount of salt is essential to bring out the flavors of the rice and the seasoning.
- Nori Sheets: 6 full sheets – These are the dried seaweed sheets that wrap the sushi. Look for dark green, crisp sheets for the best flavor and texture.
- Large English Cucumber: 1, or 2 smaller Kirby cucumbers – English cucumbers are ideal because they have thin skin and fewer seeds. We will be julienning this for a refreshing, crunchy element.
- Ripe Avocados: 2 large – The star of the show! The avocados should be ripe but still firm to the touch, ensuring they are creamy without being mushy and difficult to slice.
- Toasted Sesame Seeds: 2 tablespoons (optional) – For sprinkling inside the roll or on top, adding a nutty flavor and a bit of texture.
- For Serving (Optional): Soy sauce or tamari, wasabi paste, and pickled ginger.
Instructions
Follow these detailed, step-by-step instructions carefully to ensure your homemade sushi-making experience is a success. We will break the process down into manageable stages: preparing the rice, prepping the fillings, and finally, the art of rolling and slicing.
Part 1: Mastering the Perfect Sushi Rice
The foundation of any great sushi roll is the rice. This step is the most time-consuming but arguably the most important. Do not rush it.
- Rinse the Rice: Place the 2 cups of sushi rice into a large bowl. Cover it with cold water and use your hands to gently swish and massage the rice. The water will become milky and cloudy. Carefully pour out the cloudy water, using a fine-mesh sieve if needed to prevent losing any rice grains. Repeat this process 4-5 times, or until the water runs mostly clear. This step is non-negotiable; it removes the excess surface starch, which prevents the rice from becoming a gummy, pasty mess. Drain the rice thoroughly in the sieve for at least 15 minutes.
- Cook the Rice: Transfer the drained rice and the 2 ¼ cups of fresh water to a medium saucepan with a tight-fitting lid. Bring the water to a boil over medium-high heat. Once it’s boiling, immediately reduce the heat to the lowest possible setting, cover the pot with the lid, and let it simmer for exactly 15 minutes. Do not lift the lid during this time.
- Rest the Rice: After 15 minutes, remove the saucepan from the heat, but keep the lid on. Let the rice steam, undisturbed, for another 10-15 minutes. This allows the moisture to distribute evenly throughout the grains, resulting in a perfectly fluffy texture.
- Prepare the Vinegar Seasoning: While the rice is resting, combine the ¼ cup of rice vinegar, 2 tablespoons of sugar, and 1 teaspoon of salt in a small, non-reactive bowl or saucepan. Gently warm the mixture over low heat or in the microwave for 30-45 seconds, stirring until the sugar and salt have completely dissolved. Set this aside.
- Season the Rice: Transfer the hot, cooked rice to a large, non-metallic bowl (a wooden, glass, or plastic bowl works best, as metal can react with the vinegar). While the rice is still hot, slowly drizzle the vinegar mixture all over it. Using a wooden spoon or rice paddle, gently “cut” and “fold” the seasoning into the rice with slicing motions. Avoid stirring or mashing the rice, as this will break the grains and make it mushy. The goal is to coat each grain without crushing it.
- Cool the Rice: Fan the rice while you are folding it to help it cool down to room temperature more quickly and to give it a beautiful, glossy sheen. You can use a hand fan, a piece of cardboard, or simply let it cool naturally. Cover the bowl with a damp cloth to prevent the surface from drying out while you prepare the other ingredients.
Part 2: Preparing the Fresh Fillings
With the rice cooling, it’s time to prep the crisp and creamy fillings.
- Prepare the Cucumber: Wash and dry the English cucumber. Trim off the ends. Using a sharp knife, slice the cucumber in half lengthwise. If there are a lot of seeds, you can use a small spoon to gently scrape them out. Lay the cucumber halves flat-side down and slice them lengthwise into long, thin matchsticks (julienne).
- Prepare the Avocado: Slice the avocados in half lengthwise and remove the pits. Carefully peel the skin off each half. Place the avocado halves flat-side down on your cutting board and slice them into ¼-inch thick strips. To prevent browning, you can very lightly spritz them with lemon or lime juice.
Part 3: The Art of Assembling and Rolling
This is the fun part! Set up your sushi-making station with your bamboo rolling mat (makisu), a small bowl of water, your cooled sushi rice, the nori sheets, and your prepared fillings.
- Set Up Your Mat: Place your bamboo mat on a clean, flat work surface. Many people find it helpful to wrap the mat in plastic wrap for easy cleanup and to prevent rice from sticking to it.
- Place the Nori: Lay one sheet of nori, shiny-side down, on the bamboo mat. The rougher side should be facing up, as it helps the rice adhere better. Align the bottom edge of the nori with the bottom edge of the mat.
- Spread the Rice: Dip your fingers into the small bowl of water to prevent the rice from sticking to them. Take a handful of sushi rice (about ¾ to 1 cup) and gently spread it over the nori. Start from the center and work your way out, creating a thin, even layer. Leave a 1-inch border of bare nori at the top edge, away from you. This empty space is crucial for sealing the roll. Be gentle and use your fingertips to press, not mash, the rice.
- Add the Fillings: About one-third of the way up from the bottom edge of the rice, arrange a horizontal line of your fillings. Place a few strips of cucumber and a few slices of avocado in a neat row across the rice. If using, sprinkle a pinch of toasted sesame seeds over the fillings. Be careful not to overfill the roll, as this is the most common reason for rolls bursting or being difficult to roll.
- Roll it Up:
- The Tuck: Lift the bottom edge of the bamboo mat (along with the nori and rice) and carefully fold it over the fillings. Use your fingers to tuck the fillings in tightly as you roll. The edge of the nori should tuck just past the fillings.
- The Roll: Squeeze the roll gently but firmly with the mat to compact the ingredients and form a tight cylinder. Continue to roll forward, lifting the edge of the mat as you go so it doesn’t get rolled into the sushi.
- The Seal: When you reach the bare 1-inch strip of nori at the top, dip your finger in the bowl of water and lightly dampen the nori. This will act as an adhesive. Complete the roll, and the damp edge will seal it shut.
- Firm the Roll: Once rolled, you can use the bamboo mat to gently press and shape the roll one more time to ensure it’s a uniform, compact cylinder.
Part 4: Slicing and Presenting
A clean slice is the final touch for professional-looking sushi.
- Prepare Your Knife: Take your sharpest knife (a long, thin blade is best). Dip the blade into your bowl of water or wipe it with a damp cloth before each and every cut. A wet blade is the secret to slicing through the roll without tearing the nori or squishing the fillings.
- Slice the Roll: Place the completed sushi roll on a cutting board. First, slice the roll directly in half. Then, place the two halves side by side and slice them both into three or four equal pieces, resulting in 6 or 8 bite-sized sushi pieces per roll.
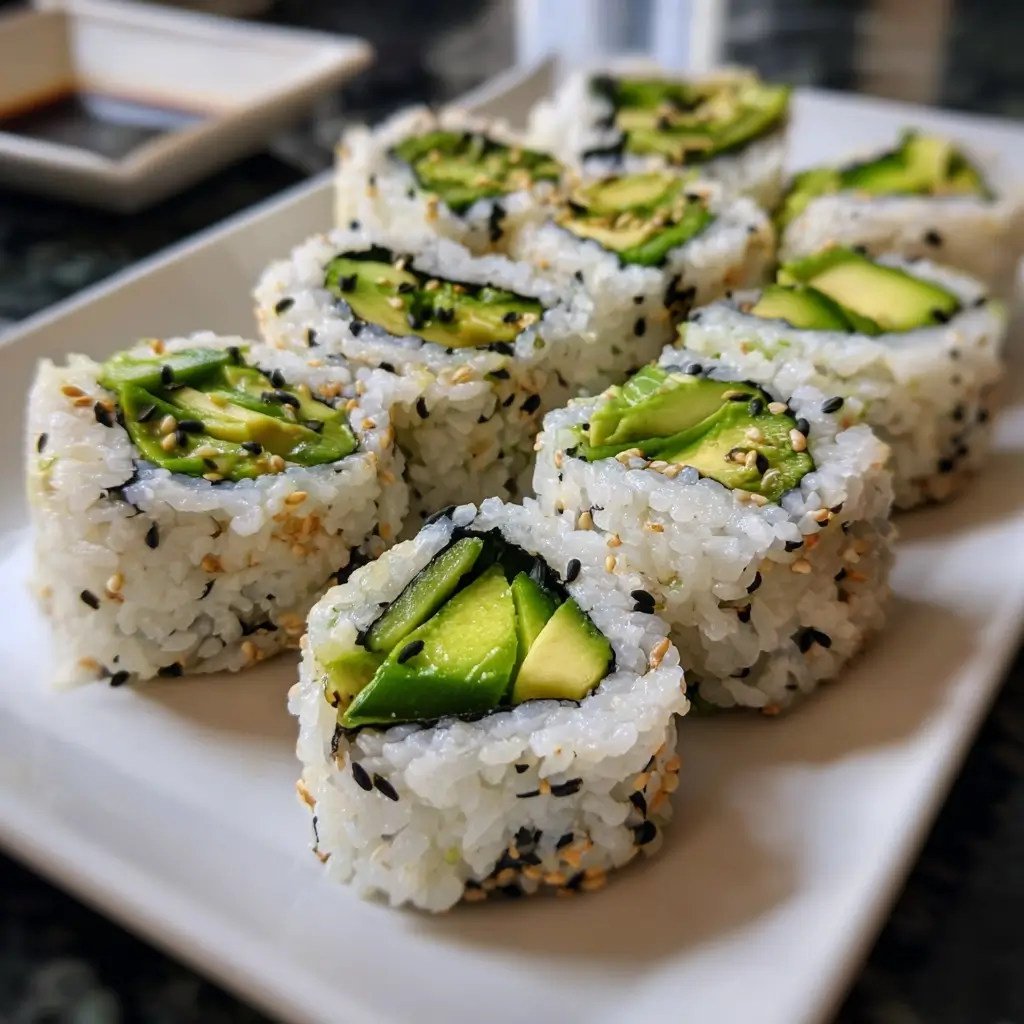
- Repeat and Serve: Repeat the rolling and slicing process with the remaining nori sheets and fillings. Arrange your beautiful Cucumber Avocado Vegetarian Sushi Rolls on a platter and serve immediately.
Nutrition Facts
This recipe yields approximately 6 rolls, which can be cut into 36-48 individual pieces. A single serving is considered one full roll (6-8 pieces). The nutritional information can vary based on exact portion sizes.
- Servings: 6 Rolls
- Calories Per Serving (1 Roll): Approximately 280-320 kcal
- Healthy Fats: A significant portion of the calories comes from the avocado, which is packed with monounsaturated fats. These are heart-healthy fats that can help reduce bad cholesterol levels and are essential for brain health.
- Complex Carbohydrates: The sushi rice provides a great source of complex carbohydrates, which are the body’s primary source of energy. They digest slowly, providing sustained energy without a sharp spike in blood sugar.
- Dietary Fiber: With contributions from the avocado, cucumber, and even the nori seaweed, these rolls offer a decent amount of dietary fiber. Fiber is crucial for digestive health, promoting regularity and helping you feel full and satisfied.
- Micronutrients: Nori seaweed is a surprisingly good source of essential micronutrients, including iodine (vital for thyroid function), vitamin A, and vitamin C.
- Low in Saturated Fat: As a completely plant-based recipe, these sushi rolls are naturally free of cholesterol and very low in saturated fat, making them an excellent choice for a heart-conscious diet.
Preparation Time
Properly planning your time is key to a stress-free sushi-making session. The majority of the time is hands-off, waiting for the rice to cook and cool.
- Active Preparation Time: 30-40 minutes (This includes rinsing the rice, chopping vegetables, and the assembly/rolling process).
- Cooking and Cooling Time: 60-75 minutes (This includes cooking the rice, the resting period, and the time it takes for the seasoned rice to cool to room temperature).
- Total Time: Approximately 1 hour and 30 minutes to 1 hour and 55 minutes.
How to Serve
Serving your homemade sushi with the right accompaniments elevates the entire experience from a simple meal to a true culinary event. Presentation matters!
- Classic Condiments: No sushi platter is complete without the traditional trio.
- Soy Sauce (or Tamari): Serve in small, individual dipping bowls. For a gluten-free option, be sure to use tamari.
- Wasabi: Place a small dab of wasabi paste on the side of each plate. Traditionally, a tiny amount is mixed into the soy sauce or placed directly on the sushi piece before dipping.
- Pickled Ginger (Gari): Serve a small pile of thinly sliced pickled ginger. It is meant to be eaten between different pieces of sushi to cleanse the palate.
- Elevated Dipping Sauces: For a modern twist, consider offering other sauces.
- Spicy Mayo: Easily make your own by mixing Japanese mayonnaise (like Kewpie) with sriracha and a tiny splash of lime juice.
- Sweet Soy Glaze (Eel Sauce): You can buy this pre-made or create a simple version by simmering equal parts soy sauce, mirin, and sugar until it thickens slightly. Drizzle it over the top of the rolls before serving.
- Perfect Pairings and Side Dishes: Turn your sushi rolls into a full, satisfying meal with these classic Japanese side dishes.
- Miso Soup: A warm, savory bowl of miso soup is the perfect starter.
- Edamame: Serve a bowl of steamed and lightly salted edamame pods for a simple and healthy appetizer.
- Seaweed Salad (Goma Wakame): A vibrant green seaweed salad adds another layer of oceanic flavor and a pleasant texture.
- Presentation Tips:
- Arrange the sliced sushi neatly on a flat platter, a long rectangular sushi plate (geta), or a simple wooden board.
- Garnish the platter with extra toasted sesame seeds or finely chopped chives.
- Provide each person with a set of chopsticks and a dipping bowl.
Additional Tips
Here are 8 extra tips to help you perfect your sushi-making craft and customize your rolls.
- Don’t Overfill Your Rolls. This is the number one mistake beginners make. It’s tempting to load up on fillings, but this makes the roll incredibly difficult to close and prone to bursting. Less is more.
- Keep Your Hands Wet. Sushi rice is incredibly sticky. Keep a small bowl of water (called “tezu”) nearby and dip your fingers in it frequently when handling the rice. This will prevent a frustrating, sticky mess.
- Use a Very Sharp, Wet Knife. We can’t stress this enough. A dull knife will crush your beautiful roll. A sharp, wet knife will glide through it, creating clean, professional-looking pieces. Wipe and re-wet the blade between cuts.
- Toast Your Nori (Optional). For an extra layer of flavor and a crispier texture, you can lightly toast your nori sheets before using them. Quickly pass each sheet over a low gas flame or a hot electric burner for a few seconds until it becomes more fragrant and slightly crisper.
- Don’t Mash the Rice. When spreading the rice on the nori, use a gentle touch. Press it into an even layer, but don’t compact it or mash it down. You want to be able to distinguish the individual grains.
- Let the Roll Rest. After rolling and sealing your sushi log, let it sit for a minute or two before slicing. This helps the nori absorb a bit of moisture from the rice, making it less likely to tear during slicing.
- Make it a Sushi Party. This recipe is perfect for a group activity. Set up an assembly line with bowls of different fillings (see variations below) and let everyone build their own custom rolls. It’s a fun and interactive dining experience.
- Experiment with Fillings. These cucumber avocado rolls are a delicious base, but feel free to get creative! Other great vegetarian fillings include julienned carrots, bell peppers, marinated baked tofu, sweet potato tempura, mango strips, or cream cheese.
FAQ Section
Here are answers to some of the most frequently asked questions about making vegetarian sushi rolls at home.
1. Why is my sushi rice so mushy and gummy?
This is almost always because the rice was not rinsed thoroughly enough before cooking. The rinsing process removes the excess surface starch that causes gumminess. Be sure to rinse until the water runs mostly clear. Another culprit could be stirring the rice (instead of folding) when adding the vinegar, which breaks the grains.
2. Can I use regular white rice (like jasmine or basmati) instead of sushi rice?
While you technically can, it’s not recommended. Long-grain rice varieties like jasmine and basmati lack the high starch (amylopectin) content of short-grain sushi rice. They cook up into separate, fluffy grains and won’t be sticky enough to hold the roll together properly. For the best results, investing in a bag of proper sushi rice is worth it.
3. My sushi roll keeps falling apart when I roll or slice it. What am I doing wrong?
There are a few likely reasons. You might be overfilling the roll with too many ingredients. You also may not be rolling it tightly enough. When you make that initial “tuck” over the fillings, you need to pull the mat towards you to create a firm, compact core. Finally, make sure you are using a very sharp, wet knife for slicing.
4. How do I store leftover sushi?
Sushi is always best enjoyed fresh on the day it’s made, as the rice will harden and the nori will become soggy in the refrigerator. However, if you have leftovers, you can wrap the rolls tightly in plastic wrap and store them in the fridge for up to 24 hours. The texture won’t be as good, but they will still be edible. Do not freeze sushi.
5. Is this recipe vegan and/or gluten-free?
Yes, this Cucumber Avocado Vegetarian Sushi Roll recipe is 100% vegan as written. To make it gluten-free, simply ensure you are using a gluten-free tamari for dipping instead of standard soy sauce, as most soy sauces contain wheat.
6. I don’t have a bamboo rolling mat. Can I still make sushi?
Absolutely! While a bamboo mat (makisu) makes it easier to get a tight, even roll, you can improvise. A clean kitchen towel or a flexible plastic placemat covered in a layer of plastic wrap can work in a pinch. The technique is the same: use the towel/placemat to help you tuck and roll the sushi tightly.
7. Where can I find ingredients like nori sheets and sushi rice?
These days, most major supermarkets carry these items in their international or Asian food aisles. If you can’t find them there, any Asian grocery store will have a wide selection. They are also readily available from online retailers.
8. Can I prepare the components of the sushi in advance?
Yes, you can do some prep ahead of time to make assembly quicker. You can cook and season the sushi rice a few hours in advance; just keep it covered with a damp cloth at room temperature (do not refrigerate). You can also wash and julienne the cucumber and store it in an airtight container in the fridge. However, you should always slice the avocado right before you plan to assemble the rolls to prevent it from browning.

Cucumber Avocado Vegetarian Sushi Rolls
Ingredients
Here is the complete list of ingredients you will need to create these delightfully fresh and creamy vegetarian sushi rolls. Each component is chosen for its specific flavor and texture, contributing to the perfect final product.
- Sushi Rice: 2 cups (approx. 400g) – It is crucial to use Japanese short-grain rice, specifically labeled “sushi rice.” Its high starch content is what makes it sticky and perfect for holding the roll’s shape.
- Water: 2 ¼ cups (approx. 530ml) – For cooking the rice to the perfect fluffy, yet firm, consistency.
- Rice Vinegar: ¼ cup (60ml) – Unseasoned rice vinegar is the base for the sushi seasoning. It adds a subtle, tangy flavor that is characteristic of authentic sushi rice.
- Granulated Sugar: 2 tablespoons – This dissolves into the vinegar to balance the tanginess, adding a hint of sweetness that enhances the overall flavor profile of the rice.
- Salt: 1 teaspoon – A small amount of salt is essential to bring out the flavors of the rice and the seasoning.
- Nori Sheets: 6 full sheets – These are the dried seaweed sheets that wrap the sushi. Look for dark green, crisp sheets for the best flavor and texture.
- Large English Cucumber: 1, or 2 smaller Kirby cucumbers – English cucumbers are ideal because they have thin skin and fewer seeds. We will be julienning this for a refreshing, crunchy element.
- Ripe Avocados: 2 large – The star of the show! The avocados should be ripe but still firm to the touch, ensuring they are creamy without being mushy and difficult to slice.
- Toasted Sesame Seeds: 2 tablespoons (optional) – For sprinkling inside the roll or on top, adding a nutty flavor and a bit of texture.
- For Serving (Optional): Soy sauce or tamari, wasabi paste, and pickled ginger.
Instructions
Follow these detailed, step-by-step instructions carefully to ensure your homemade sushi-making experience is a success. We will break the process down into manageable stages: preparing the rice, prepping the fillings, and finally, the art of rolling and slicing.
Part 1: Mastering the Perfect Sushi Rice
The foundation of any great sushi roll is the rice. This step is the most time-consuming but arguably the most important. Do not rush it.
- Rinse the Rice: Place the 2 cups of sushi rice into a large bowl. Cover it with cold water and use your hands to gently swish and massage the rice. The water will become milky and cloudy. Carefully pour out the cloudy water, using a fine-mesh sieve if needed to prevent losing any rice grains. Repeat this process 4-5 times, or until the water runs mostly clear. This step is non-negotiable; it removes the excess surface starch, which prevents the rice from becoming a gummy, pasty mess. Drain the rice thoroughly in the sieve for at least 15 minutes.
- Cook the Rice: Transfer the drained rice and the 2 ¼ cups of fresh water to a medium saucepan with a tight-fitting lid. Bring the water to a boil over medium-high heat. Once it’s boiling, immediately reduce the heat to the lowest possible setting, cover the pot with the lid, and let it simmer for exactly 15 minutes. Do not lift the lid during this time.
- Rest the Rice: After 15 minutes, remove the saucepan from the heat, but keep the lid on. Let the rice steam, undisturbed, for another 10-15 minutes. This allows the moisture to distribute evenly throughout the grains, resulting in a perfectly fluffy texture.
- Prepare the Vinegar Seasoning: While the rice is resting, combine the ¼ cup of rice vinegar, 2 tablespoons of sugar, and 1 teaspoon of salt in a small, non-reactive bowl or saucepan. Gently warm the mixture over low heat or in the microwave for 30-45 seconds, stirring until the sugar and salt have completely dissolved. Set this aside.
- Season the Rice: Transfer the hot, cooked rice to a large, non-metallic bowl (a wooden, glass, or plastic bowl works best, as metal can react with the vinegar). While the rice is still hot, slowly drizzle the vinegar mixture all over it. Using a wooden spoon or rice paddle, gently “cut” and “fold” the seasoning into the rice with slicing motions. Avoid stirring or mashing the rice, as this will break the grains and make it mushy. The goal is to coat each grain without crushing it.
- Cool the Rice: Fan the rice while you are folding it to help it cool down to room temperature more quickly and to give it a beautiful, glossy sheen. You can use a hand fan, a piece of cardboard, or simply let it cool naturally. Cover the bowl with a damp cloth to prevent the surface from drying out while you prepare the other ingredients.
Part 2: Preparing the Fresh Fillings
With the rice cooling, it’s time to prep the crisp and creamy fillings.
- Prepare the Cucumber: Wash and dry the English cucumber. Trim off the ends. Using a sharp knife, slice the cucumber in half lengthwise. If there are a lot of seeds, you can use a small spoon to gently scrape them out. Lay the cucumber halves flat-side down and slice them lengthwise into long, thin matchsticks (julienne).
- Prepare the Avocado: Slice the avocados in half lengthwise and remove the pits. Carefully peel the skin off each half. Place the avocado halves flat-side down on your cutting board and slice them into ¼-inch thick strips. To prevent browning, you can very lightly spritz them with lemon or lime juice.
Part 3: The Art of Assembling and Rolling
This is the fun part! Set up your sushi-making station with your bamboo rolling mat (makisu), a small bowl of water, your cooled sushi rice, the nori sheets, and your prepared fillings.
- Set Up Your Mat: Place your bamboo mat on a clean, flat work surface. Many people find it helpful to wrap the mat in plastic wrap for easy cleanup and to prevent rice from sticking to it.
- Place the Nori: Lay one sheet of nori, shiny-side down, on the bamboo mat. The rougher side should be facing up, as it helps the rice adhere better. Align the bottom edge of the nori with the bottom edge of the mat.
- Spread the Rice: Dip your fingers into the small bowl of water to prevent the rice from sticking to them. Take a handful of sushi rice (about ¾ to 1 cup) and gently spread it over the nori. Start from the center and work your way out, creating a thin, even layer. Leave a 1-inch border of bare nori at the top edge, away from you. This empty space is crucial for sealing the roll. Be gentle and use your fingertips to press, not mash, the rice.
- Add the Fillings: About one-third of the way up from the bottom edge of the rice, arrange a horizontal line of your fillings. Place a few strips of cucumber and a few slices of avocado in a neat row across the rice. If using, sprinkle a pinch of toasted sesame seeds over the fillings. Be careful not to overfill the roll, as this is the most common reason for rolls bursting or being difficult to roll.
- Roll it Up:
- The Tuck: Lift the bottom edge of the bamboo mat (along with the nori and rice) and carefully fold it over the fillings. Use your fingers to tuck the fillings in tightly as you roll. The edge of the nori should tuck just past the fillings.
- The Roll: Squeeze the roll gently but firmly with the mat to compact the ingredients and form a tight cylinder. Continue to roll forward, lifting the edge of the mat as you go so it doesn’t get rolled into the sushi.
- The Seal: When you reach the bare 1-inch strip of nori at the top, dip your finger in the bowl of water and lightly dampen the nori. This will act as an adhesive. Complete the roll, and the damp edge will seal it shut.
- Firm the Roll: Once rolled, you can use the bamboo mat to gently press and shape the roll one more time to ensure it’s a uniform, compact cylinder.
Part 4: Slicing and Presenting
A clean slice is the final touch for professional-looking sushi.
- Prepare Your Knife: Take your sharpest knife (a long, thin blade is best). Dip the blade into your bowl of water or wipe it with a damp cloth before each and every cut. A wet blade is the secret to slicing through the roll without tearing the nori or squishing the fillings.
- Slice the Roll: Place the completed sushi roll on a cutting board. First, slice the roll directly in half. Then, place the two halves side by side and slice them both into three or four equal pieces, resulting in 6 or 8 bite-sized sushi pieces per roll.
- Repeat and Serve: Repeat the rolling and slicing process with the remaining nori sheets and fillings. Arrange your beautiful Cucumber Avocado Vegetarian Sushi Rolls on a platter and serve immediately.
Nutrition
- Serving Size: one normal portion
- Calories: 320