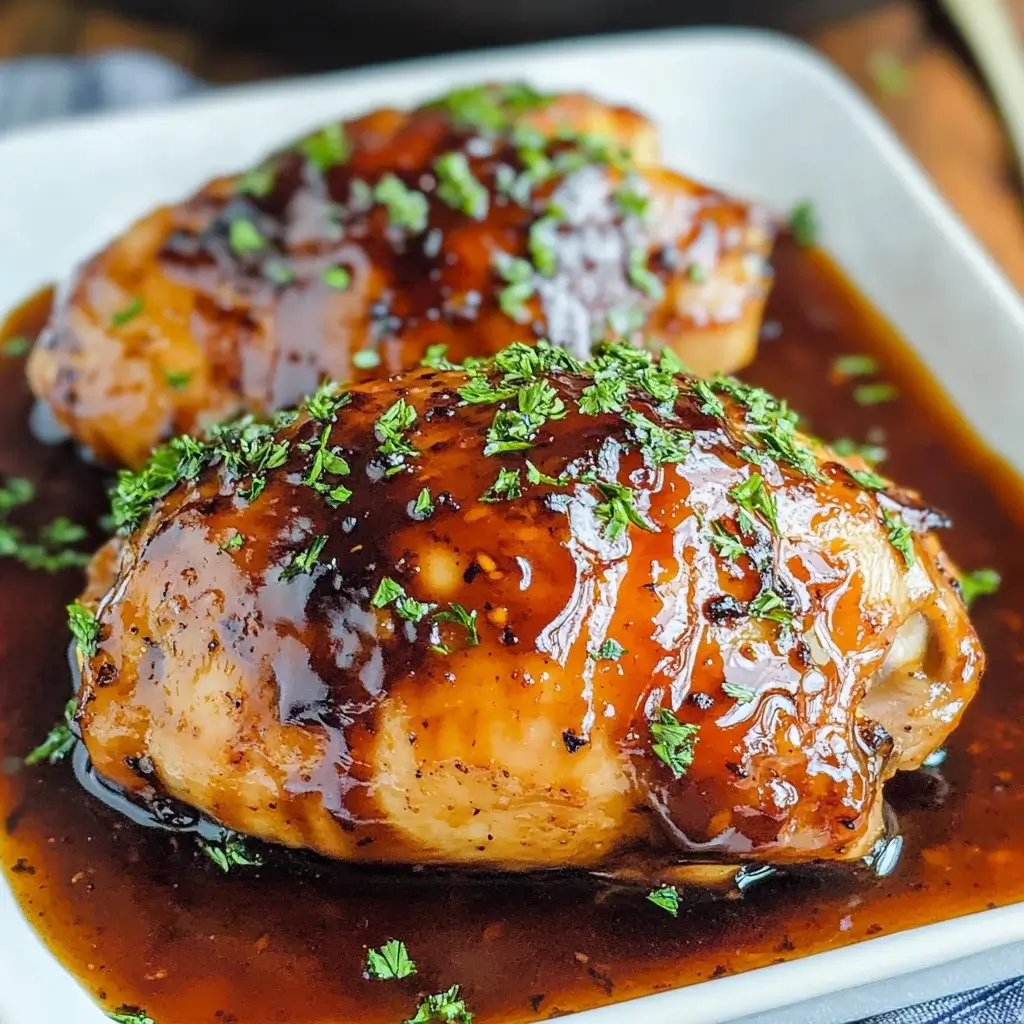
It’s Easter Sunday, and the aroma wafting from my kitchen is nothing short of divine. This year, instead of the usual ham or lamb, I decided to try something a little different for our Easter feast: Balsamic Glazed Chicken. Let me tell you, it was a resounding success! The chicken, perfectly juicy and tender, was enveloped in a luscious, tangy-sweet balsamic glaze that had everyone at the table licking their plates clean. Even my notoriously picky nephew couldn’t get enough, and my mom declared it the “best Easter chicken” she’d ever had. The vibrant glaze, with its deep, rich flavors, felt both festive and sophisticated, a wonderful departure from the usual heavy holiday fare. It was surprisingly easy to prepare, allowing me more time to spend with family and less time slaving away in the kitchen. If you’re looking for a show-stopping yet simple main course that will impress your Easter guests and become a new family favorite, look no further than this Balsamic Glazed Chicken. Trust me, it’s an Easter game-changer!
Ingredients
- Chicken Pieces: 3 lbs, bone-in, skin-on chicken pieces (thighs, drumsticks, breasts) – Provides a rich, flavorful base and stays moist during cooking.
- Balsamic Vinegar: 1 cup – The star of the glaze, offering a tangy, sweet, and complex flavor.
- Honey or Maple Syrup: ¼ cup – Sweetens the glaze and balances the acidity of the balsamic vinegar. Honey adds a floral note, while maple syrup provides a deeper, caramel-like sweetness.
- Dijon Mustard: 2 tablespoons – Adds a subtle tang and depth of flavor to the glaze, helping it emulsify and cling to the chicken.
- Garlic: 3 cloves, minced – Infuses the glaze with aromatic and savory notes.
- Dried Thyme: 1 teaspoon – Earthy and slightly minty, thyme complements the balsamic and chicken beautifully.
- Dried Rosemary: ½ teaspoon – Piney and fragrant, rosemary adds another layer of herbal complexity.
- Olive Oil: 2 tablespoons – Used for searing the chicken and adding richness to the glaze.
- Salt: 1 teaspoon, or to taste – Enhances the flavors of all ingredients.
- Black Pepper: ½ teaspoon, or to taste – Adds a touch of spice and balances the sweetness.
- Fresh Parsley (optional): For garnish – Adds a fresh, vibrant touch and visual appeal.
Instructions
- Prepare the Chicken: Preheat your oven to 400°F (200°C). Pat the chicken pieces dry with paper towels. This helps the skin crisp up nicely. Season the chicken generously with salt and pepper on all sides.
- Sear the Chicken: Heat olive oil in a large oven-safe skillet or Dutch oven over medium-high heat. Once the oil is hot and shimmering, carefully place the chicken pieces skin-side down in the skillet, being careful not to overcrowd. You may need to do this in batches. Sear the chicken for 4-5 minutes per side, or until golden brown. Searing adds depth of flavor and crispy skin. Remove the chicken from the skillet and set aside.
- Make the Balsamic Glaze: In the same skillet, reduce the heat to medium. Add the minced garlic and sauté for about 30 seconds until fragrant, being careful not to burn it. Pour in the balsamic vinegar, honey (or maple syrup), Dijon mustard, dried thyme, and dried rosemary. Stir well to combine all ingredients.
- Reduce the Glaze: Bring the glaze to a simmer and let it cook for 8-10 minutes, or until it has reduced and thickened slightly. The glaze should be syrupy enough to coat the back of a spoon. Stir occasionally to prevent sticking. Reducing the balsamic vinegar concentrates its flavor and creates a beautiful glaze.
- Glaze the Chicken: Return the seared chicken pieces to the skillet, nestling them into the balsamic glaze. Spoon the glaze generously over the chicken, ensuring each piece is well coated.
- Bake the Chicken: Transfer the skillet to the preheated oven and bake for 25-30 minutes, or until the chicken is cooked through and the internal temperature reaches 165°F (74°C) when measured with a meat thermometer inserted into the thickest part of the thigh, avoiding the bone. Basting the chicken with the glaze every 10 minutes during baking will enhance the flavor and keep it moist.
- Broil for Crispy Skin (Optional): For extra crispy skin, you can broil the chicken for the last 2-3 minutes of cooking. Keep a close eye on it to prevent burning.
- Rest and Serve: Once the chicken is cooked through, remove the skillet from the oven and let the chicken rest for 5-10 minutes before serving. This allows the juices to redistribute, resulting in more tender and flavorful chicken. Garnish with fresh parsley, if desired, and serve hot with your favorite sides.
Nutrition Facts
(Per Serving, estimated for 4 servings, based on 3 lbs chicken and glaze ingredients. Nutritional values are approximate and may vary based on specific ingredients and portion sizes.)
- Serving Size: 1 chicken piece (approximately ¼ of the recipe)
- Calories: 450 kcal
- Protein: 45g
Preparation Time
- Prep Time: 20 minutes (includes chopping garlic, measuring ingredients, and searing chicken)
- Cook Time: 35-40 minutes (includes glaze reduction and baking time)
- Total Time: Approximately 55-60 minutes – This recipe is relatively quick and easy, perfect for a weeknight meal or a special occasion.
How to Serve
This Easter Balsamic Glazed Chicken is incredibly versatile and pairs well with a variety of side dishes. Here are some serving suggestions to create a complete and delicious meal:
- Classic Easter Sides:
- Roasted Asparagus: A spring classic that complements the richness of the chicken and glaze with its fresh, slightly bitter flavor.
- Garlic Mashed Potatoes: Creamy and comforting, mashed potatoes are always a crowd-pleaser and soak up the delicious balsamic glaze.
- Honey Glazed Carrots: Adds a touch of sweetness and vibrant color to the plate.
- Green Bean Casserole (lighter version): A lighter take on the classic, using fresh green beans and a creamy mushroom sauce.
- Fresh and Light Options:
- Quinoa Salad with Feta and Herbs: A healthy and flavorful grain salad that provides a nice textural contrast to the chicken.
- Spinach Salad with Strawberries and Goat Cheese: A refreshing salad with sweet and tangy elements that balances the savory chicken.
- Caprese Salad: Simple and elegant, the fresh tomatoes, mozzarella, and basil complement the balsamic glaze beautifully.
- Hearty and Satisfying Sides:
- Roasted Rosemary Potatoes: Herb-roasted potatoes echo the rosemary in the chicken glaze and add a comforting element.
- Creamy Polenta: Smooth and buttery polenta provides a delicious base for the balsamic glazed chicken and absorbs the sauce wonderfully.
- Wild Rice Pilaf: A nutty and flavorful rice dish that adds complexity and texture to the meal.
- Bread and Rolls:
- Crusty Bread or Baguette: Perfect for soaking up the delicious balsamic glaze from the plate.
- Dinner Rolls: Soft and fluffy rolls are always a welcome addition to any meal.
- Wine Pairing:
- Pinot Noir: A light-bodied red wine with earthy notes that complements the balsamic and chicken without overpowering it.
- Dry Rosé: A crisp and refreshing rosé wine is a versatile pairing for chicken and balsamic flavors.
- Off-Dry Riesling: The slight sweetness of an off-dry Riesling can balance the acidity of the balsamic glaze beautifully.
Additional Tips for Perfect Balsamic Glazed Chicken
Achieving the perfect balsamic glazed chicken requires attention to detail and a few culinary tricks that can elevate your dish. Here’s a comprehensive guide to ensure your chicken turns out delicious every time.
Marinate for Deeper Flavor
Marinating your chicken in a portion of the balsamic glaze is a crucial step for enhancing the flavor profile. For optimal results, allow the chicken to soak in the marinade for a minimum of 30 minutes, but ideally up to 4 hours in the refrigerator. The acidity in the balsamic vinegar helps to tenderize the meat while infusing it with rich flavors. To marinate, simply combine your balsamic glaze with olive oil, garlic, and herbs of your choice, and pour it over the chicken in a resealable bag or a shallow dish. Make sure to turn the chicken occasionally to ensure even marination. If you’re short on time, even a quick 30-minute soak can make a noticeable difference.
Use High-Quality Balsamic Vinegar
The quality of balsamic vinegar you choose can dramatically affect the taste of your glaze. Authentic balsamic vinegar of Modena is aged and has a rich, complex flavor that can elevate your dish. Look for labels that specify “Tradizionale” or “I.G.P.” (Indicazione Geografica Protetta) to ensure you’re getting a genuine product. Avoid using “balsamic-flavored” vinegars or imitation products, as they often contain additives and lack the depth of flavor found in high-quality vinegars. A good balsamic vinegar will impart a sweet, tangy richness to your glaze that is essential for achieving that perfect balance of flavors.
Don’t Overcrowd the Skillet When Searing
When it comes to searing your chicken, less is more. Overcrowding the skillet leads to a drop in temperature, resulting in steaming rather than searing. This can prevent that desirable caramelization and crispy texture on the chicken’s surface. To avoid this, cook the chicken in batches if necessary. Use a large skillet or a cast-iron pan that can accommodate multiple pieces without crowding. Sear the chicken for about 4-5 minutes on each side or until it achieves a golden-brown crust before transferring it to the oven to finish cooking.
Adjust Sweetness to Your Preference
The balance of sweetness in your balsamic glaze can be tailored to suit your palate. Start with the recommended amount of honey or maple syrup, then taste the glaze as it simmers. If you prefer a tangier profile, reduce the sweetener slightly. Conversely, for those who enjoy a sweeter glaze, feel free to add a bit more honey or syrup. Remember that the flavors will concentrate as the glaze reduces, so make adjustments gradually. This flexibility allows you to customize your dish to match your family’s preferences perfectly.
Thicken the Glaze to Your Desired Consistency
The texture of your balsamic glaze is crucial for adhering nicely to the chicken. Aim for a syrupy consistency that will coat the chicken without being runny. After combining your ingredients, bring the mixture to a gentle simmer and let it reduce, stirring occasionally. If, after simmering, the glaze is too thin, continuing to cook it for a few more minutes will help it thicken naturally. Conversely, if it becomes too thick, you can easily adjust the consistency by whisking in a tablespoon of water or chicken broth. This simple step ensures that your glaze maintains the perfect texture for that enticing finish.
Use a Meat Thermometer
To ensure your chicken is perfectly cooked and safe to eat, invest in a reliable meat thermometer. Insert the thermometer into the thickest part of the chicken thigh, avoiding contact with the bone, which can give an inaccurate reading. The internal temperature should reach 165°F (74°C) for optimal safety and juiciness. Using a meat thermometer not only guarantees that your chicken is thoroughly cooked but also helps prevent overcooking, which can lead to dry meat.
Baste Regularly During Baking
Basting your chicken with the balsamic glaze during the baking process is an excellent way to enhance flavor and moisture. Every 10 minutes or so, use a baster or a spoon to drizzle the glaze over the chicken as it bakes. This not only creates a beautiful, sticky coating but also helps to keep the chicken moist, ensuring that each bite is bursting with flavor. The combination of basting and the slow baking process allows the glaze to caramelize, resulting in a mouthwatering finish.
Rest the Chicken Before Serving
After baking, it’s essential to allow your chicken to rest for 5-10 minutes before serving. This resting period is critical for achieving juicy, tender meat. When chicken cooks, its juices are pushed towards the center; resting allows these juices to redistribute throughout the meat. If you cut into the chicken immediately, those flavorful juices will escape, leading to a drier final product. To rest the chicken, simply cover it loosely with aluminum foil and let it sit. This small step ensures that every bite is succulent and packed with flavor.
By following these detailed tips, you can create a balsamic glazed chicken dish that is not only flavorful but also visually appealing and perfectly cooked. Enjoy your culinary creation!
Frequently Asked Questions (FAQ)
Q1: Can I use boneless, skinless chicken breasts for this recipe?
A1: Yes, you can! Boneless, skinless chicken breasts will cook faster, so reduce the baking time to about 20-25 minutes, or until cooked through. Keep in mind that bone-in, skin-on chicken pieces tend to be more flavorful and stay moister during cooking. If using boneless breasts, be extra careful not to overcook them to prevent dryness.
Q2: Can I make this recipe ahead of time?
A2: Yes, you can prepare the balsamic glaze ahead of time and store it in an airtight container in the refrigerator for up to 3 days. You can also sear the chicken ahead of time and store it separately in the refrigerator for up to 24 hours. When ready to bake, simply combine the seared chicken and glaze in the skillet and bake as directed.
Q3: Can I substitute fresh herbs for dried herbs?
A3: Absolutely! Fresh herbs will add a brighter flavor to the glaze. If substituting, use about 1 tablespoon of fresh thyme and 1 teaspoon of fresh rosemary, finely chopped. Add the fresh herbs towards the end of the glaze reduction to preserve their flavor.
Q4: I don’t have Dijon mustard. Can I use another type of mustard?
A4: Dijon mustard adds a specific tang and emulsifying quality to the glaze. If you don’t have Dijon, you can use yellow mustard in a pinch, but the flavor profile will be slightly different. You might also consider adding a touch of white wine vinegar or lemon juice to mimic the tang of Dijon.
Q5: Can I use different cuts of chicken besides thighs, drumsticks, and breasts?
A5: Yes, you can use other cuts of chicken, such as wings or a whole chicken cut into pieces. Adjust the cooking time accordingly depending on the size and cut of chicken you use. Ensure the internal temperature reaches 165°F (74°C) for safe consumption.
Q6: Can I make this recipe gluten-free?
A6: Yes, this recipe is naturally gluten-free as long as you ensure your Dijon mustard and balsamic vinegar are certified gluten-free (most are, but always check labels if you are highly sensitive). Serve it with gluten-free sides like quinoa, rice, or roasted vegetables.
Q7: How do I store leftover Balsamic Glazed Chicken?
A7: Store leftover Balsamic Glazed Chicken in an airtight container in the refrigerator for up to 3-4 days. Reheat gently in the oven at 350°F (175°C) or in the microwave until heated through. You can also enjoy it cold in salads or sandwiches.
Q8: Can I grill the chicken instead of baking it?
A8: Yes, grilling is a fantastic option! Sear the chicken on the grill over medium-high heat as instructed, then reduce the heat to medium-low, brush generously with the balsamic glaze, and continue grilling, turning and basting frequently, until cooked through. Grilling will impart a smoky flavor that complements the balsamic glaze beautifully. Just be careful to watch it closely to prevent burning the glaze.

Easter Balsamic Glazed Chicken
Ingredients
- Chicken Pieces: 3 lbs, bone-in, skin-on chicken pieces (thighs, drumsticks, breasts) – Provides a rich, flavorful base and stays moist during cooking.
- Balsamic Vinegar: 1 cup – The star of the glaze, offering a tangy, sweet, and complex flavor.
- Honey or Maple Syrup: ¼ cup – Sweetens the glaze and balances the acidity of the balsamic vinegar. Honey adds a floral note, while maple syrup provides a deeper, caramel-like sweetness.
- Dijon Mustard: 2 tablespoons – Adds a subtle tang and depth of flavor to the glaze, helping it emulsify and cling to the chicken.
- Garlic: 3 cloves, minced – Infuses the glaze with aromatic and savory notes.
- Dried Thyme: 1 teaspoon – Earthy and slightly minty, thyme complements the balsamic and chicken beautifully.
- Dried Rosemary: ½ teaspoon – Piney and fragrant, rosemary adds another layer of herbal complexity.
- Olive Oil: 2 tablespoons – Used for searing the chicken and adding richness to the glaze.
- Salt: 1 teaspoon, or to taste – Enhances the flavors of all ingredients.
- Black Pepper: ½ teaspoon, or to taste – Adds a touch of spice and balances the sweetness.
- Fresh Parsley (optional): For garnish – Adds a fresh, vibrant touch and visual appeal.
Instructions
- Prepare the Chicken: Preheat your oven to 400°F (200°C). Pat the chicken pieces dry with paper towels. This helps the skin crisp up nicely. Season the chicken generously with salt and pepper on all sides.
- Sear the Chicken: Heat olive oil in a large oven-safe skillet or Dutch oven over medium-high heat. Once the oil is hot and shimmering, carefully place the chicken pieces skin-side down in the skillet, being careful not to overcrowd. You may need to do this in batches. Sear the chicken for 4-5 minutes per side, or until golden brown. Searing adds depth of flavor and crispy skin. Remove the chicken from the skillet and set aside.
- Make the Balsamic Glaze: In the same skillet, reduce the heat to medium. Add the minced garlic and sauté for about 30 seconds until fragrant, being careful not to burn it. Pour in the balsamic vinegar, honey (or maple syrup), Dijon mustard, dried thyme, and dried rosemary. Stir well to combine all ingredients.
- Reduce the Glaze: Bring the glaze to a simmer and let it cook for 8-10 minutes, or until it has reduced and thickened slightly. The glaze should be syrupy enough to coat the back of a spoon. Stir occasionally to prevent sticking. Reducing the balsamic vinegar concentrates its flavor and creates a beautiful glaze.
- Glaze the Chicken: Return the seared chicken pieces to the skillet, nestling them into the balsamic glaze. Spoon the glaze generously over the chicken, ensuring each piece is well coated.
- Bake the Chicken: Transfer the skillet to the preheated oven and bake for 25-30 minutes, or until the chicken is cooked through and the internal temperature reaches 165°F (74°C) when measured with a meat thermometer inserted into the thickest part of the thigh, avoiding the bone. Basting the chicken with the glaze every 10 minutes during baking will enhance the flavor and keep it moist.
- Broil for Crispy Skin (Optional): For extra crispy skin, you can broil the chicken for the last 2-3 minutes of cooking. Keep a close eye on it to prevent burning.
- Rest and Serve: Once the chicken is cooked through, remove the skillet from the oven and let the chicken rest for 5-10 minutes before serving. This allows the juices to redistribute, resulting in more tender and flavorful chicken. Garnish with fresh parsley, if desired, and serve hot with your favorite sides.
Nutrition
- Serving Size: one normal portion
- Calories: 450
- Protein: 45g