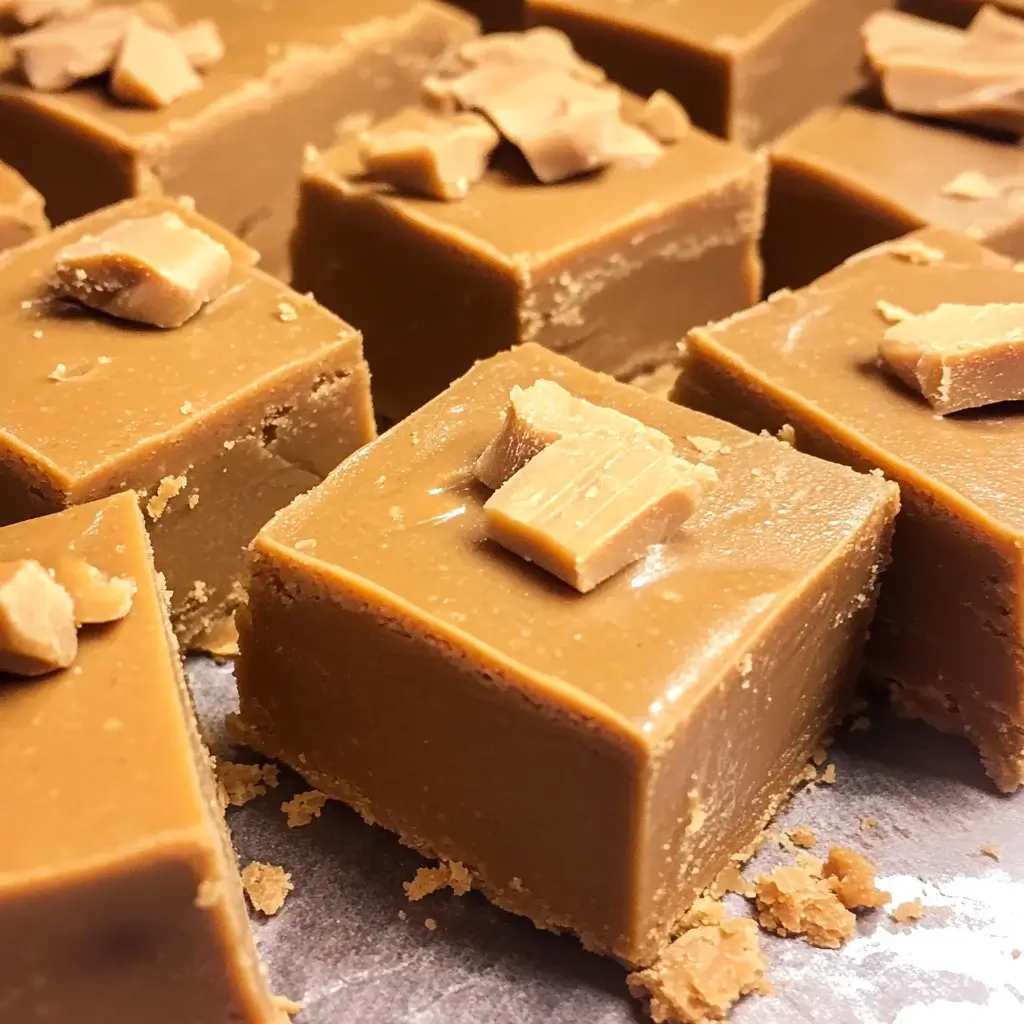
The first time I made it, my family was skeptical. “Homemade fudge? Sounds complicated,” my teenager groaned. But the aroma that filled the kitchen as the ingredients melted together – rich, nutty, and utterly irresistible – quickly changed their tune. And the taste? Let’s just say that pan of fudge disappeared faster than I could say “peanut butter.” The texture is unbelievably smooth and creamy, the peanut butter flavor is intense and perfectly balanced, and the sweetness is just right – not cloying, but satisfyingly decadent. Since then, this Easy Peanut Butter Fudge has become a staple in our home. It’s our go-to dessert for potlucks, holiday gatherings, or simply a weekend treat. It’s the perfect sweet ending to any meal and, trust me, once you try this recipe, you’ll understand why we’re completely hooked. Prepare to be amazed by how effortlessly you can create fudge that tastes like it came straight from a gourmet candy shop!
Ingredients for Irresistible Easy Peanut Butter Fudge
To create this melt-in-your-mouth Easy Peanut Butter Fudge, you only need a few simple ingredients. Each plays a crucial role in achieving the perfect texture and flavor. Here’s what you’ll need:
- Creamy Peanut Butter: 1 cup (approximately 250g) – Opt for your favorite brand of creamy peanut butter. The smooth texture is key for a silky fudge. Avoid natural peanut butter where the oil separates, as it can affect the fudge’s consistency. Regular creamy peanut butter provides the classic flavor and richness we’re looking for.
- Sweetened Condensed Milk: 1 can (14 ounces or 397g) – This is the magic ingredient that provides sweetness and creates the fudge’s incredibly smooth and creamy texture without the need for candy thermometers or complex sugar cooking. Make sure it’s sweetened condensed milk, not evaporated milk, as they are not interchangeable.
- Unsalted Butter: ½ cup (1 stick or 113g) – Unsalted butter adds richness, flavor, and helps the fudge set properly. It contributes to the melt-in-your-mouth quality and balances the sweetness. Using unsalted butter allows you to control the salt level in the recipe.
- Vanilla Extract: 1 teaspoon (5ml) – Pure vanilla extract enhances the overall flavor profile, adding a touch of warmth and complexity that complements the peanut butter beautifully. It elevates the fudge from simply sweet to truly delicious.
- Pinch of Salt: Just a small pinch (about ⅛ teaspoon or 0.5g) – Salt might seem counterintuitive in a sweet recipe, but it’s essential for balancing the sweetness and enhancing the peanut butter flavor. It prevents the fudge from being overly sugary and brings out the nutty notes.
Step-by-Step Instructions for Perfect Peanut Butter Fudge
Making this Easy Peanut Butter Fudge is incredibly straightforward. Follow these simple steps for foolproof results every time:
- Prepare Your Pan: Begin by lining an 8×8 inch square baking pan with parchment paper. Make sure the parchment paper overhangs the sides of the pan – this will act as handles later, making it incredibly easy to lift the fudge out of the pan once it’s set. This step is crucial for easy removal and clean cutting.
- Melt the Butter: In a medium-sized saucepan, melt the unsalted butter over low heat. Keep the heat low to prevent the butter from browning or burning. Stir occasionally as it melts to ensure even heating. Melted butter is the base for our creamy fudge.
- Combine Peanut Butter and Sweetened Condensed Milk: Once the butter is completely melted, remove the saucepan from the heat. Immediately add the creamy peanut butter and the entire can of sweetened condensed milk to the melted butter.
- Stir Until Smooth and Combined: Using a spatula or wooden spoon, stir the peanut butter and sweetened condensed milk into the melted butter until everything is completely smooth and thoroughly combined. Continue stirring until you have a homogenous, glossy mixture with no streaks of peanut butter or condensed milk remaining. This step is important for achieving a uniform fudge texture.
- Add Vanilla Extract and Salt: Now, stir in the vanilla extract and the pinch of salt. Incorporate them evenly into the fudge mixture. The vanilla and salt enhance the overall flavor profile and balance the sweetness. Stir until just combined.
- Pour into Prepared Pan: Pour the smooth peanut butter fudge mixture into the parchment-lined baking pan. Use a spatula to spread it evenly across the bottom of the pan, ensuring a uniform thickness. This will help the fudge set evenly and look neat when cut.
- Refrigerate to Set: Place the pan of fudge in the refrigerator. Refrigerate for at least 2-3 hours, or preferably overnight, to allow the fudge to firm up completely. The longer chilling time ensures a firm, sliceable fudge. Resist the temptation to cut into it too soon!
- Cut and Serve: Once the fudge is firm, lift it out of the pan using the parchment paper overhang. Place it on a cutting board. Use a sharp knife to cut the fudge into squares. For clean cuts, you can run the knife under hot water and wipe it dry between cuts. Cut into your desired size – smaller squares for a lighter treat, or larger squares for a more indulgent serving.
- Store Properly: Store any leftover fudge in an airtight container in the refrigerator. It will keep well for up to a week, although it’s unlikely to last that long! Keeping it refrigerated ensures it stays firm and fresh.
Nutrition Facts: A Sweet Treat in Moderation
While this Easy Peanut Butter Fudge is undeniably delicious, it’s important to enjoy it as a treat in moderation. Here are estimated nutrition facts per serving (serving size is approximately one 1.5-inch square, recipe makes about 24 squares):
- Calories: Approximately 150-180 calories per serving – This is an estimate and can vary slightly depending on the specific brands of ingredients used and the exact serving size.
- Total Fat: Approximately 9-12 grams per serving – This includes fats from peanut butter and butter. A significant portion will be from healthy monounsaturated and polyunsaturated fats from peanut butter, but also includes saturated fat from butter.
- Sugar: Approximately 15-20 grams per serving – The sugar content primarily comes from the sweetened condensed milk and naturally occurring sugars in peanut butter. Enjoy in moderation as part of a balanced diet.
Disclaimer: Nutritional information is an estimate and may vary based on specific ingredients and serving sizes. For precise nutritional information, you can use online nutrition calculators with the specific brands of ingredients you use.
Preparation Time: Quick, Easy, and Delicious
One of the best things about this Easy Peanut Butter Fudge is how quickly it comes together. Here’s a breakdown of the preparation time:
- Prep Time: 10 minutes – This includes gathering your ingredients, lining the baking pan with parchment paper, and measuring out the ingredients. Minimal prep work is required, making it a very quick recipe to start.
- Cook Time: 5 minutes – The actual cooking time on the stovetop is very short. Melting the butter and combining the ingredients only takes a few minutes over low heat. This quick cooking time makes it ideal for when you need a fast dessert.
- Chill Time: 2-3 hours (minimum, preferably overnight) – The majority of the time is hands-off chilling time in the refrigerator. While you need to wait for it to set, this time requires no active effort.
- Total Time: Approximately 2 hours 15 minutes to 3 hours 15 minutes (including chilling) – From start to finish, including chilling, you can have delicious homemade fudge ready in just a few hours. The active time is minimal, making it a perfect recipe for busy schedules.
How to Serve Easy Peanut Butter Fudge: Delightful Ideas
Easy Peanut Butter Fudge is delicious on its own, but there are many ways to elevate the serving experience and enjoy it in different ways. Here are some delightful serving suggestions:
- Simply on its own: Cut into squares and serve as a classic fudge treat. The rich peanut butter flavor and creamy texture are satisfying enough to be enjoyed just as they are.
- With a glass of cold milk: The creamy fudge pairs perfectly with a refreshing glass of cold milk. This is a classic combination that’s loved by both kids and adults.
- Alongside a cup of hot coffee or tea: The sweetness of the fudge complements the bitterness of coffee or tea beautifully. Enjoy a square with your afternoon or evening beverage.
- Topped with a sprinkle of sea salt: A few flakes of sea salt sprinkled on top of each square enhance the peanut butter flavor and create a delightful sweet and salty contrast.
- Drizzled with melted chocolate: Add a drizzle of melted dark, milk, or white chocolate for an extra layer of decadence. The combination of peanut butter and chocolate is always a winner.
- As part of a dessert platter: Include peanut butter fudge on a dessert platter alongside other sweets like cookies, brownies, and fresh fruit for a variety of treats.
- Served with ice cream: Crumble peanut butter fudge over vanilla or chocolate ice cream for a rich and flavorful sundae. The cold ice cream and creamy fudge create a wonderful texture contrast.
- As a homemade gift: Package squares of peanut butter fudge in decorative boxes or bags to give as thoughtful homemade gifts for friends, family, or neighbors.
Additional Tips for Perfect Peanut Butter Fudge Every Time
Want to ensure your Easy Peanut Butter Fudge is absolutely perfect? Here are eight additional tips to help you achieve fudge-making success:
- Use Good Quality Peanut Butter: While any creamy peanut butter will work, using a high-quality brand will enhance the flavor of your fudge. Opt for a peanut butter that you enjoy eating straight from the jar, as its flavor will shine through in the final product.
- Don’t Overcook: It’s important not to overheat or overcook the fudge mixture on the stovetop. You only need to melt the butter and combine the ingredients until smooth. Overheating can make the fudge grainy or oily. Keep the heat low and stir constantly.
- Stir Constantly While Melting: Continuously stirring the mixture as it melts ensures even heating and prevents scorching or sticking to the bottom of the saucepan. This constant motion helps create a smooth and homogenous fudge base.
- Adjust Sweetness to Taste: While the recipe is perfectly balanced for most palates, you can adjust the sweetness slightly. If you prefer a less sweet fudge, you can reduce the amount of sweetened condensed milk by a tablespoon or two. However, remember that the condensed milk is crucial for the texture.
- Add Mix-ins for Extra Flavor and Texture: Get creative and add mix-ins to your fudge! Consider stirring in chopped nuts (like peanuts, pecans, or walnuts), mini chocolate chips, toffee bits, or even a swirl of caramel sauce before pouring it into the pan.
- Ensure Fudge is Firm Before Cutting: Patience is key! Make sure the fudge is completely firm before attempting to cut it. Chilling it for at least 2-3 hours, or overnight, is crucial for clean cuts and a firm texture. If it’s not firm enough, it will be difficult to cut neatly.
- Use a Warm Knife for Clean Cuts: For perfectly clean cuts, run your knife under hot water and wipe it dry before each cut. This helps the knife glide smoothly through the fudge without sticking or crumbling it.
- Store Fudge Properly to Maintain Freshness: Store leftover fudge in an airtight container in the refrigerator to keep it fresh and prevent it from drying out. Proper storage will maintain its creamy texture and delicious flavor for up to a week.
Frequently Asked Questions About Easy Peanut Butter Fudge (FAQ)
Have questions about making Easy Peanut Butter Fudge? Here are answers to some frequently asked questions to help you along the way:
Q1: Can I use natural peanut butter for this recipe?
A: While you can use natural peanut butter, it’s generally not recommended for this specific recipe. Natural peanut butter tends to have oil separation, which can make the fudge oily or grainy. For the best texture and classic fudge consistency, stick with regular creamy peanut butter. If you do use natural peanut butter, ensure it is very well stirred and try to drain off any excess oil.
Q2: Can I make this fudge without sweetened condensed milk?
A: Sweetened condensed milk is a key ingredient in this recipe and is essential for achieving the fudge’s signature creamy texture and sweetness without traditional candy-making methods. Substituting it with evaporated milk or regular milk will not yield the same results. For this easy no-bake fudge recipe, sweetened condensed milk is indispensable.
Q3: How long does peanut butter fudge last?
A: When stored properly in an airtight container in the refrigerator, peanut butter fudge will last for up to a week. However, it’s typically best enjoyed within 5-7 days for optimal freshness and texture. While it might last longer, the quality may start to decline after a week.
Q4: Can I freeze peanut butter fudge?
A: Yes, you can freeze peanut butter fudge! To freeze, cut the fudge into squares and wrap them individually in plastic wrap, then place them in an airtight freezer-safe container or bag. Frozen fudge can last for up to 2-3 months. Thaw it in the refrigerator overnight before serving.
Q5: Can I add chocolate to this peanut butter fudge?
A: Absolutely! Peanut butter and chocolate are a classic combination. You can easily add chocolate to this fudge recipe in several ways. You can melt chocolate chips and swirl them into the fudge mixture before pouring it into the pan, or drizzle melted chocolate over the top of the set fudge. Mini chocolate chips or chopped chocolate bars can also be stirred directly into the mixture.
Q6: Is this peanut butter fudge gluten-free?
A: Yes, this recipe for Easy Peanut Butter Fudge is naturally gluten-free, as it does not contain any wheat or gluten-containing ingredients. However, always double-check the labels of your specific peanut butter, sweetened condensed milk, and vanilla extract to ensure they are certified gluten-free if you have strict dietary restrictions.
Q7: Can I use chunky peanut butter instead of creamy?
A: Yes, you can use chunky peanut butter if you prefer a fudge with more texture. Using chunky peanut butter will result in a fudge with small pieces of peanuts throughout, adding a bit of crunch and nutty flavor. It’s a matter of personal preference – both creamy and chunky peanut butter work well.
Q8: What if my fudge is too soft and doesn’t set properly?
A: If your fudge is too soft, it likely needs more chilling time. Place it back in the refrigerator for a few more hours, or even overnight. In rare cases, if the butter wasn’t measured accurately or if the mixture wasn’t stirred enough, it might remain slightly softer. However, following the recipe closely and allowing ample chilling time should result in a perfectly set fudge. Avoid placing it in the freezer to rush the process as this can impact the texture negatively.
Easy Peanut Butter Fudge
Ingredients
To create this melt-in-your-mouth Easy Peanut Butter Fudge, you only need a few simple ingredients. Each plays a crucial role in achieving the perfect texture and flavor. Here’s what you’ll need:
- Creamy Peanut Butter: 1 cup (approximately 250g) – Opt for your favorite brand of creamy peanut butter. The smooth texture is key for a silky fudge. Avoid natural peanut butter where the oil separates, as it can affect the fudge’s consistency. Regular creamy peanut butter provides the classic flavor and richness we’re looking for.
- Sweetened Condensed Milk: 1 can (14 ounces or 397g) – This is the magic ingredient that provides sweetness and creates the fudge’s incredibly smooth and creamy texture without the need for candy thermometers or complex sugar cooking. Make sure it’s sweetened condensed milk, not evaporated milk, as they are not interchangeable.
- Unsalted Butter: ½ cup (1 stick or 113g) – Unsalted butter adds richness, flavor, and helps the fudge set properly. It contributes to the melt-in-your-mouth quality and balances the sweetness. Using unsalted butter allows you to control the salt level in the recipe.
- Vanilla Extract: 1 teaspoon (5ml) – Pure vanilla extract enhances the overall flavor profile, adding a touch of warmth and complexity that complements the peanut butter beautifully. It elevates the fudge from simply sweet to truly delicious.
- Pinch of Salt: Just a small pinch (about ⅛ teaspoon or 0.5g) – Salt might seem counterintuitive in a sweet recipe, but it’s essential for balancing the sweetness and enhancing the peanut butter flavor. It prevents the fudge from being overly sugary and brings out the nutty notes.
Instructions
Making this Easy Peanut Butter Fudge is incredibly straightforward. Follow these simple steps for foolproof results every time:
- Prepare Your Pan: Begin by lining an 8×8 inch square baking pan with parchment paper. Make sure the parchment paper overhangs the sides of the pan – this will act as handles later, making it incredibly easy to lift the fudge out of the pan once it’s set. This step is crucial for easy removal and clean cutting.
- Melt the Butter: In a medium-sized saucepan, melt the unsalted butter over low heat. Keep the heat low to prevent the butter from browning or burning. Stir occasionally as it melts to ensure even heating. Melted butter is the base for our creamy fudge.
- Combine Peanut Butter and Sweetened Condensed Milk: Once the butter is completely melted, remove the saucepan from the heat. Immediately add the creamy peanut butter and the entire can of sweetened condensed milk to the melted butter.
- Stir Until Smooth and Combined: Using a spatula or wooden spoon, stir the peanut butter and sweetened condensed milk into the melted butter until everything is completely smooth and thoroughly combined. Continue stirring until you have a homogenous, glossy mixture with no streaks of peanut butter or condensed milk remaining. This step is important for achieving a uniform fudge texture.
- Add Vanilla Extract and Salt: Now, stir in the vanilla extract and the pinch of salt. Incorporate them evenly into the fudge mixture. The vanilla and salt enhance the overall flavor profile and balance the sweetness. Stir until just combined.
- Pour into Prepared Pan: Pour the smooth peanut butter fudge mixture into the parchment-lined baking pan. Use a spatula to spread it evenly across the bottom of the pan, ensuring a uniform thickness. This will help the fudge set evenly and look neat when cut.
- Refrigerate to Set: Place the pan of fudge in the refrigerator. Refrigerate for at least 2-3 hours, or preferably overnight, to allow the fudge to firm up completely. The longer chilling time ensures a firm, sliceable fudge. Resist the temptation to cut into it too soon!
- Cut and Serve: Once the fudge is firm, lift it out of the pan using the parchment paper overhang. Place it on a cutting board. Use a sharp knife to cut the fudge into squares. For clean cuts, you can run the knife under hot water and wipe it dry between cuts. Cut into your desired size – smaller squares for a lighter treat, or larger squares for a more indulgent serving.
- Store Properly: Store any leftover fudge in an airtight container in the refrigerator. It will keep well for up to a week, although it’s unlikely to last that long! Keeping it refrigerated ensures it stays firm and fresh.
Nutrition
- Serving Size: one normal portion
- Calories: 180
- Sugar: 20 grams
- Fat: 12 grams