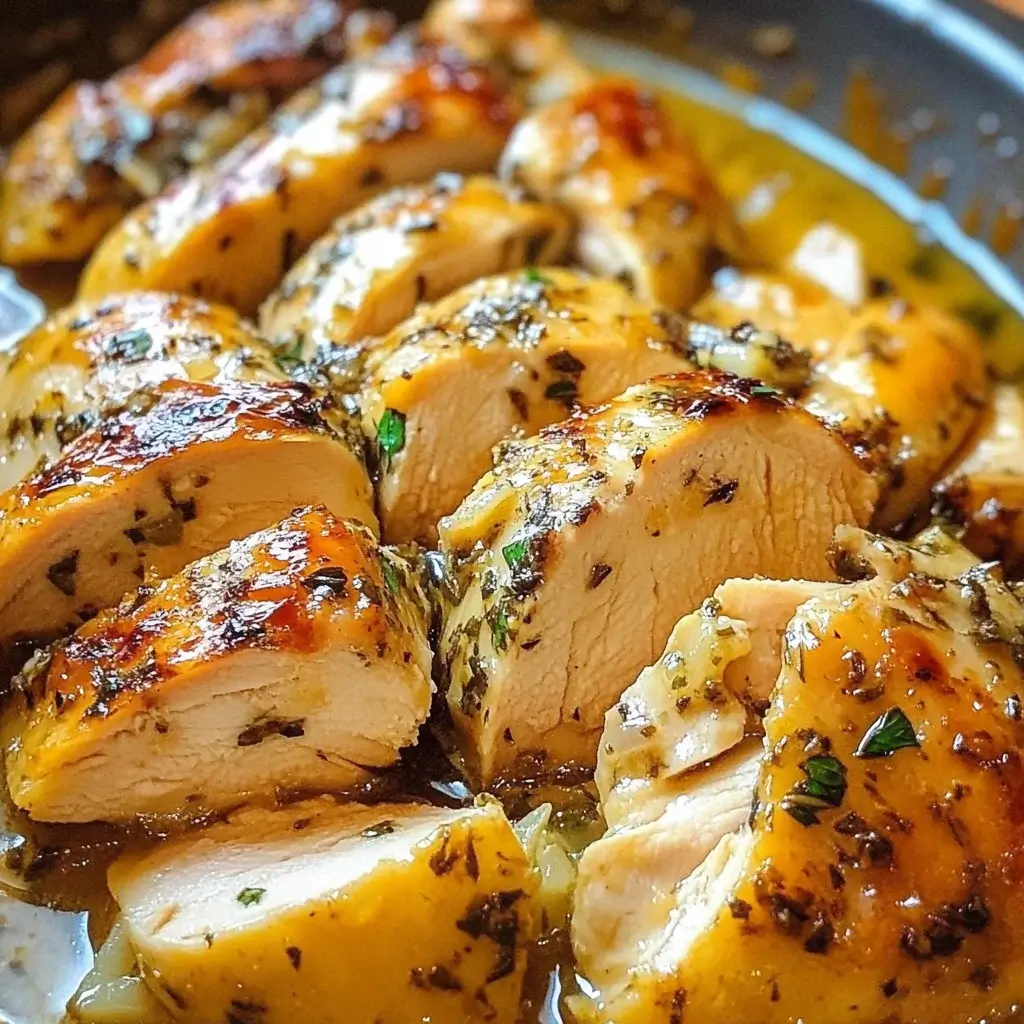
There’s just something inherently comforting about the aroma of roasted chicken wafting through the house. For years, Sunday roasts were a staple, a tradition passed down, but weeknights? Weeknights were often a scramble. That was until I stumbled upon this garlic butter roasted chicken recipe. Let me tell you, it’s been nothing short of a culinary revolution in our home. From picky eaters to adventurous palates, everyone devours it. The chicken emerges from the oven unbelievably juicy, infused with the rich, savory goodness of garlic butter, and boasting a perfectly crispy, golden skin. It’s simple enough for a busy weeknight, yet elegant enough to serve to guests. Honestly, this recipe has transformed our weeknight dinners from mundane to something truly special, and I’m so excited to share the magic with you. Prepare to be amazed at how such simple ingredients can create a dish that’s both incredibly flavorful and incredibly easy to make.
Ingredients
Here’s what you’ll need to create this mouthwatering Garlic Butter Roasted Chicken. We focus on fresh, high-quality ingredients to really let the flavors shine through.
- Whole Chicken (3-4 lbs): The star of the show! Opt for a good quality, air-chilled chicken if possible for the best flavor and texture. A 3-4 pound chicken is ideal for a family dinner.
- Unsalted Butter (1 cup, 2 sticks): This is the base of our flavorful sauce. Unsalted butter allows you to control the saltiness of the dish and lets the garlic flavor truly come through.
- Garlic (8-10 cloves): The more garlic, the merrier in this recipe! Fresh garlic cloves, minced, provide a pungent and aromatic kick that complements the richness of the butter perfectly.
- Fresh Parsley (1/4 cup, chopped): Adds a touch of freshness and herbaceousness to the garlic butter. Fresh parsley is preferred for its vibrant flavor and color.
- Fresh Thyme (2 tablespoons, chopped): Earthy and fragrant, thyme enhances the savory notes of the chicken and garlic butter. Fresh thyme is recommended for its superior aroma and taste.
- Lemon (1 medium): The zest and juice of a lemon brighten the flavors and cut through the richness of the butter. Lemon adds a crucial element of acidity and freshness.
- Salt (to taste): Enhances all the flavors in the recipe. Kosher salt is a great choice for seasoning chicken as it adheres well and provides even seasoning.
- Black Pepper (to taste): Adds a touch of spice and depth to the flavor profile. Freshly ground black pepper is always preferred for its bolder taste.
- Optional Vegetables (Potatoes, Carrots, Onions): For a complete one-pan meal, consider adding root vegetables like potatoes, carrots, and onions. They roast beautifully alongside the chicken, soaking up all the delicious garlic butter flavors.
Instructions
Follow these simple steps to create the most succulent and flavorful Garlic Butter Roasted Chicken you’ve ever tasted.
Step 1: Prepare the Chicken
Begin by preheating your oven to 400°F (200°C). While the oven is heating, prepare your chicken. Remove the chicken from its packaging and pat it thoroughly dry with paper towels, both inside and out. This is a crucial step for achieving crispy skin. Moisture is the enemy of crispiness, so ensure the chicken is completely dry. If you have time, you can even leave the chicken uncovered in the refrigerator for an hour or two to further dry out the skin. This will result in even crispier skin once roasted.
Step 2: Make the Garlic Butter
Now, let’s create the star of the show – the garlic butter. In a small saucepan or microwave-safe bowl, melt the unsalted butter. If using a saucepan, melt the butter over low heat to prevent it from browning. Alternatively, microwave the butter in short intervals until just melted. Be careful not to overheat it. Once melted, add the minced garlic, chopped fresh parsley, and chopped fresh thyme to the melted butter. Stir well to combine all the ingredients. The aroma at this point is already intoxicating!
Step 3: Zest and Juice the Lemon
Next, zest the lemon using a microplane or fine grater, being careful to only zest the yellow part of the peel and avoid the bitter white pith. Add the lemon zest to the garlic butter mixture. Then, juice the lemon and add the lemon juice to the garlic butter as well. The lemon zest and juice will add brightness and acidity to the rich butter sauce. Stir everything together to ensure the lemon zest and juice are evenly distributed.
Step 4: Season the Chicken
Season the chicken generously inside and out with salt and freshly ground black pepper. Don’t be shy with the seasoning! Proper seasoning is key to bringing out the flavors of the chicken and garlic butter. Make sure to season the cavity of the chicken as well. You can even lift the skin gently and season underneath for even more flavor penetration.
Step 5: Apply the Garlic Butter
Now comes the fun part – applying the garlic butter! Using your hands or a pastry brush, generously brush the garlic butter mixture all over the chicken, ensuring every nook and cranny is coated. Lift the skin of the chicken gently and spread some of the garlic butter underneath the skin as well, especially over the breast meat. This will keep the breast meat moist and flavorful during roasting. If you have any leftover garlic butter, set it aside for basting later.
Step 6: Prepare Vegetables (Optional)
If you’re adding vegetables, now is the time to prepare them. Cut potatoes and carrots into roughly equal-sized chunks. Quarter or halve onions, depending on their size. Toss the vegetables with a little olive oil, salt, and pepper. You can also add a bit of the garlic butter to the vegetables for extra flavor if desired. Spread the vegetables in the bottom of a roasting pan.
Step 7: Roast the Chicken
Place the chicken on top of the vegetables (if using) in the roasting pan. If you are not using vegetables, simply place the chicken directly in the roasting pan. Roast in the preheated oven at 400°F (200°C) for approximately 1 hour and 15 minutes to 1 hour and 30 minutes, or until the internal temperature of the chicken reaches 165°F (74°C) in the thickest part of the thigh, without touching the bone. The roasting time will depend on the size of your chicken and your oven.
Step 8: Baste and Continue Roasting
About halfway through the roasting time, around 45 minutes in, baste the chicken with the reserved garlic butter (if you have any left) or with the pan juices. Basting helps to keep the chicken moist and adds extra flavor to the skin. Continue roasting until the chicken is cooked through and the skin is golden brown and crispy. If the skin is browning too quickly, you can loosely tent the chicken with foil for the remaining roasting time.
Step 9: Rest the Chicken
Once the chicken is cooked through, remove it from the oven and let it rest for at least 10-15 minutes before carving. Resting is crucial as it allows the juices to redistribute throughout the chicken, resulting in a more tender and flavorful bird. Cover the chicken loosely with foil while it rests to keep it warm.
Step 10: Carve and Serve
After resting, carve the chicken and serve immediately. Spoon any pan juices and roasted vegetables over the chicken when serving. Enjoy your incredibly delicious and flavorful Garlic Butter Roasted Chicken!
Nutrition Facts
(Per serving, assuming 6 servings and using a 3.5 lb chicken, without added vegetables. Nutritional values are estimates and can vary based on specific ingredients and portion sizes.)
- Serving Size: Approximately 1/6 of the roasted chicken
- Calories: Approximately 450-550 kcal
- Protein: 50-60g
Note: These values are estimations and do not include any side dishes or vegetables roasted with the chicken.
Preparation Time
This Garlic Butter Roasted Chicken is surprisingly easy to prepare, making it perfect for both weeknights and weekend gatherings.
- Prep Time: 20 minutes (includes chopping vegetables if using, making garlic butter, and seasoning chicken)
- Cook Time: 1 hour 15 minutes – 1 hour 30 minutes (depending on chicken size and oven)
- Rest Time: 10-15 minutes
- Total Time: Approximately 1 hour 45 minutes – 2 hours
This recipe is mostly hands-off once the chicken is in the oven, giving you time to prepare side dishes or relax while the delicious aromas fill your kitchen. The active cooking time is minimal, making it a relatively quick and easy meal to put together, especially considering the impressive flavor payoff.
How to Serve
Garlic Butter Roasted Chicken is incredibly versatile and pairs well with a variety of side dishes. Here are some delicious serving suggestions:
- Classic Sides:
- Mashed Potatoes: Creamy mashed potatoes are the perfect accompaniment to soak up the flavorful pan juices.
- Roasted Vegetables: Roast vegetables like broccoli, asparagus, Brussels sprouts, or green beans alongside the chicken or as a separate side dish. The roasted vegetables will complement the chicken beautifully.
- Steamed Green Beans: A simple and healthy side that provides a fresh contrast to the richness of the chicken.
- Corn on the Cob: A summertime favorite that pairs wonderfully with roasted chicken.
- Salads:
- Simple Green Salad: A light and refreshing green salad with a vinaigrette dressing balances the richness of the chicken.
- Caesar Salad: A classic Caesar salad provides a creamy and savory contrast.
- Caprese Salad: The fresh flavors of tomatoes, mozzarella, and basil complement the garlic butter chicken.
- Grains and Bread:
- Rice Pilaf: Fluffy rice pilaf is a great way to soak up the delicious pan juices.
- Quinoa: A healthy and nutritious grain that pairs well with roasted chicken.
- Crusty Bread: Serve with crusty bread to mop up every last bit of the flavorful garlic butter sauce.
- Wine Pairing:
- Chardonnay: A buttery Chardonnay complements the richness of the garlic butter and chicken.
- Pinot Noir: A light-bodied Pinot Noir provides a nice contrast and doesn’t overpower the chicken.
- Sauvignon Blanc: A crisp Sauvignon Blanc cuts through the richness and offers a refreshing pairing.
Additional Tips for Perfect Garlic Butter Roasted Chicken
Elevate your Garlic Butter Roasted Chicken to the next level with these helpful tips:
- Dry Brining for Extra Crispy Skin: For even crispier skin, try dry brining the chicken. The day before you plan to roast the chicken, generously salt it all over, inside and out, and place it uncovered on a wire rack in the refrigerator overnight. This draws out moisture and results in incredibly crispy skin when roasted.
- Spatchcocking for Faster Cooking: Spatchcocking (or butterflying) the chicken involves removing the backbone and flattening the chicken. This allows the chicken to cook more evenly and significantly reduces the roasting time. You can ask your butcher to spatchcock the chicken for you, or find tutorials online to do it yourself.
- Use a Meat Thermometer: Don’t rely solely on cooking time. Use a meat thermometer to ensure the chicken is cooked to a safe internal temperature of 165°F (74°C) in the thickest part of the thigh. This is the most accurate way to determine doneness and avoid overcooking or undercooking.
- Elevate the Chicken on a Roasting Rack: Roasting the chicken on a rack inside the roasting pan allows for better air circulation around the chicken, promoting even cooking and crispier skin all around. If you don’t have a roasting rack, you can use chopped vegetables to elevate the chicken.
- Add Aromatics to the Cavity: For extra flavor, stuff the cavity of the chicken with aromatics like lemon wedges, onion quarters, garlic cloves, and fresh herbs like rosemary or sage. These aromatics infuse the chicken from the inside out as it roasts.
- Make-Ahead Garlic Butter: Save time by making the garlic butter mixture ahead of time. You can prepare it a day or two in advance and store it in the refrigerator. Simply melt it slightly before brushing it on the chicken.
- Use Browned Butter for Nutty Flavor: For a richer, nuttier flavor in your garlic butter, try using browned butter. Melt the butter in a saucepan over medium heat and cook it until it turns a light brown color and smells nutty. Be careful not to burn it. Then, proceed with the recipe as directed.
- Don’t Discard the Pan Drippings: The pan drippings are liquid gold! Strain the pan drippings and use them to make a delicious pan sauce or gravy to serve with the chicken. You can also drizzle them over mashed potatoes or roasted vegetables for extra flavor.
Frequently Asked Questions (FAQs)
Here are some common questions about making Garlic Butter Roasted Chicken:
Q1: Can I use dried herbs instead of fresh herbs?
A: While fresh herbs are highly recommended for the best flavor, you can use dried herbs if you don’t have fresh on hand. Use about 1 teaspoon of dried parsley and 1 teaspoon of dried thyme for this recipe. However, remember that fresh herbs provide a brighter and more vibrant flavor.
Q2: Can I use bone-in, skin-on chicken pieces instead of a whole chicken?
A: Yes, you can definitely use bone-in, skin-on chicken pieces like thighs and drumsticks. Adjust the roasting time accordingly, as chicken pieces will cook faster than a whole chicken. Roast at 400°F (200°C) for about 30-45 minutes, or until the internal temperature reaches 165°F (74°C).
Q3: Can I add other vegetables besides potatoes, carrots, and onions?
A: Absolutely! Feel free to add other root vegetables like parsnips, sweet potatoes, or turnips. You can also add vegetables that cook faster, like broccoli florets or bell peppers, during the last 20-30 minutes of roasting to prevent them from becoming overcooked.
Q4: How do I ensure the chicken breast doesn’t dry out?
A: Brushing garlic butter under the skin of the chicken breast is key to keeping it moist. Also, avoid overcooking the chicken. Use a meat thermometer and remove the chicken from the oven as soon as it reaches 165°F (74°C) in the thigh. Resting the chicken is also crucial for retaining moisture.
Q5: Can I make this recipe ahead of time?
A: While Garlic Butter Roasted Chicken is best served fresh, you can prepare components ahead of time. You can make the garlic butter mixture a day or two in advance. You can also chop the vegetables ahead of time. However, it’s recommended to roast the chicken closer to serving time for the best quality and crispiness. Leftover roasted chicken can be stored in the refrigerator for 3-4 days and reheated.
Q6: What if I don’t have lemon? Can I substitute it?
A: Lemon adds brightness and acidity that balances the richness of the butter. If you don’t have lemon, you can use a tablespoon of white wine vinegar or apple cider vinegar as a substitute, although the flavor profile will be slightly different. Lime can also be used as a substitute for lemon.
Q7: Can I use salted butter instead of unsalted butter?
A: Yes, you can use salted butter, but you will need to adjust the amount of salt you add to the recipe. Start with less salt and taste before adding more, as salted butter already contains sodium. Using unsalted butter gives you better control over the saltiness of the final dish.
Q8: How do I carve a roasted chicken?
A: Let the chicken rest for 10-15 minutes before carving. Start by removing the legs and thighs. Then, locate the breastbone and slice down along each side of the breastbone to remove the breast meat. Slice the breast meat against the grain for tender slices. You can then separate the thighs from the drumsticks at the joint. Serve and enjoy!

Garlic Butter Roasted Chicken
Ingredients
Here’s what you’ll need to create this mouthwatering Garlic Butter Roasted Chicken. We focus on fresh, high-quality ingredients to really let the flavors shine through.
- Whole Chicken (3-4 lbs): The star of the show! Opt for a good quality, air-chilled chicken if possible for the best flavor and texture. A 3-4 pound chicken is ideal for a family dinner.
- Unsalted Butter (1 cup, 2 sticks): This is the base of our flavorful sauce. Unsalted butter allows you to control the saltiness of the dish and lets the garlic flavor truly come through.
- Garlic (8-10 cloves): The more garlic, the merrier in this recipe! Fresh garlic cloves, minced, provide a pungent and aromatic kick that complements the richness of the butter perfectly.
- Fresh Parsley (1/4 cup, chopped): Adds a touch of freshness and herbaceousness to the garlic butter. Fresh parsley is preferred for its vibrant flavor and color.
- Fresh Thyme (2 tablespoons, chopped): Earthy and fragrant, thyme enhances the savory notes of the chicken and garlic butter. Fresh thyme is recommended for its superior aroma and taste.
- Lemon (1 medium): The zest and juice of a lemon brighten the flavors and cut through the richness of the butter. Lemon adds a crucial element of acidity and freshness.
- Salt (to taste): Enhances all the flavors in the recipe. Kosher salt is a great choice for seasoning chicken as it adheres well and provides even seasoning.
- Black Pepper (to taste): Adds a touch of spice and depth to the flavor profile. Freshly ground black pepper is always preferred for its bolder taste.
- Optional Vegetables (Potatoes, Carrots, Onions): For a complete one-pan meal, consider adding root vegetables like potatoes, carrots, and onions. They roast beautifully alongside the chicken, soaking up all the delicious garlic butter flavors.
Instructions
Follow these simple steps to create the most succulent and flavorful Garlic Butter Roasted Chicken you’ve ever tasted.
Step 1: Prepare the Chicken
Begin by preheating your oven to 400°F (200°C). While the oven is heating, prepare your chicken. Remove the chicken from its packaging and pat it thoroughly dry with paper towels, both inside and out. This is a crucial step for achieving crispy skin. Moisture is the enemy of crispiness, so ensure the chicken is completely dry. If you have time, you can even leave the chicken uncovered in the refrigerator for an hour or two to further dry out the skin. This will result in even crispier skin once roasted.
Step 2: Make the Garlic Butter
Now, let’s create the star of the show – the garlic butter. In a small saucepan or microwave-safe bowl, melt the unsalted butter. If using a saucepan, melt the butter over low heat to prevent it from browning. Alternatively, microwave the butter in short intervals until just melted. Be careful not to overheat it. Once melted, add the minced garlic, chopped fresh parsley, and chopped fresh thyme to the melted butter. Stir well to combine all the ingredients. The aroma at this point is already intoxicating!
Step 3: Zest and Juice the Lemon
Next, zest the lemon using a microplane or fine grater, being careful to only zest the yellow part of the peel and avoid the bitter white pith. Add the lemon zest to the garlic butter mixture. Then, juice the lemon and add the lemon juice to the garlic butter as well. The lemon zest and juice will add brightness and acidity to the rich butter sauce. Stir everything together to ensure the lemon zest and juice are evenly distributed.
Step 4: Season the Chicken
Season the chicken generously inside and out with salt and freshly ground black pepper. Don’t be shy with the seasoning! Proper seasoning is key to bringing out the flavors of the chicken and garlic butter. Make sure to season the cavity of the chicken as well. You can even lift the skin gently and season underneath for even more flavor penetration.
Step 5: Apply the Garlic Butter
Now comes the fun part – applying the garlic butter! Using your hands or a pastry brush, generously brush the garlic butter mixture all over the chicken, ensuring every nook and cranny is coated. Lift the skin of the chicken gently and spread some of the garlic butter underneath the skin as well, especially over the breast meat. This will keep the breast meat moist and flavorful during roasting. If you have any leftover garlic butter, set it aside for basting later.
Step 6: Prepare Vegetables (Optional)
If you’re adding vegetables, now is the time to prepare them. Cut potatoes and carrots into roughly equal-sized chunks. Quarter or halve onions, depending on their size. Toss the vegetables with a little olive oil, salt, and pepper. You can also add a bit of the garlic butter to the vegetables for extra flavor if desired. Spread the vegetables in the bottom of a roasting pan.
Step 7: Roast the Chicken
Place the chicken on top of the vegetables (if using) in the roasting pan. If you are not using vegetables, simply place the chicken directly in the roasting pan. Roast in the preheated oven at 400°F (200°C) for approximately 1 hour and 15 minutes to 1 hour and 30 minutes, or until the internal temperature of the chicken reaches 165°F (74°C) in the thickest part of the thigh, without touching the bone. The roasting time will depend on the size of your chicken and your oven.
Step 8: Baste and Continue Roasting
About halfway through the roasting time, around 45 minutes in, baste the chicken with the reserved garlic butter (if you have any left) or with the pan juices. Basting helps to keep the chicken moist and adds extra flavor to the skin. Continue roasting until the chicken is cooked through and the skin is golden brown and crispy. If the skin is browning too quickly, you can loosely tent the chicken with foil for the remaining roasting time.
Step 9: Rest the Chicken
Once the chicken is cooked through, remove it from the oven and let it rest for at least 10-15 minutes before carving. Resting is crucial as it allows the juices to redistribute throughout the chicken, resulting in a more tender and flavorful bird. Cover the chicken loosely with foil while it rests to keep it warm.
Step 10: Carve and Serve
After resting, carve the chicken and serve immediately. Spoon any pan juices and roasted vegetables over the chicken when serving. Enjoy your incredibly delicious and flavorful Garlic Butter Roasted Chicken!
Nutrition
- Serving Size: one normal portion
- Calories: 550
- Protein: 60g