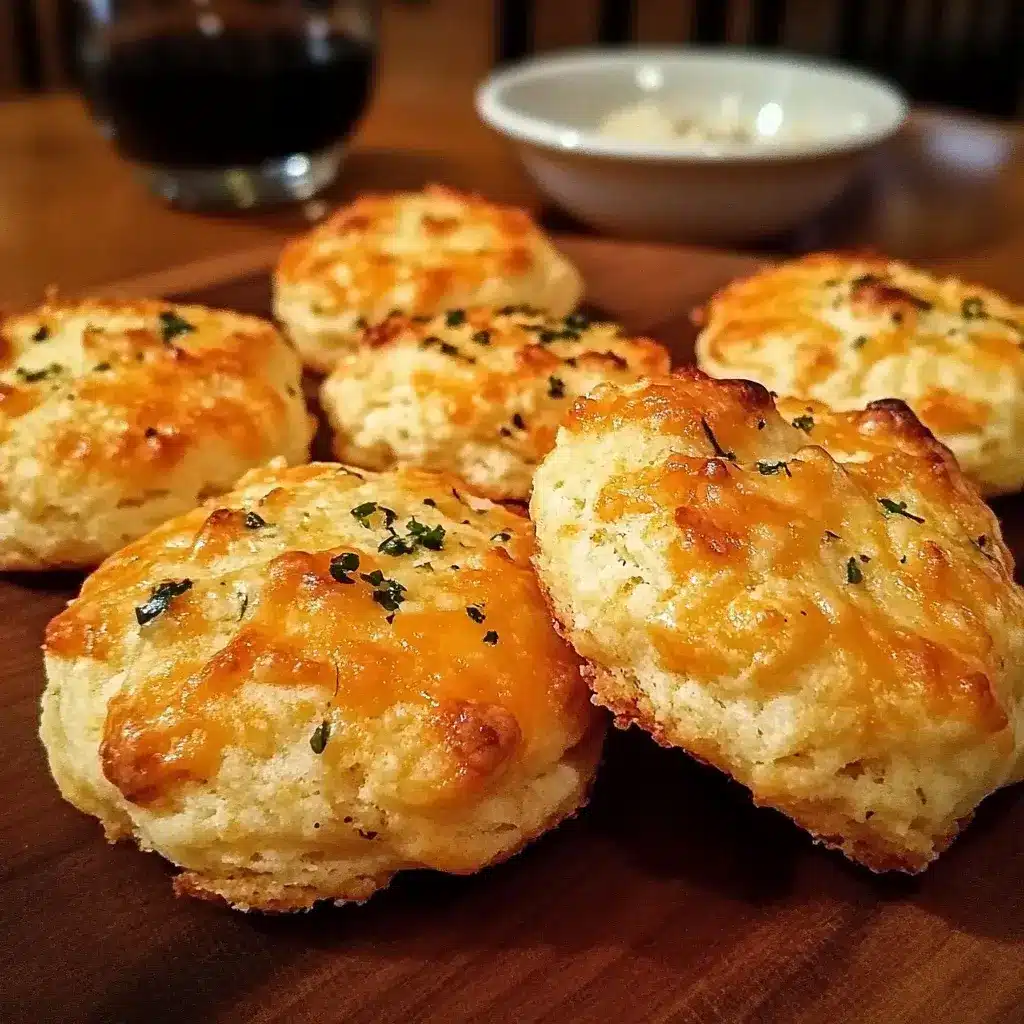
Garlic cheddar biscuits have become a staple in our home, and for good reason! From the moment the aroma of garlic and cheese starts wafting through the kitchen, everyone knows they’re in for a treat. My family, especially my kids, absolutely devour them – they disappear almost as quickly as I can pull them out of the oven. There’s something utterly irresistible about the combination of flaky, buttery biscuit, sharp cheddar, and savory garlic. Whether we’re having a cozy weeknight dinner or a weekend brunch with friends, these biscuits are always a hit. They elevate any meal from ordinary to extraordinary with minimal effort, and the sheer joy they bring to everyone at the table makes them worth every single minute spent in the kitchen. Honestly, if you’re looking for a guaranteed crowd-pleaser that’s both easy to make and incredibly delicious, look no further. These garlic cheddar biscuits are about to become your new go-to recipe.
Ingredients
- 2 1/2 cups All-Purpose Flour: The foundation of our biscuits, providing structure and a tender crumb. Using all-purpose flour ensures a classic biscuit texture that’s both light and satisfying.
- 1 tablespoon Baking Powder: Our leavening agent, responsible for the biscuits’ rise and fluffy texture. Double-acting baking powder is key for achieving that perfect lift.
- 1/2 teaspoon Baking Soda: Works in conjunction with baking powder and acidic ingredients (like buttermilk, if used) to further enhance the rise and create a lighter texture.
- 1 teaspoon Salt: Essential for flavor enhancement, balancing the sweetness and bringing out the savory notes of the garlic and cheddar.
- 1/2 cup (1 stick or 8 tablespoons) Cold Unsalted Butter: The secret to flaky biscuits! Cold butter creates pockets of steam during baking, resulting in those desirable layers and a melt-in-your-mouth texture.
- 1 cup Cold Buttermilk (or Milk): Adds moisture and tenderness to the biscuits. Buttermilk’s acidity also reacts with baking soda for extra lift. If using milk, you can add a teaspoon of lemon juice or vinegar to mimic buttermilk’s effect.
- 1 1/2 teaspoons Garlic Powder: Provides a robust garlic flavor that permeates the biscuits, creating a savory and aromatic experience.
- 2 cloves, minced Fresh Garlic: Adds a punch of fresh garlic flavor that complements the garlic powder beautifully and provides little bursts of savory goodness throughout the biscuit.
- 1 cup Shredded Cheddar Cheese: Sharp cheddar is recommended for its bold flavor that stands up well to the garlic. It melts beautifully, creating cheesy pockets and a delightful texture.
- 2 tablespoons chopped Fresh Parsley (optional): Adds a touch of freshness, color, and a subtle herbaceous note. It’s a lovely garnish and complements the other flavors.
- 2 tablespoons Melted Butter (for brushing): Brushing the baked biscuits with melted butter adds richness, shine, and extra flavor. It also helps to keep the biscuits soft and tender.
Instructions
- Preheat Your Oven and Prepare Baking Sheet: Start by preheating your oven to 450°F (232°C). This high temperature is crucial for creating steam quickly, which helps the biscuits rise tall and become flaky. While the oven is preheating, prepare your baking sheet. You can line it with parchment paper for easy cleanup and to prevent sticking, or lightly grease it with butter or cooking spray. Parchment paper is generally preferred as it offers the best non-stick surface and makes removing the biscuits effortless. Set the prepared baking sheet aside while you move on to the next steps. Getting the oven and baking sheet ready first ensures that everything is in place when the biscuit dough is ready to bake, allowing for immediate transfer and optimal results.
- Combine Dry Ingredients: In a large mixing bowl, whisk together the all-purpose flour, baking powder, baking soda, salt, and garlic powder. Whisking is important here because it aerates the flour and ensures that the leavening agents (baking powder and baking soda) and salt are evenly distributed throughout the flour. This even distribution is critical for consistent rising and flavor in every biscuit. Make sure there are no clumps of baking powder or baking soda. A well-combined dry mixture is the foundation for a uniformly textured and flavored biscuit.
- Cut in the Cold Butter: This is arguably the most important step for achieving flaky biscuits. Cold butter is key! Dice the cold unsalted butter into small cubes. The smaller the cubes, the easier they will be to incorporate into the flour. Add the cubed butter to the bowl with the dry ingredients. Using a pastry blender, or your fingertips (work quickly to keep the butter cold), cut the butter into the flour mixture until it resembles coarse crumbs. You should still see small pieces of butter, roughly pea-sized or slightly larger. The goal is not to fully incorporate the butter, but to leave small pieces intact. These pieces of cold butter will melt during baking, creating pockets of steam that result in the flaky layers we desire in biscuits. If using your fingertips, work quickly and lightly to prevent the butter from warming up too much from the heat of your hands.
- Add Garlic, Cheddar Cheese, and Parsley (if using): Now it’s time to add the flavor powerhouses! Stir in the minced fresh garlic and the shredded cheddar cheese to the flour and butter mixture. If you’re using fresh parsley, add it at this stage as well. Gently toss everything together to distribute the garlic, cheese, and parsley evenly throughout the mixture. Be careful not to overmix at this point; just a gentle toss is sufficient. You want to keep the butter pieces as undisturbed as possible for flakiness. The cheese will melt into the biscuits during baking, adding a wonderful cheesy flavor and texture, while the garlic and parsley will infuse the biscuits with their aromatic and savory notes.
- Add Cold Buttermilk (or Milk): Make a well in the center of the dry ingredients mixture. Pour in the cold buttermilk (or milk). Using a spatula or wooden spoon, gently stir the wet and dry ingredients together until just combined. The dough will be shaggy and slightly sticky, and that’s perfectly fine. It’s crucial not to overmix the dough at this stage. Overmixing will develop the gluten in the flour, resulting in tough, dense biscuits instead of tender, fluffy ones. Mix just until the dry ingredients are moistened and the dough comes together in a rough ball. If using milk instead of buttermilk, remember to add a teaspoon of lemon juice or vinegar to the milk and let it sit for a few minutes to slightly curdle it before adding it to the dough; this will mimic the acidity of buttermilk and contribute to a more tender biscuit.
- Turn Dough Out and Knead Gently: Lightly flour a clean work surface. Turn the shaggy biscuit dough out onto the floured surface. Gently knead the dough 4-5 times. This is not traditional kneading like bread dough; it’s more like gently pressing and folding the dough to bring it together and create a slightly smoother surface. The goal of this very brief kneading is to just bring the dough together and help develop a little bit of structure without overworking it. Over-kneading will make the biscuits tough. A few gentle kneads are all you need.
- Pat Dough into a Rectangle and Cut Biscuits: Pat the dough into a rectangle about ¾ inch to 1 inch thick. You can use your hands or a rolling pin, but be gentle and avoid pressing too hard. Using a biscuit cutter (round or square, about 2-3 inches in diameter) or a sharp knife, cut out the biscuits. For round biscuits, press the cutter straight down and lift up – avoid twisting the cutter, as this can seal the edges and prevent them from rising properly. If using a knife, cut square or rectangular biscuits. Reshape any scraps of dough and cut out more biscuits until you have used up most of the dough. The biscuits cut from the first round of dough will generally be the most tender, so try to get as many as possible from the first cut.
- Arrange Biscuits on Baking Sheet and Bake: Place the cut biscuits onto the prepared baking sheet, leaving a little space between them (about 1-2 inches). This allows for even heat circulation and prevents them from sticking together as they bake. Bake in the preheated oven at 450°F (232°C) for 12-15 minutes, or until the biscuits are golden brown on top and cooked through. The baking time may vary slightly depending on your oven, so keep an eye on them. They are done when they are puffed up, golden brown, and a toothpick inserted into the center comes out clean.
- Brush with Melted Butter and Serve: Once the biscuits are baked, remove them from the oven. Immediately brush the tops of the hot biscuits with melted butter. This step adds richness, flavor, and a beautiful sheen to the biscuits. The melted butter also helps to keep the biscuits soft and tender. Let the biscuits cool slightly on the baking sheet for a few minutes before serving. Serve warm and enjoy the deliciousness of your homemade garlic cheddar biscuits! They are best enjoyed fresh from the oven when they are at their peak of flakiness and flavor.
Nutrition Facts
(Per serving, based on a recipe making 12 biscuits. Nutritional values are approximate and can vary based on specific ingredients and portion sizes.)
- Serving Size: 1 biscuit
- Calories: Approximately 220-250 kcal
- Fat: 12-15g
Preparation Time
Prep time: 20 minutes
Cook time: 15 minutes
Total time: 35 minutes
These garlic cheddar biscuits are incredibly quick and easy to make, perfect for when you need a delicious side dish or appetizer in a hurry. From gathering your ingredients to pulling them out of the oven, you can have warm, savory biscuits on the table in under 40 minutes. The hands-on prep time is minimal, mostly involving mixing ingredients and cutting the dough. The baking time is also relatively short, making this recipe a fantastic option for busy weeknights or last-minute gatherings.
How to Serve
These garlic cheddar biscuits are incredibly versatile and can be served in a multitude of ways. Their savory flavor profile makes them a perfect complement to a wide range of dishes and occasions. Here are some delicious serving suggestions:
- Alongside Soups and Stews: Biscuits are a classic pairing with hearty soups and stews. The warm, fluffy biscuits are perfect for soaking up flavorful broths and adding a comforting element to the meal. Serve them with creamy tomato soup, chicken noodle soup, chili, beef stew, or lentil soup.
- With Pasta Dishes: Elevate your pasta night by serving garlic cheddar biscuits on the side. They are especially delicious with creamy pasta dishes like Alfredo, mac and cheese, or baked ziti. The savory biscuits provide a delightful contrast to the richness of the pasta.
- As a Side Dish for Roasted Meats or Vegetables: These biscuits are a wonderful accompaniment to roasted chicken, beef, pork, or lamb. They also pair beautifully with roasted vegetables like asparagus, broccoli, Brussels sprouts, or root vegetables. The cheesy garlic flavor complements the savory roasted dishes perfectly.
- For Breakfast or Brunch: Enjoy these biscuits as part of a weekend breakfast or brunch spread. Serve them with scrambled eggs, omelets, breakfast casseroles, or alongside a fruit salad. You can also split them open and use them as a base for breakfast sandwiches with eggs, cheese, or vegetarian sausage patties.
- As an Appetizer: Garlic cheddar biscuits make fantastic appetizers for parties or gatherings. Serve them warm with a side of whipped butter, honey butter, garlic aioli, or a cheese dip. They are sure to be a crowd-pleaser and disappear quickly.
- With Salad: Add a warm biscuit to the side of a fresh salad for a more satisfying and complete meal. They pair well with garden salads, Caesar salads, or spinach salads.
- For Sandwiches: While not traditionally used for sandwiches, you can split these biscuits and fill them with your favorite sandwich fillings for a unique and flavorful twist. Consider vegetarian fillings like roasted vegetables, hummus, or grilled halloumi cheese.
- Simply with Butter: Sometimes, the simplest way is the best. These biscuits are incredibly delicious on their own, served warm with just a pat of butter. The flavors of garlic and cheddar shine through, making them a delightful treat.
Additional Tips for Perfect Garlic Cheddar Biscuits
Making perfect garlic cheddar biscuits is easier than you might think, but a few key tips can elevate your biscuits from good to truly outstanding. Here are eight essential tips to ensure biscuit success every time:
- Keep Your Ingredients Cold: This is the golden rule of biscuit making! Cold ingredients, especially butter and buttermilk (or milk), are crucial for achieving flaky biscuits. Cold butter creates those desirable pockets of steam that lead to layers and flakiness. Make sure your butter is straight from the refrigerator and your buttermilk is well-chilled. If your kitchen is warm, consider chilling your flour and mixing bowl as well for optimal results.
- Don’t Overmix the Dough: Overmixing is the enemy of tender biscuits. When you overmix, you develop the gluten in the flour, which results in tough, dense biscuits. Mix the wet and dry ingredients just until they are barely combined. The dough should be shaggy and slightly sticky. A few streaks of flour are perfectly acceptable. Embrace the imperfection and resist the urge to mix until smooth.
- Use the Right Type of Cheddar: For the best flavor in garlic cheddar biscuits, opt for sharp or extra-sharp cheddar cheese. Sharp cheddar has a bolder, more pronounced flavor that stands up well to the garlic and baking process. Mild cheddar can get lost in the mix. Pre-shredded cheese is convenient, but freshly grated cheddar melts more smoothly and has a better texture.
- Handle the Dough Gently: Biscuit dough is delicate. Handle it with a light touch throughout the process. When patting out the dough or cutting the biscuits, be gentle and avoid pressing down too hard. Rough handling can compress the dough and prevent it from rising properly, leading to denser biscuits.
- Cut Biscuits Straight Down: When using a biscuit cutter, press straight down firmly and lift up cleanly. Avoid twisting the cutter, as this can seal the edges of the biscuit dough and hinder their ability to rise tall and straight. If you don’t have a biscuit cutter, use a sharp knife to cut square or rectangular biscuits.
- Bake at a High Temperature: Baking biscuits at a high temperature (450°F/232°C) is essential for creating steam quickly and ensuring a good rise. The high heat also helps the biscuits to brown beautifully and develop a slightly crisp exterior while remaining soft and tender inside. Make sure your oven is properly preheated before placing the biscuits in to bake.
- Don’t Overbake: Biscuits bake quickly. Overbaking can dry them out and make them tough. Keep a close eye on them in the oven. They are done when they are golden brown on top and cooked through, usually in about 12-15 minutes. A toothpick inserted into the center should come out clean.
- Brush with Melted Butter Immediately After Baking: Brushing the hot biscuits with melted butter as soon as they come out of the oven is a crucial finishing touch. It adds richness, flavor, and a beautiful sheen to the biscuits. The melted butter also helps to keep the biscuits soft and tender and enhances their overall deliciousness. Don’t skip this step!
FAQ About Garlic Cheddar Biscuits
Q1: Can I use self-rising flour for these biscuits?
A: While you can use self-rising flour, it’s generally recommended to use all-purpose flour and add baking powder and baking soda separately for better control over the leavening. Self-rising flour already contains leavening and salt, so you’ll need to adjust the recipe by omitting the baking powder, baking soda, and salt if you choose to use it. However, using all-purpose flour as directed in the recipe will give you more consistent and reliable results for flaky and tender biscuits.
Q2: Can I make these biscuits ahead of time?
A: Biscuits are best enjoyed fresh and warm from the oven. However, you can prepare the dough ahead of time and store it in the refrigerator for up to 24 hours. Wrap the dough tightly in plastic wrap to prevent it from drying out. When you’re ready to bake, simply cut out the biscuits and bake as directed. You can also bake the biscuits ahead of time and reheat them gently in a low oven (around 300°F/150°C) for 5-10 minutes to warm them through before serving.
Q3: Can I freeze garlic cheddar biscuits?
A: Yes, you can freeze baked garlic cheddar biscuits. Allow the biscuits to cool completely after baking. Then, wrap them individually in plastic wrap and place them in a freezer-safe bag or container. Freeze for up to 2-3 months. To reheat frozen biscuits, bake them directly from frozen in a 350°F (175°C) oven for 10-15 minutes, or until heated through. You can also thaw them overnight in the refrigerator and then reheat them.
Q4: Can I substitute the cheddar cheese with another type of cheese?
A: Absolutely! While sharp cheddar is classic and highly recommended, you can experiment with other types of cheese to customize the flavor of your biscuits. Good substitutes include Monterey Jack, Colby, Gruyere, Pepper Jack (for a spicy kick), or even a blend of cheeses. Consider cheeses that melt well and have a flavor profile that you enjoy.
Q5: I don’t have buttermilk. Can I use regular milk?
A: Yes, you can substitute buttermilk with regular milk. However, buttermilk adds a slight tang and acidity that contributes to the tenderness and flavor of the biscuits. To mimic buttermilk’s effect with regular milk, you can add 1 teaspoon of lemon juice or white vinegar to 1 cup of milk. Stir and let it sit for 5 minutes to slightly curdle before using it in the recipe. This “soured milk” will work as a good substitute in a pinch.
Q6: My biscuits are not rising properly. What could be the reason?
A: There are several reasons why your biscuits might not be rising properly. Common culprits include using old or inactive baking powder or baking soda, overmixing the dough, or not using cold enough ingredients. Make sure your baking powder and baking soda are fresh (check the expiration date), avoid overmixing the dough, and ensure your butter and buttermilk (or milk) are very cold. Also, make sure your oven is properly preheated to the correct temperature.
Q7: Can I add other herbs or spices to these biscuits?
A: Yes, you can definitely customize these biscuits with other herbs and spices to your liking. Consider adding dried herbs like chives, thyme, rosemary, or oregano for a different flavor profile. You can also add a pinch of red pepper flakes for a subtle heat, or a dash of smoked paprika for a smoky flavor. Experiment with different combinations to create your own signature garlic cheddar biscuit variation.
Q8: What’s the best way to reheat leftover biscuits?
A: The best way to reheat leftover biscuits and maintain their texture is to wrap them loosely in foil and reheat them in a low oven (around 300°F/150°C) for 5-10 minutes, or until warmed through. Avoid microwaving them, as this can make them tough and rubbery. Reheating them in the oven gently revives their warmth and texture without drying them out too much. You can also reheat them in an air fryer at a low temperature for a few minutes.
Print
Garlic Cheddar Biscuits
Ingredients
- All-Purpose Flour: The foundation of our biscuits, providing structure and a tender crumb. Using all-purpose flour ensures a classic biscuit texture that’s both light and satisfying.
- Baking Powder: Our leavening agent, responsible for the biscuits’ rise and fluffy texture. Double-acting baking powder is key for achieving that perfect lift.
- Baking Soda: Works in conjunction with baking powder and acidic ingredients (like buttermilk, if used) to further enhance the rise and create a lighter texture.
- Salt: Essential for flavor enhancement, balancing the sweetness and bringing out the savory notes of the garlic and cheddar.
- Cold Unsalted Butter: The secret to flaky biscuits! Cold butter creates pockets of steam during baking, resulting in those desirable layers and a melt-in-your-mouth texture.
- Cold Buttermilk (or Milk): Adds moisture and tenderness to the biscuits. Buttermilk’s acidity also reacts with baking soda for extra lift. If using milk, you can add a teaspoon of lemon juice or vinegar to mimic buttermilk’s effect.
- Garlic Powder: Provides a robust garlic flavor that permeates the biscuits, creating a savory and aromatic experience.
- Fresh Garlic: Adds a punch of fresh garlic flavor that complements the garlic powder beautifully and provides little bursts of savory goodness throughout the biscuit.
- Shredded Cheddar Cheese: Sharp cheddar is recommended for its bold flavor that stands up well to the garlic. It melts beautifully, creating cheesy pockets and a delightful texture.
- Fresh Parsley (optional): Adds a touch of freshness, color, and a subtle herbaceous note. It’s a lovely garnish and complements the other flavors.
- Melted Butter (for brushing): Brushing the baked biscuits with melted butter adds richness, shine, and extra flavor. It also helps to keep the biscuits soft and tender.
Instructions
- Preheat Your Oven and Prepare Baking Sheet: Start by preheating your oven to 450°F (232°C). This high temperature is crucial for creating steam quickly, which helps the biscuits rise tall and become flaky. While the oven is preheating, prepare your baking sheet. You can line it with parchment paper for easy cleanup and to prevent sticking, or lightly grease it with butter or cooking spray. Parchment paper is generally preferred as it offers the best non-stick surface and makes removing the biscuits effortless. Set the prepared baking sheet aside while you move on to the next steps. Getting the oven and baking sheet ready first ensures that everything is in place when the biscuit dough is ready to bake, allowing for immediate transfer and optimal results.
- Combine Dry Ingredients: In a large mixing bowl, whisk together the all-purpose flour, baking powder, baking soda, salt, and garlic powder. Whisking is important here because it aerates the flour and ensures that the leavening agents (baking powder and baking soda) and salt are evenly distributed throughout the flour. This even distribution is critical for consistent rising and flavor in every biscuit. Make sure there are no clumps of baking powder or baking soda. A well-combined dry mixture is the foundation for a uniformly textured and flavored biscuit.
- Cut in the Cold Butter: This is arguably the most important step for achieving flaky biscuits. Cold butter is key! Dice the cold unsalted butter into small cubes. The smaller the cubes, the easier they will be to incorporate into the flour. Add the cubed butter to the bowl with the dry ingredients. Using a pastry blender, or your fingertips (work quickly to keep the butter cold), cut the butter into the flour mixture until it resembles coarse crumbs. You should still see small pieces of butter, roughly pea-sized or slightly larger. The goal is not to fully incorporate the butter, but to leave small pieces intact. These pieces of cold butter will melt during baking, creating pockets of steam that result in the flaky layers we desire in biscuits. If using your fingertips, work quickly and lightly to prevent the butter from warming up too much from the heat of your hands.
- Add Garlic, Cheddar Cheese, and Parsley (if using): Now it’s time to add the flavor powerhouses! Stir in the minced fresh garlic and the shredded cheddar cheese to the flour and butter mixture. If you’re using fresh parsley, add it at this stage as well. Gently toss everything together to distribute the garlic, cheese, and parsley evenly throughout the mixture. Be careful not to overmix at this point; just a gentle toss is sufficient. You want to keep the butter pieces as undisturbed as possible for flakiness. The cheese will melt into the biscuits during baking, adding a wonderful cheesy flavor and texture, while the garlic and parsley will infuse the biscuits with their aromatic and savory notes.
- Add Cold Buttermilk (or Milk): Make a well in the center of the dry ingredients mixture. Pour in the cold buttermilk (or milk). Using a spatula or wooden spoon, gently stir the wet and dry ingredients together until just combined. The dough will be shaggy and slightly sticky, and that’s perfectly fine. It’s crucial not to overmix the dough at this stage. Overmixing will develop the gluten in the flour, resulting in tough, dense biscuits instead of tender, fluffy ones. Mix just until the dry ingredients are moistened and the dough comes together in a rough ball. If using milk instead of buttermilk, remember to add a teaspoon of lemon juice or vinegar to the milk and let it sit for a few minutes to slightly curdle it before adding it to the dough; this will mimic the acidity of buttermilk and contribute to a more tender biscuit.
- Turn Dough Out and Knead Gently: Lightly flour a clean work surface. Turn the shaggy biscuit dough out onto the floured surface. Gently knead the dough 4-5 times. This is not traditional kneading like bread dough; it’s more like gently pressing and folding the dough to bring it together and create a slightly smoother surface. The goal of this very brief kneading is to just bring the dough together and help develop a little bit of structure without overworking it. Over-kneading will make the biscuits tough. A few gentle kneads are all you need.
- Pat Dough into a Rectangle and Cut Biscuits: Pat the dough into a rectangle about ¾ inch to 1 inch thick. You can use your hands or a rolling pin, but be gentle and avoid pressing too hard. Using a biscuit cutter (round or square, about 2-3 inches in diameter) or a sharp knife, cut out the biscuits. For round biscuits, press the cutter straight down and lift up – avoid twisting the cutter, as this can seal the edges and prevent them from rising properly. If using a knife, cut square or rectangular biscuits. Reshape any scraps of dough and cut out more biscuits until you have used up most of the dough. The biscuits cut from the first round of dough will generally be the most tender, so try to get as many as possible from the first cut.
- Arrange Biscuits on Baking Sheet and Bake: Place the cut biscuits onto the prepared baking sheet, leaving a little space between them (about 1-2 inches). This allows for even heat circulation and prevents them from sticking together as they bake. Bake in the preheated oven at 450°F (232°C) for 12-15 minutes, or until the biscuits are golden brown on top and cooked through. The baking time may vary slightly depending on your oven, so keep an eye on them. They are done when they are puffed up, golden brown, and a toothpick inserted into the center comes out clean.
- Brush with Melted Butter and Serve: Once the biscuits are baked, remove them from the oven. Immediately brush the tops of the hot biscuits with melted butter. This step adds richness, flavor, and a beautiful sheen to the biscuits. The melted butter also helps to keep the biscuits soft and tender. Let the biscuits cool slightly on the baking sheet for a few minutes before serving. Serve warm and enjoy the deliciousness of your homemade garlic cheddar biscuits! They are best enjoyed fresh from the oven when they are at their peak of flakiness and flavor.
Nutrition
- Serving Size: one normal portion
- Calories: 250
- Fat: 15g