
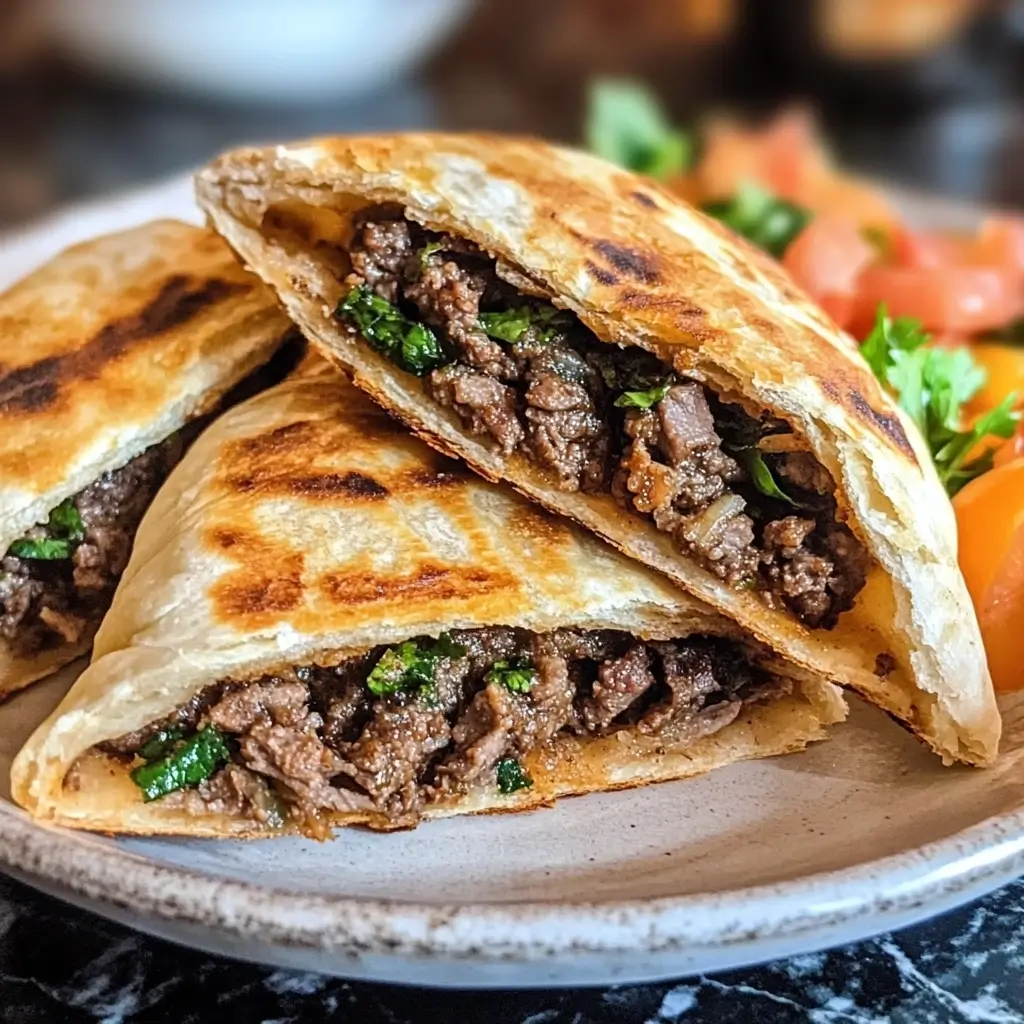
Of all the recipes that have become staples in my kitchen, this one for Mini Beef Stuffed Pita Pockets holds a special place in my heart. It was born out of a chaotic Tuesday evening, the kind where everyone is hungry, I had forgotten to thaw anything for dinner, and the thought of ordering takeout for the third time that week was looming. I had a pound of ground beef, some sad-looking pita bread in the pantry, and a crisper drawer full of various vegetables. What started as a “let’s see what happens” experiment quickly turned into a family-wide obsession. The moment my husband took his first bite, his eyes lit up. My kids, who normally scrutinize anything green, were too busy devouring their own mini pockets to complain about the finely chopped parsley and onion. The combination of the warmly spiced, savory beef filling encased in a soft, pillowy pita pocket was an instant-hit. It’s now our go-to for quick weeknight dinners, a favorite for packing in lunchboxes, and even a crowd-pleasing appetizer when we have guests. It’s a recipe that feels both comforting and a little bit special, proving that sometimes the best meals come from a little bit of pantry-raiding creativity.
Ingredients
Here is the simple, yet powerful, list of ingredients you’ll need to create these delicious Mini Beef Stuffed Pita Pockets. Each component is chosen to build layers of flavor for a truly satisfying bite.
- 1 lb (450g) Lean Ground Beef: The heart of the filling. Using lean beef (90/10 or 93/7) provides a rich, meaty flavor with less grease, ensuring the pita pockets don’t become soggy.
- 1 tablespoon Olive Oil: Used for sautéing the aromatics, this adds a touch of fruity, Mediterranean flavor that forms the base of our filling.
- 1 medium Yellow Onion, finely chopped: When cooked down, yellow onions become sweet and tender, providing a foundational sweetness that balances the savory spices.
- 2 cloves Garlic, minced: An essential aromatic that brings a pungent, savory depth to the beef mixture.
- 1 teaspoon Ground Cumin: This adds a warm, earthy, and slightly smoky flavor that is central to many Mediterranean and Middle Eastern dishes.
- 1 teaspoon Smoked Paprika: Lends a beautiful reddish hue to the meat and a deep, smoky flavor that complements the cumin perfectly.
- ½ teaspoon Ground Coriander: Provides a slightly sweet, citrusy, and floral note that brightens the entire spice blend.
- ¼ teaspoon Cayenne Pepper (optional): For those who enjoy a little kick. Adjust the amount to your personal preference or omit it entirely for a milder version.
- ½ cup Beef Broth or Water: This is the secret to a moist and tender filling. It helps to deglaze the pan, melding all the spices together and preventing the beef from drying out.
- 2 tablespoons Tomato Paste: Adds a concentrated, umami-rich tomato flavor and a touch of acidity that cuts through the richness of the beef.
- 1 teaspoon Salt (or to taste): Enhances all the other flavors in the dish. Start with one teaspoon and adjust as needed.
- ½ teaspoon Black Pepper, freshly ground: Provides a bit of sharp, woody spice. Freshly ground pepper offers the most potent flavor.
- ¼ cup Fresh Parsley, finely chopped: Adds a burst of fresh, clean, and slightly peppery flavor that lifts the entire dish. Stir it in at the end to preserve its vibrant taste.
- 6-8 Mini Pita Breads: The vessel for our delicious filling. Look for soft, pliable mini pitas that have a distinct pocket.
- Optional Toppings: Crumbled feta cheese, shredded lettuce, diced tomatoes, thinly sliced red onion, and a dollop of tzatziki sauce or plain yogurt.
Instructions
Follow these step-by-step instructions carefully to ensure your Mini Beef Stuffed Pita Pockets are perfectly cooked, flavorful, and assembled with ease. We’ll break it down into preparing the filling and then assembling the pockets.
Part 1: Crafting the Savory Beef Filling
- Sauté the Aromatics: Place a large skillet or sauté pan over medium-high heat. Add the 1 tablespoon of olive oil. Once the oil is shimmering, add the finely chopped yellow onion. Sauté for 5-7 minutes, stirring occasionally, until the onion has softened, become translucent, and is starting to turn golden at the edges. Add the minced garlic and cook for another minute until fragrant, being careful not to let it burn.
- Brown the Beef: Add the 1 lb of lean ground beef to the skillet with the onions and garlic. Use a wooden spoon or spatula to break the meat apart into small crumbles. Cook the beef until it is browned all over, which should take about 6-8 minutes. There should be no pink remaining.
- Bloom the Spices: Drain off any excess fat from the skillet if necessary. Push the beef to one side of the pan. Add the ground cumin, smoked paprika, ground coriander, and optional cayenne pepper to the empty side of the pan. Toast the spices in the hot pan for about 30 seconds until they become very fragrant. This step, known as “blooming,” deepens their flavor significantly.
- Combine and Simmer: Stir the toasted spices into the ground beef mixture until everything is evenly coated. Stir in the 2 tablespoons of tomato paste, cooking it for one minute to caramelize its sugars and deepen its flavor. Pour in the ½ cup of beef broth or water, using your spatula to scrape up any browned bits (the “fond”) from the bottom of the pan. This is where a ton of flavor is.
- Reduce and Finish: Bring the mixture to a simmer, then reduce the heat to low. Let it gently simmer for 5-10 minutes, or until most of the liquid has been absorbed and the mixture has thickened. This allows the flavors to meld together beautifully. Turn off the heat. Stir in the finely chopped fresh parsley, salt, and freshly ground black pepper. Taste the filling and adjust the seasoning if necessary.
Part 2: Assembling the Pita Pockets
- Warm the Pitas: Warming the pitas makes them softer, more pliable, and easier to open without tearing. You can do this in a few ways:
- Microwave: Wrap the stack of pitas in a slightly damp paper towel and microwave for 20-30 seconds.
- Oven: Wrap the pitas in foil and warm them in a 350°F (175°C) oven for 5-7 minutes.
- Toaster/Toaster Oven: Lightly toast each pita for a minute until just warmed and puffed.
- Prepare the Pockets: Once warmed, carefully cut each mini pita in half to create two pockets. If your pitas don’t have a natural pocket, you can carefully use a knife to create one, leaving the bottom intact.
- Stuff the Pockets: Gently open each pita half. Using a spoon, generously fill each pocket with the warm beef mixture. Be careful not to overfill, as this can cause the pitas to tear.
- Serve Immediately: Arrange the stuffed pita pockets on a platter and serve immediately with your choice of optional toppings like crumbled feta, diced tomatoes, and a side of tzatziki sauce for dipping.
Nutrition Facts
This nutritional information is an estimate and can vary based on specific ingredients used.
- Servings: 6
- Calories per Serving: Approximately 380 kcal
- Protein (25g): An excellent source of high-quality protein from the ground beef, which is essential for muscle repair, immune function, and keeping you feeling full and satisfied.
- Iron (3mg): Beef is a fantastic source of heme iron, a type of iron that is easily absorbed by the body. Iron is crucial for carrying oxygen in the blood and preventing fatigue.
- Fiber (4g): Primarily from the whole wheat pita bread and vegetables, fiber aids in digestion, helps maintain stable blood sugar levels, and contributes to a feeling of fullness.
- Carbohydrates (30g): The pita bread provides complex carbohydrates, which are the body’s primary source of energy, fueling your brain and muscles throughout the day.
- Healthy Fats (18g): Sourced from the lean beef and olive oil, these fats are important for hormone production and the absorption of fat-soluble vitamins.
Preparation Time
This recipe is designed for efficiency, making it perfect for a busy schedule without sacrificing flavor.
- Active Preparation Time: 15 minutes (chopping vegetables, measuring spices)
- Cooking Time: 20-25 minutes (sautéing, browning beef, simmering)
- Total Time: Approximately 35-40 minutes from start to finish.
How to Serve
These Mini Beef Stuffed Pita Pockets are incredibly versatile. You can serve them as a light lunch, a hearty dinner, or a fun party appetizer. Here are some creative ways to present and serve them:
- As a Complete Dinner Platter:
- Arrange the stuffed pitas on a large platter or board.
- In the center, place a large bowl of a crisp Greek salad with cucumbers, tomatoes, olives, and feta.
- Add small bowls of various toppings and sauces, such as:
- Creamy Tzatziki Sauce
- Rich and Smoky Baba Ghanoush
- Classic Hummus
- A simple lemon-tahini dressing
- Include a side of lemon-herb roasted potatoes or a fluffy couscous salad.
- For a Party or Gathering:
- Set up a “DIY Pita Pocket Bar” and let your guests build their own.
- Keep the beef filling warm in a slow cooker set to the “warm” setting.
- Lay out the warmed, halved pitas on a tray.
- Provide a wide array of toppings in separate bowls: shredded lettuce, diced tomatoes, sliced cucumbers, crumbled feta, pickled red onions, sliced black olives, and fresh mint leaves.
- In a Lunchbox (Bento Box Style):
- These are perfect for meal prep and packing for lunch.
- To prevent sogginess, pack the beef filling in one compartment of a bento box.
- Place the mini pita halves in another compartment.
- Use small silicone cups or containers for wet toppings like tzatziki or hummus.
- Include some sturdy raw veggies like carrot sticks, cucumber slices, or bell pepper strips for dipping.
- As a Quick and Healthy Snack:
- A single stuffed mini pita pocket is a perfect, protein-packed snack to tide you over between meals.
- Serve it with a dollop of plain Greek yogurt for extra protein and a tangy flavor.
Additional Tips
Unlock the full potential of this recipe with these eight expert tips designed to enhance flavor, save time, and ensure perfect results every time.
- Tip #1: The Perfect Pita Pick: Not all pitas are created equal. For this recipe, seek out thick, fluffy, and soft pita bread, often found in the bakery section or at Mediterranean specialty stores. Thinner, crispier pitas are more prone to tearing when you try to create and stuff the pocket.
- Tip #2: Prevent Soggy Pockets: The enemy of a good stuffed pita is a soggy bottom. To combat this, ensure your beef filling has thickened properly and is not overly wet before stuffing. Also, for best results, stuff the pitas just before serving. If meal prepping, store the filling and pitas separately.
- Tip #3: Make the Filling Ahead of Time: The beef filling is a meal prepper’s dream. You can make a double or triple batch over the weekend. It stores beautifully in an airtight container in the refrigerator for up to 4 days. When you’re ready to eat, simply reheat the filling in a skillet or microwave and stuff your fresh pitas for a dinner that’s ready in under 10 minutes.
- Tip #4: Sneak in More Veggies: This recipe is a fantastic vehicle for adding extra nutrients. Finely chop or grate vegetables like zucchini, carrots, or bell peppers and sauté them along with the onion. They will cook down and blend seamlessly into the beef mixture, adding flavor, moisture, and vitamins.
- Tip #5: Customize Your Spice Blend: Don’t be afraid to play with the spices. For a more pronounced Middle Eastern flavor, add a pinch of allspice or cinnamon. For more heat, add a finely chopped jalapeño with the garlic. A squeeze of fresh lemon juice stirred in with the parsley at the end can also brighten up all the flavors.
- Tip #6: Freezing for Future Meals: The cooked and cooled beef filling freezes exceptionally well. Portion it into freezer-safe bags or containers and it will last for up to 3 months. To use, thaw it overnight in the refrigerator and then reheat. This is a lifesaver for those extra-busy weeks.
- Tip #7: Getting the Perfect Pocket: The trick to easily opening the pita pocket without tearing is warmth. The steam created inside the pita when it’s warmed helps the layers separate. If you’re still having trouble, lay the warm pita on a cutting board and gently press down on it with the palm of your hand before cutting; this can help loosen the layers.
- Tip #8: Protein Variations: This recipe is easily adaptable to other proteins. You can substitute the ground beef with ground lamb for a more traditional and robust flavor. Ground turkey or chicken also work wonderfully for a leaner option. For a vegetarian version, use crumbled firm tofu, lentils, or a mixture of finely chopped mushrooms and walnuts.
FAQ Section
Here are answers to some of the most common questions about making Mini Beef Stuffed Pita Pockets.
- Q: Can I make this recipe vegetarian or vegan?
- A: Absolutely! For a fantastic vegetarian version, substitute the ground beef with one 15-ounce can of brown or green lentils (drained and rinsed) or 1.5 cups of cooked lentils. You can also use crumbled firm tofu or a plant-based ground meat alternative. Sauté them just as you would the beef. For a vegan version, ensure you use water or vegetable broth instead of beef broth and serve with a vegan yogurt or tahini-based sauce.
- Q: My pitas keep tearing when I try to open them. What am I doing wrong?
- A: This is a common issue, and it usually comes down to two things: the quality of the pita and its temperature. First, ensure you’re using a fresh, soft, thick style of pita. Second, and most importantly, make sure the pita is thoroughly warmed before you try to cut or open it. The heat creates steam inside, which helps the two layers separate easily. A cold or dry pita will almost always tear.
- Q: What is the best way to reheat leftover stuffed pitas?
- A: The best way to reheat already assembled pita pockets is in an oven or toaster oven. This helps to re-crisp the pita bread and warm the filling evenly. Place them on a baking sheet and heat at 350°F (175°C) for 8-10 minutes. Microwaving is faster but can make the pita bread soft and a bit chewy.
- Q: Can I use a pre-made spice mix like a shawarma or kofta blend instead of the individual spices?
- A: Yes, that’s a great shortcut! If you have a favorite Mediterranean or Middle Eastern spice blend, feel free to use it. Start with about 2-3 teaspoons of the blend in place of the cumin, paprika, coriander, and cayenne. Taste the filling and add more if needed, as the salt content and potency can vary between brands.
- Q: Are these Mini Beef Stuffed Pita Pockets kid-friendly?
- A: They are exceptionally kid-friendly! The mini size is perfect for little hands, and the “pocket” format is fun for kids to eat. The flavor of the beef is savory and not overwhelmingly spicy (especially if you omit the cayenne). You can also let kids add their own favorite toppings, which gives them a sense of ownership over their meal.
- Q: How long will the cooked beef filling last in the refrigerator?
- A: Stored properly in an airtight container, the cooked beef filling will stay fresh and delicious in the refrigerator for 3 to 4 days. This makes it an excellent choice for meal planning at the beginning of the week.
- Q: Can I bake the stuffed pitas instead of just serving them warm?
- A: Yes, baking them can create a delicious, slightly crispy version. After stuffing the pitas, you can brush them lightly with olive oil or melted butter and bake them in a 400°F (200°C) oven for about 10-12 minutes, or until the edges are golden and crispy. This turns them into something akin to a savory, handheld pie.
- Q: I don’t have fresh parsley. Can I use dried parsley or another herb?
- A: While fresh parsley adds a unique brightness, you can substitute it in a pinch. Use about 1-2 teaspoons of dried parsley, as dried herbs are more concentrated. Add the dried parsley along with the other spices to allow it to rehydrate and release its flavor. Fresh cilantro or fresh mint would also be delicious and complementary fresh herb substitutions.


