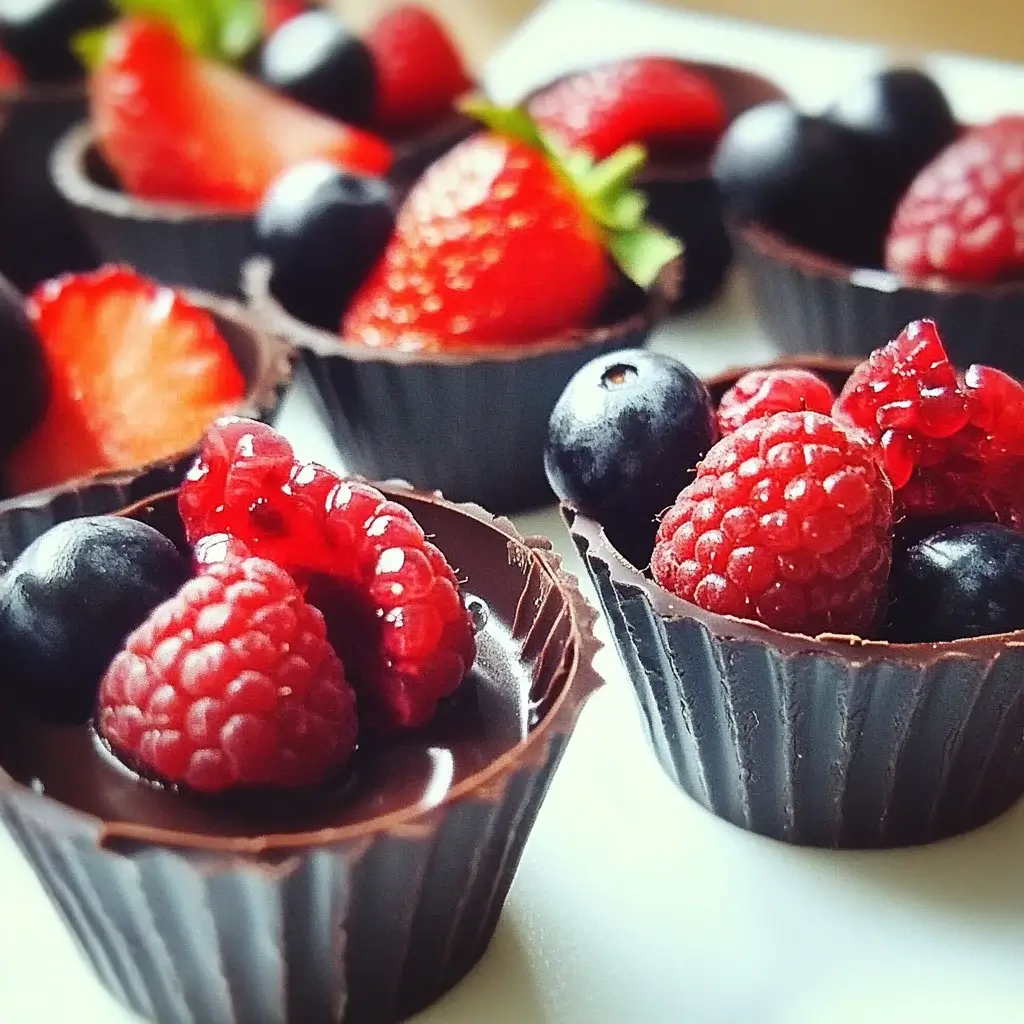
I still remember the first time I made these Mini Dark Chocolate Fruit Cups. It was a warm Saturday afternoon, and the kids were clamoring for a treat, but I wanted something a little healthier than the usual cookies or ice cream. I’d seen variations online, but I decided to combine the richness of dark chocolate with the vibrant freshness of berries we’d picked up from the farmer’s market that morning. Honestly, I wasn’t sure how they’d turn out – sometimes simple ideas are deceptively tricky. But the process was surprisingly therapeutic: melting the glossy dark chocolate, carefully arranging the colorful berries in the little cups, the anticipation as they chilled… The result? Absolute magic. My partner, usually reserved about desserts, declared them “dangerously good,” and the kids? They devoured them, completely forgetting they were packed with fruit! Since then, these little bites of joy have become a staple in our house. They’re my go-to for potlucks (they always disappear first!), a quick after-school snack, or even a sophisticated-looking dessert for dinner parties. They strike that perfect balance: indulgent yet light, simple yet elegant, and endlessly customizable. They feel special without requiring hours in the kitchen, and seeing the bright fruit peeking through the rich chocolate never fails to make me smile. They’re more than just a recipe; they’re a little bite of happiness.
Ingredients
- 10 ounces (about 280g) Good Quality Dark Chocolate (60-70% cacao): Provides a rich, intense chocolate flavor that pairs beautifully with fruit. Using good quality chocolate ensures better melting and taste. Choose chips, chunks, or a bar broken into small pieces.
- 1 teaspoon Coconut Oil (Optional): Helps the chocolate melt smoothly and gives the finished cups a slight sheen and softer bite. Can be omitted if preferred.
- 1.5 – 2 cups Fresh Mixed Berries/Fruit, washed and thoroughly dried: The star filling! Use a colorful mix like strawberries (hulled and quartered or sliced), blueberries, raspberries, blackberries. Small chunks of kiwi, mango, or banana also work. Crucially, the fruit must be completely dry to prevent the chocolate from seizing.
- Mini Muffin Liners (Paper or Silicone): You’ll need about 18-24 standard mini muffin liners to create the individual cups. Silicone liners are reusable and make removal easier.
Instructions
- Prepare the Muffin Tin: Place mini muffin liners into the cups of a mini muffin tin. This provides structure while the chocolate sets. If using silicone liners, you might be able to place them directly on a baking sheet, but a tin offers more stability. Set aside.
- Prepare the Fruit: Wash your chosen fruit gently under cold running water. Pat them completely dry with paper towels. This step is critical – any water can cause the melted chocolate to seize (become thick and grainy). Cut larger fruits like strawberries into small, bite-sized pieces (e.g., quarters or small slices). Leave smaller berries like blueberries and raspberries whole. Ensure all pieces are small enough to fit comfortably within the mini muffin liners. Set the prepared fruit aside.
- Melt the Chocolate: You have two main options for melting the chocolate:
- Microwave Method: Place the dark chocolate pieces and the optional coconut oil in a microwave-safe bowl. Microwave on medium power (50%) for 30-second intervals, stirring well after each interval. Continue until the chocolate is about 80% melted. Remove from the microwave and stir continuously until the residual heat melts the remaining pieces and the chocolate is smooth and glossy. Be careful not to overheat, as this can scorch the chocolate or cause it to seize.
- Double Boiler Method: If you don’t have a microwave or prefer more control, use a double boiler. Place the chocolate and optional coconut oil in a heatproof bowl. Set the bowl over a saucepan filled with about an inch of simmering (not boiling) water. Ensure the bottom of the bowl does not touch the water. Stir the chocolate occasionally until it is completely melted and smooth. Remove the bowl from the heat carefully (avoid getting steam or water into the chocolate).
- Create the Base Layer: Spoon approximately 1 teaspoon of the melted dark chocolate into the bottom of each mini muffin liner. Use the back of the spoon or a small brush to gently spread the chocolate up the sides of the liner slightly, creating a shallow cup shape. This doesn’t need to be perfect, just enough to form a base and partial wall.
- Add the Fruit Filling: Carefully arrange the prepared, dry fruit pieces inside the chocolate-lined cups. Fill them generously but don’t overpack, leaving a little space at the top for the final chocolate layer. Aim for a colorful mix in each cup.
- Top with Chocolate: Spoon the remaining melted dark chocolate over the fruit, ensuring the fruit is mostly covered. You might need about 1-2 teaspoons per cup, depending on how much fruit you added. Gently tap the muffin tin on the counter a couple of times to help the chocolate settle around the fruit and release any air bubbles. If desired, you can leave a few fruit pieces peeking through the top for visual appeal.
- Chill to Set: Place the entire muffin tin into the refrigerator. Let the Mini Dark Chocolate Fruit Cups chill for at least 30-45 minutes, or until the chocolate is completely firm and set. If using very juicy fruit or if your kitchen is warm, they might need slightly longer. For a faster set, you can place them in the freezer for 15-20 minutes, but watch carefully to avoid freezing the fruit solid.
- Remove and Store: Once the chocolate is hard, gently remove the cups from the muffin tin. Carefully peel away the paper liners (if used) or pop them out of the silicone molds. Your delicious Mini Dark Chocolate Fruit Cups are ready to be enjoyed! Store them in an airtight container in the refrigerator.
Nutrition Facts
- Servings: Approximately 18-24 mini cups (depending on size and amount of chocolate/fruit used)
- Calories Per Serving: Estimated 70-100 calories per mini cup (highly dependent on chocolate type, amount, and fruit used)
- Antioxidant Powerhouse: Dark chocolate (especially high cacao content) and berries are packed with antioxidants like flavonoids and polyphenols, which help fight cell damage in the body.
- Source of Fiber: Both dark chocolate and fresh fruits contribute dietary fiber, which is important for digestive health and can help you feel full.
- Healthy Fats: Dark chocolate contains monounsaturated fats (similar to those in olive oil) and some saturated fats from cocoa butter. When consumed in moderation, these can be part of a balanced diet.
- Vitamins & Minerals: The fresh fruit provides various essential vitamins (like Vitamin C from berries) and minerals, adding a nutritional boost to this delightful treat.
- Portion Control: The mini size makes these cups naturally portion-controlled, allowing you to indulge your sweet tooth without overdoing it.
Preparation Time
- Active Preparation Time: Approximately 15-20 minutes (washing/drying fruit, melting chocolate, assembling cups).
- Chilling Time: Approximately 30-45 minutes (or until chocolate is fully set).
- Total Time: Approximately 45-65 minutes from start to finish. This makes it a relatively quick and easy treat to prepare, perfect for busy schedules or last-minute cravings.
How to Serve
These Mini Dark Chocolate Fruit Cups are incredibly versatile! Here are some delightful ways to serve them:
- Simple Snack Attack:
- Serve them straight from the fridge for a quick, refreshing, and satisfying afternoon pick-me-up or after-dinner treat. They’re perfect for curbing sweet cravings in a healthier way.
- Elegant Dessert Platter:
- Arrange them on a beautiful platter alongside other small desserts like mini cheesecakes, macarons, or chocolate-covered strawberries for a stunning dessert buffet at parties or gatherings.
- Consider dusting them lightly with cocoa powder or powdered sugar just before serving for an extra touch of elegance.
- Party Favorites:
- They are ideal for birthday parties, baby showers, bridal showers, or holiday gatherings. Their bite-size nature makes them easy for guests to handle while mingling.
- Place them in festive mini cupcake liners that match your party’s theme.
- Lunchbox Surprise:
- Tuck one or two into a lunchbox (with an ice pack to keep them cool) for a special treat that’s both fun and contains fruit. Ensure they are well-protected to avoid squashing.
- With Coffee or Tea:
- Enjoy a cup alongside your morning coffee or afternoon tea for a moment of pure indulgence. The rich chocolate pairs beautifully with bitter coffee or fragrant tea.
- Brunch Addition:
- Add them to a brunch spread as a sweet counterpoint to savory dishes. They look lovely alongside pastries, yogurt parfaits, and fruit salads.
- Garnished Delights:
- Before the top layer of chocolate fully sets, sprinkle on some chopped nuts (pistachios, almonds), shredded coconut, hemp seeds, or a tiny pinch of flaky sea salt to add texture and flavor complexity.
- After setting, you could drizzle them with a contrasting chocolate (like white chocolate) or a thin line of caramel sauce for extra visual appeal and decadence.
- Gift Giving:
- Arrange a selection in a small, attractive box lined with parchment paper for a lovely homemade edible gift for friends, neighbors, or teachers.
Additional Tips
- Choose Your Chocolate Wisely: The quality and type of dark chocolate significantly impact the final taste. Aim for a cacao percentage between 60% and 75%. Higher percentages offer more intense flavor and potential health benefits but can be more bitter. Use chocolate you enjoy eating on its own. Avoid using candy melts, as they have a different composition and flavor profile.
- Master the Melt: Avoid overheating the chocolate! This is the most common pitfall. Use short bursts in the microwave or gentle heat on a double boiler. Stir frequently. If chocolate seizes (becomes thick, clumpy, and grainy), it’s usually due to moisture or overheating. While difficult to fully recover for this recipe, you might try stirring in a tiny bit more coconut oil or vegetable shortening, but the texture won’t be quite the same. Prevention is key!
- Dry Fruit is Non-Negotiable: Seriously, pat that fruit completely dry after washing. Even a tiny droplet of water can cause your beautifully melted chocolate to seize into a lumpy mess. Let the fruit air dry for a few minutes after patting, just to be safe.
- Liner Choices Matter: Paper mini muffin liners work well and are readily available, but they can sometimes stick a little. Silicone mini muffin liners are fantastic for easy release – the chocolate cups pop right out once set. They are also reusable and eco-friendly. If you don’t have liners, you could try lightly greasing a mini muffin tin, but removal can be tricky.
- Get Creative with Customization: Don’t limit yourself to just berries! Consider adding:
- Texture: A sprinkle of chopped nuts (almonds, pecans, pistachios), seeds (chia, hemp, sunflower), toasted shredded coconut, or granola inside or on top.
- Flavor Boosts: A tiny pinch of flaky sea salt on top enhances the chocolate flavor. Add a drop of peppermint, orange, or almond extract to the melted chocolate. A dash of cinnamon or chili powder can add warmth. Orange or lime zest folded into the chocolate or sprinkled on top adds brightness.
- Layers: Add a tiny dollop of peanut butter, almond butter, or seed butter at the bottom of the cup before the first chocolate layer for a Reese’s-cup-like variation.
- Storage Savvy: These cups are best stored in an airtight container in the refrigerator. This keeps the chocolate firm and the fruit fresh. They will typically last for 3-5 days, although the fruit may soften slightly over time, especially juicier fruits like strawberries.
- Make-Ahead Magic: These are perfect for making ahead! Prepare them a day or two before you need them for a party or event. This allows the flavors to meld slightly and saves you time on the day. Just keep them chilled until serving.
- Smooth Finish Technique: For a neater appearance, after adding the top layer of chocolate, gently tap the muffin tin on the counter several times. This helps the chocolate level out and encase the fruit more smoothly. You can also use the back of a small spoon or an offset spatula to smooth the tops before chilling.
Frequently Asked Questions (FAQ)
- Q: Can I use milk chocolate or white chocolate instead of dark chocolate?
- A: Absolutely! You can substitute milk chocolate or white chocolate using the same method. Keep in mind that milk and white chocolate are generally sweeter and have different melting properties (white chocolate is particularly prone to scorching). You might want to omit the optional coconut oil when using white chocolate. The flavor profile will be different – sweeter and less intense than dark chocolate, but still delicious!
- Q: Can I use frozen fruit for this recipe?
- A: It’s generally not recommended to use frozen fruit directly. As frozen fruit thaws, it releases a lot of moisture (water), which will cause the melted chocolate to seize and can make the final cups soggy. If you must use frozen fruit, thaw it completely first, then drain off all excess liquid, and pat the fruit extremely dry with paper towels before adding it to the chocolate cups. Fresh fruit yields the best results in terms of texture and preventing chocolate issues.
- Q: Are these Mini Dark Chocolate Fruit Cups vegan and/or gluten-free?
- A: They can easily be both! To ensure they are vegan, choose a dark chocolate that is certified vegan or check the ingredients label carefully – many dark chocolates (especially higher cacao percentages) are naturally dairy-free. Also, ensure no non-vegan additions are used. The core ingredients (dark chocolate, fruit, coconut oil) are naturally gluten-free, but always double-check your chocolate label for any potential cross-contamination warnings if serving someone with celiac disease.
- Q: How long will these chocolate fruit cups last?
- A: Stored properly in an airtight container in the refrigerator, they should stay fresh for about 3 to 5 days. The limiting factor is usually the freshness of the fruit. Berries like blueberries and blackberries tend to hold up better than cut strawberries or raspberries, which might become slightly softer or weep moisture over time. They are best enjoyed within the first few days for optimal texture.
- Q: Help! My chocolate seized while melting. What did I do wrong?
- A: Chocolate seizing (becoming thick, stiff, and grainy) is almost always caused by one of two things: overheating or contact with moisture (even a tiny drop of water or steam). To prevent this: melt chocolate gently (low power in microwave, simmering water for double boiler), stir frequently, and ensure all bowls, utensils, and especially the fruit are completely dry. If it happens, unfortunately, it’s hard to fix for coating purposes, but don’t throw it out! Let it cool, break it up, and use it for baking where texture is less critical.
- Q: Can I make these in a standard-sized muffin tin instead of mini?
- A: Yes, you can make larger chocolate fruit cups using a standard muffin tin and regular-sized liners. You will need significantly more chocolate and fruit per cup. The chilling time might also need to be increased slightly to ensure the thicker chocolate shell sets completely. These larger cups make for a more substantial dessert portion.
- Q: What are the best fruits to use in these cups?
- A: Berries are classic choices: strawberries (quartered), blueberries, raspberries, and blackberries work beautifully due to their size, flavor, and color. Other great options include small chunks of mango, kiwi, banana slices (use immediately as they brown), seedless grapes (halved), or pomegranate seeds. The key is to use fruits that aren’t excessively watery and are cut into small, manageable pieces. Ensure they are thoroughly dried!
- Q: My fruit cups are sticking to the paper liners. How can I prevent this?
- A: Sticking can sometimes happen with paper liners. Here are a few tips: Ensure the chocolate is fully set and cold before trying to peel the liner. Sometimes chilling them slightly longer helps. You can also try using foil liners, which tend to stick less than paper ones. The best solution for zero sticking is to use silicone mini muffin liners – the cups pop out effortlessly once chilled. If using paper, peel gently and slowly.

Mini Dark Chocolate Fruit Cups
Ingredients
- 10 ounces (about 280g) Good Quality Dark Chocolate (60-70% cacao): Provides a rich, intense chocolate flavor that pairs beautifully with fruit. Using good quality chocolate ensures better melting and taste. Choose chips, chunks, or a bar broken into small pieces.
- 1 teaspoon Coconut Oil (Optional): Helps the chocolate melt smoothly and gives the finished cups a slight sheen and softer bite. Can be omitted if preferred.
- 1.5 – 2 cups Fresh Mixed Berries/Fruit, washed and thoroughly dried: The star filling! Use a colorful mix like strawberries (hulled and quartered or sliced), blueberries, raspberries, blackberries. Small chunks of kiwi, mango, or banana also work. Crucially, the fruit must be completely dry to prevent the chocolate from seizing.
- Mini Muffin Liners (Paper or Silicone): You’ll need about 18-24 standard mini muffin liners to create the individual cups. Silicone liners are reusable and make removal easier.
Instructions
- Prepare the Muffin Tin: Place mini muffin liners into the cups of a mini muffin tin. This provides structure while the chocolate sets. If using silicone liners, you might be able to place them directly on a baking sheet, but a tin offers more stability. Set aside.
- Prepare the Fruit: Wash your chosen fruit gently under cold running water. Pat them completely dry with paper towels. This step is critical – any water can cause the melted chocolate to seize (become thick and grainy). Cut larger fruits like strawberries into small, bite-sized pieces (e.g., quarters or small slices). Leave smaller berries like blueberries and raspberries whole. Ensure all pieces are small enough to fit comfortably within the mini muffin liners. Set the prepared fruit aside.
- Melt the Chocolate: You have two main options for melting the chocolate:
- Microwave Method: Place the dark chocolate pieces and the optional coconut oil in a microwave-safe bowl. Microwave on medium power (50%) for 30-second intervals, stirring well after each interval. Continue until the chocolate is about 80% melted. Remove from the microwave and stir continuously until the residual heat melts the remaining pieces and the chocolate is smooth and glossy. Be careful not to overheat, as this can scorch the chocolate or cause it to seize.
- Double Boiler Method: If you don’t have a microwave or prefer more control, use a double boiler. Place the chocolate and optional coconut oil in a heatproof bowl. Set the bowl over a saucepan filled with about an inch of simmering (not boiling) water. Ensure the bottom of the bowl does not touch the water. Stir the chocolate occasionally until it is completely melted and smooth. Remove the bowl from the heat carefully (avoid getting steam or water into the chocolate).
- Create the Base Layer: Spoon approximately 1 teaspoon of the melted dark chocolate into the bottom of each mini muffin liner. Use the back of the spoon or a small brush to gently spread the chocolate up the sides of the liner slightly, creating a shallow cup shape. This doesn’t need to be perfect, just enough to form a base and partial wall.
- Add the Fruit Filling: Carefully arrange the prepared, dry fruit pieces inside the chocolate-lined cups. Fill them generously but don’t overpack, leaving a little space at the top for the final chocolate layer. Aim for a colorful mix in each cup.
- Top with Chocolate: Spoon the remaining melted dark chocolate over the fruit, ensuring the fruit is mostly covered. You might need about 1-2 teaspoons per cup, depending on how much fruit you added. Gently tap the muffin tin on the counter a couple of times to help the chocolate settle around the fruit and release any air bubbles. If desired, you can leave a few fruit pieces peeking through the top for visual appeal.
- Chill to Set: Place the entire muffin tin into the refrigerator. Let the Mini Dark Chocolate Fruit Cups chill for at least 30-45 minutes, or until the chocolate is completely firm and set. If using very juicy fruit or if your kitchen is warm, they might need slightly longer. For a faster set, you can place them in the freezer for 15-20 minutes, but watch carefully to avoid freezing the fruit solid.
- Remove and Store: Once the chocolate is hard, gently remove the cups from the muffin tin. Carefully peel away the paper liners (if used) or pop them out of the silicone molds. Your delicious Mini Dark Chocolate Fruit Cups are ready to be enjoyed! Store them in an airtight container in the refrigerator.
Nutrition
- Serving Size: one normal portion
- Calories: 100