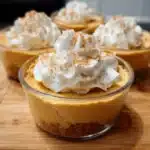
There’s something undeniably magical about miniature treats, isn’t there? They’re perfectly portioned, irresistibly cute, and always a crowd-pleaser. But when you combine the charm of mini desserts with the delicate beauty of flowers, you elevate the sweetness to a whole new level. That’s precisely what these Mini Flower Cupcakes are all about. From the moment I first baked these little blossoms, my family was completely smitten. The kids, of course, were instantly drawn to the vibrant colors and whimsical floral decorations, their eyes widening with delight as they helped arrange the candy petals. But it wasn’t just the visual appeal; the taste was equally enchanting. Imagine a light, fluffy cupcake, moist and tender, topped with a creamy, dreamy frosting that melts in your mouth. Then, picture that frosting transformed into a miniature garden of edible flowers, each petal carefully placed to create a stunningly beautiful and utterly delicious treat. These Mini Flower Cupcakes have become a staple in our household for birthdays, holidays, and even just because. They’re surprisingly easy to make, incredibly fun to decorate, and always disappear in a flash. If you’re looking for a recipe that’s guaranteed to bring smiles and a touch of floral elegance to your table, you’ve absolutely found it. Prepare to be charmed by these little blooms – they’re not just cupcakes; they’re edible works of art that will brighten any occasion and leave everyone wanting more. Get ready to transform your kitchen into a sweet-smelling garden and bake up a batch of happiness!
Ingredients: Your Garden of Baking Essentials
- All-Purpose Flour: The foundation of our cupcakes, providing structure and a tender crumb. Use 2 ½ cups of all-purpose flour for the perfect texture.
- Granulated Sugar: Sweetness and moisture are key! 1 ½ cups of granulated sugar will give these cupcakes the ideal level of sweetness.
- Unsalted Butter: For richness, flavor, and that melt-in-your-mouth texture, we need ½ cup (1 stick) of unsalted butter, softened to room temperature.
- Large Eggs: Binding ingredients together and adding richness, 3 large eggs are crucial for the perfect cupcake consistency.
- Whole Milk: Adds moisture and helps to create a tender crumb. You’ll need ¾ cup of whole milk for this recipe.
- Vanilla Extract: Enhances the overall flavor profile and brings a touch of warmth. 2 teaspoons of pure vanilla extract are recommended for a delightful aroma.
- Baking Powder: The leavening agent that makes our cupcakes light and fluffy. 2 ½ teaspoons of baking powder will ensure they rise beautifully.
- Salt: Balances the sweetness and enhances all the other flavors. Just ½ teaspoon of salt is enough to make a difference.
- Buttercream Frosting: The canvas for our floral masterpiece! You’ll need approximately 3-4 cups of your favorite buttercream frosting. You can use store-bought or homemade.
- Gel Food Coloring: To tint your frosting and create vibrant flower petals. Choose a variety of colors to make your flowers pop. Gel food coloring is recommended as it’s more concentrated and won’t thin out your frosting.
- Candy Melts or Small Candies: For creating the flower petals. Candy melts in various colors, or small round candies like M&Ms or Sixlets, work wonderfully. You can also use sprinkles, edible pearls, or even small pieces of fruit for variety.
- Piping Bag and Tips (Optional): For more intricate frosting designs and easier application, a piping bag and tips (especially a leaf tip and a round tip) can be helpful but are not essential for basic flower designs.
Instructions: Planting the Seeds of Deliciousness – Step-by-Step Guide
- Preheat and Prepare: Begin by preheating your oven to 350°F (175°C). This ensures the oven is at the correct temperature when you place your cupcakes in, leading to even baking. While the oven is preheating, prepare your mini muffin tin by lining it with paper liners. This step is crucial for easy cupcake removal and cleanup. If you don’t have liners, you can grease and flour the muffin tin to prevent sticking, although liners are highly recommended for mini cupcakes as they are delicate.
- Dry Ingredients Unite: In a medium-sized mixing bowl, whisk together the all-purpose flour, granulated sugar, baking powder, and salt. Whisking is important here to ensure the baking powder and salt are evenly distributed throughout the flour. This prevents pockets of baking powder that could lead to uneven rising and ensures consistent flavor in every cupcake. Make sure to measure your flour correctly by spooning it into the measuring cup and leveling it off, rather than scooping directly from the bag, which can pack the flour and result in too much flour in the recipe.
- Cream the Butter and Sugar: In a separate large mixing bowl, cream together the softened unsalted butter and the remaining granulated sugar using an electric mixer (hand mixer or stand mixer) on medium speed. Creaming butter and sugar is a vital step in creating light and fluffy cupcakes. Continue mixing until the mixture is light and fluffy, pale in color, and has increased in volume. This process incorporates air into the butter and sugar, which contributes to the cupcakes’ texture. This usually takes about 2-3 minutes. Scrape down the sides of the bowl occasionally to ensure everything is evenly combined.
- Incorporate the Eggs: Add the large eggs one at a time to the creamed butter and sugar mixture, beating well after each addition. Make sure each egg is fully incorporated before adding the next. This ensures a smooth batter and prevents the mixture from curdling. Beating well after each egg helps to further emulsify the batter, contributing to a tender and moist final product. If the mixture looks slightly curdled at any point, don’t worry, it will come together as you add the dry ingredients and milk.
- Vanilla Infusion: Stir in the vanilla extract to the wet ingredients. Vanilla extract enhances the overall flavor of the cupcakes and adds a warm, comforting aroma. Ensure it’s well combined into the wet mixture. You can also experiment with other extracts like almond or lemon for different flavor variations in the future.
- Alternate Wet and Dry: Gradually add the dry ingredients to the wet ingredients, alternating with the whole milk. Begin by adding about one-third of the dry ingredients to the wet mixture and mix until just combined. Then, add half of the milk and mix again. Continue alternating, adding another third of the dry ingredients, then the remaining milk, and finally the last third of the dry ingredients. Mix until just combined after each addition. Be careful not to overmix the batter at this stage. Overmixing develops gluten, which can result in tough cupcakes. Mix until the dry ingredients are just incorporated and no streaks of flour remain. The batter should be smooth and lump-free.
- Fill the Mini Muffin Tin: Using a spoon or a small cookie scoop, fill each mini muffin liner about two-thirds full with the cupcake batter. Filling them to two-thirds full allows room for the cupcakes to rise without overflowing. Using a cookie scoop helps to ensure uniform cupcake sizes, which leads to even baking. If you overfill the liners, the cupcakes may spill over the sides and become misshapen.
- Bake to Perfection: Place the filled mini muffin tin in the preheated oven and bake for 12-15 minutes, or until a wooden skewer inserted into the center of a cupcake comes out clean. Baking times can vary slightly depending on your oven, so it’s always best to check for doneness using the skewer test. The cupcakes should be lightly golden brown on top and spring back lightly when gently pressed. Avoid opening the oven door frequently during baking as this can cause temperature fluctuations and affect the cupcakes’ rise.
- Cool Down Completely: Once baked, remove the muffin tin from the oven and let it cool in the tin for a few minutes. This allows the cupcakes to set slightly and makes them easier to remove from the tin without breaking. After a few minutes, carefully transfer the cupcakes from the muffin tin to a wire rack to cool completely. Cooling them on a wire rack allows air to circulate around them, preventing condensation and ensuring they cool evenly. Make sure the cupcakes are completely cool before frosting, as frosting warm cupcakes will cause it to melt and slide off.
- Frosting Fantasy: While the cupcakes are cooling, prepare your buttercream frosting and divide it into several bowls, depending on how many different colors you want for your flowers. Tint each bowl of frosting with gel food coloring to achieve your desired shades. Start with a small amount of gel food coloring and gradually add more until you reach the desired color intensity. Remember that gel food coloring is concentrated, so a little goes a long way.
- Petal Power: Once the cupcakes are completely cooled, it’s time to decorate! Frost each cupcake with a thin layer of buttercream frosting as a base. This base layer helps the flower petals adhere better. Now, get creative with your candy melts or small candies to create flower petals. For a simple daisy, for example, arrange candy melts around the edge of the cupcake to form petals and place a yellow candy in the center for the flower’s center. You can create various flower designs using different colored candies and arranging them in different patterns. Use your imagination and have fun experimenting with different flower types and colors. If using a piping bag, you can pipe buttercream petals using a leaf tip for more realistic looking flower petals. A round tip can be used to pipe small dots or swirls in the center of the flowers.
- Finishing Touches: Add any finishing touches you desire! Sprinkles, edible pearls, or even small pieces of fresh fruit can be added to the center of the flowers or scattered around the petals for extra sparkle and visual appeal. Get the kids involved in this step – they’ll love adding their own creative flair to the flower cupcakes.
- Admire and Devour: Once decorated, your Mini Flower Cupcakes are ready to be admired and devoured! Arrange them beautifully on a platter or cupcake stand and watch as they bring smiles to everyone’s faces. These little floral delights are perfect for parties, celebrations, or simply a sweet treat any day of the week. Store leftover cupcakes in an airtight container at room temperature for up to 3 days or in the refrigerator for up to a week.
Nutrition Facts: Sweetness with a Side of Knowledge
(Per Serving – 1 Mini Cupcake, estimated, values are approximate and can vary based on specific ingredients and frosting amount)
- Servings: Approximately 24 mini cupcakes
- Calories: 120 kcal
- Fat: 5g
Preparation Time: From Garden to Plate – Quick and Easy Baking
- Prep Time: 20 minutes (for batter preparation and getting ingredients ready)
- Bake Time: 12-15 minutes
- Cooling Time: 30 minutes (for cupcakes to cool completely before frosting)
- Decoration Time: 30-45 minutes (depending on complexity of flower designs and quantity)
- Total Time: Approximately 1 hour 30 minutes – 1 hour 50 minutes (from start to finish, including baking, cooling, and decorating). These Mini Flower Cupcakes are relatively quick to prepare, making them perfect for a fun weekend baking project or a last-minute treat for a special occasion. The decoration time can be adjusted depending on your desired level of detail, making this recipe adaptable for both beginner and more experienced bakers.
How to Serve: Showcasing Your Floral Delights
- Party Centerpiece: Arrange the Mini Flower Cupcakes on a tiered cupcake stand or platter to create a stunning and edible centerpiece for birthday parties, baby showers, garden parties, or spring celebrations. The vibrant colors and floral designs will instantly brighten up any party table.
- Afternoon Tea Treat: Serve these delicate cupcakes as part of a delightful afternoon tea spread. Pair them with a selection of teas, finger sandwiches, and scones for a classic and elegant treat. Their mini size makes them perfect for dainty tea parties.
- Kids’ Party Favorite: Mini Flower Cupcakes are a guaranteed hit at children’s parties. Their small size is perfect for little hands, and the fun floral decorations will capture their imaginations. Let the kids even help with the decorating process for a fun and interactive party activity.
- Dessert Platter Variety: Include these cupcakes on a dessert platter alongside other sweet treats like cookies, brownies, and fruit tarts to offer a diverse and visually appealing selection for guests. The flower cupcakes add a touch of elegance and visual interest to any dessert assortment.
- Gift Giving: Package a batch of Mini Flower Cupcakes in a decorative box or container and give them as a thoughtful and homemade gift to friends, neighbors, teachers, or anyone who deserves a sweet surprise. They make a charming and personal gift for any occasion.
- Picnic Basket Sweetness: Pack these cupcakes in your picnic basket for a delightful outdoor treat. Their sturdy nature and individual liners make them easy to transport and enjoy in a park, at the beach, or on a hike.
- Special Occasion Dessert: These cupcakes are perfect for celebrating special occasions like Mother’s Day, Easter, Valentine’s Day, or anniversaries. The floral theme makes them especially appropriate for spring and summer celebrations.
- Everyday Treat: Don’t wait for a special occasion to enjoy these Mini Flower Cupcakes. They’re a delightful treat to bake and enjoy any day of the week when you need a little something sweet to brighten your day. Pair them with a glass of milk or a cup of coffee for a simple yet satisfying dessert.
Additional Tips for Blooming Success: Expert Baking Secrets
- Room Temperature is Key: Ensure your butter, eggs, and milk are all at room temperature before starting. Room temperature ingredients emulsify more easily, creating a smoother batter and a more tender cupcake. Cold ingredients can lead to a denser and less airy texture.
- Don’t Overmix the Batter: Overmixing the batter develops gluten, resulting in tough cupcakes. Mix the wet and dry ingredients until just combined, and no streaks of flour remain. A few lumps are okay; they will disappear during baking.
- Accurate Measuring Matters: Baking is a science, and accurate measurements are crucial for success. Use measuring cups and spoons correctly. Spoon flour into the measuring cup and level it off with a knife rather than scooping directly from the bag. Liquid ingredients should be measured in liquid measuring cups at eye level.
- Cool Cupcakes Completely Before Frosting: Frosting warm cupcakes will cause the frosting to melt and slide off. Ensure the cupcakes are completely cool to the touch before you begin frosting and decorating. Patience is key for a beautifully frosted cupcake.
- Get Creative with Frosting Flavors: While vanilla buttercream is classic, don’t be afraid to experiment with other frosting flavors to complement your cupcakes. Lemon, chocolate, strawberry, or even cream cheese frosting would all be delicious options. You can also add extracts or zest to your buttercream for subtle flavor variations.
- Candy Melt Melting Tips: When melting candy melts, melt them in short intervals in the microwave (30 seconds at a time) and stir frequently to prevent overheating and burning. If the candy melts become too thick, you can add a tiny bit of vegetable shortening or coconut oil to thin them out.
- Piping Bag Pro-Tips: If using a piping bag for frosting, fill it no more than two-thirds full to prevent it from bursting. Twist the top of the bag to seal it and apply pressure from the top to pipe frosting smoothly. Practice piping on parchment paper before decorating your cupcakes to get comfortable with the technique.
- Storage Secrets: Store leftover Mini Flower Cupcakes in an airtight container at room temperature for up to 3 days or in the refrigerator for up to a week. If storing in the refrigerator, bring them to room temperature for about 30 minutes before serving for the best flavor and texture. You can also freeze unfrosted cupcakes for up to 3 months. Wrap them individually in plastic wrap and then place them in a freezer-safe bag or container. Thaw them completely before frosting.
Frequently Asked Questions: Your Mini Flower Cupcake Queries Answered
Q1: Can I use cake flour instead of all-purpose flour?
A: Yes, you can substitute cake flour for all-purpose flour for an even more tender and delicate crumb. Use the same amount, 2 ½ cups of cake flour. Cake flour has a lower protein content than all-purpose flour, which contributes to a softer texture. However, all-purpose flour works perfectly well for this recipe and is more readily available in most kitchens.
Q2: Can I make these cupcakes ahead of time?
A: Absolutely! You can bake the cupcakes a day or two ahead of time and store them in an airtight container at room temperature. Frost and decorate them on the day you plan to serve them for the freshest taste and appearance. You can also make the buttercream frosting ahead of time and store it in the refrigerator for up to a week. Just bring it to room temperature and rewhip it before using.
Q3: Can I double the recipe?
A: Yes, this recipe can easily be doubled to make a larger batch of Mini Flower Cupcakes. Simply double all the ingredients and ensure you have enough mini muffin liners and baking tins to accommodate the increased quantity. Baking time may need to be slightly adjusted, so always check for doneness with a skewer.
Q4: What if I don’t have candy melts or small candies? What else can I use for flower petals?
A: If you don’t have candy melts or small candies, you can get creative with other edible decorations! Consider using:
* Sprinkles: Arrange colorful sprinkles to create petal shapes.
* Edible Pearls: Edible pearls add a touch of elegance and can be arranged to form delicate petals.
* Sliced Almonds: Toasted sliced almonds can be used to create a more rustic floral look.
* Fresh Fruit: Thinly sliced strawberries, kiwi, or mandarin orange segments can be used as natural and colorful petals.
* Chocolate Shavings: White chocolate or dark chocolate shavings can create sophisticated and elegant flower petals.
Q5: Can I make these cupcakes gluten-free?
A: Yes, you can make these cupcakes gluten-free by substituting the all-purpose flour with a gluten-free all-purpose flour blend. Ensure the gluten-free blend is formulated for baking and contains xanthan gum or guar gum, which helps to provide structure in gluten-free baking. Follow the recipe as directed, and enjoy delicious gluten-free Mini Flower Cupcakes.
Q6: Can I freeze the frosted cupcakes?
A: Freezing frosted cupcakes is not recommended as the frosting can sometimes change texture upon thawing and the candy decorations may become sticky. It is best to freeze unfrosted cupcakes and frost them after thawing for the best results. However, if you must freeze frosted cupcakes, freeze them in a single layer on a baking sheet until solid, then wrap them individually in plastic wrap and place them in a freezer-safe container. Thaw in the refrigerator.
Q7: My cupcakes are sinking in the middle. What did I do wrong?
A: Cupcakes sinking in the middle can be caused by a few factors:
* Oven Temperature: If your oven temperature is too low, the cupcakes may not set properly and can sink. Ensure your oven is preheated to the correct temperature of 350°F (175°C).
* Overmixing: Overmixing the batter can develop gluten, which can cause the cupcakes to rise and then collapse. Mix the batter until just combined.
* Too Much Leavening Agent: Using too much baking powder can cause the cupcakes to rise too quickly and then sink. Ensure you are using the correct amount of baking powder (2 ½ teaspoons).
* Opening Oven Door Too Early: Opening the oven door too early during baking can cause temperature fluctuations and lead to sinking. Avoid opening the oven door until the cupcakes are almost done baking.
Q8: Can I make these cupcakes vegan?
A: Yes, you can adapt this recipe to be vegan with a few substitutions:
* Butter: Replace unsalted butter with vegan butter sticks.
* Eggs: Use flax eggs (1 tablespoon flaxseed meal mixed with 3 tablespoons of water per egg, let it sit for 5 minutes to thicken) or a commercial egg replacer.
* Milk: Use plant-based milk such as almond milk, soy milk, or oat milk.
* Buttercream Frosting: Use vegan butter and vegan powdered sugar to make vegan buttercream frosting. Ensure your candy melts or candies used for decoration are also vegan-friendly if needed. With these substitutions, you can enjoy delicious vegan Mini Flower Cupcakes!

Mini Flower Cupcakes
Ingredients
- All-Purpose Flour: The foundation of our cupcakes, providing structure and a tender crumb. Use 2 ½ cups of all-purpose flour for the perfect texture.
- Granulated Sugar: Sweetness and moisture are key! 1 ½ cups of granulated sugar will give these cupcakes the ideal level of sweetness.
- Unsalted Butter: For richness, flavor, and that melt-in-your-mouth texture, we need ½ cup (1 stick) of unsalted butter, softened to room temperature.
- Large Eggs: Binding ingredients together and adding richness, 3 large eggs are crucial for the perfect cupcake consistency.
- Whole Milk: Adds moisture and helps to create a tender crumb. You’ll need ¾ cup of whole milk for this recipe.
- Vanilla Extract: Enhances the overall flavor profile and brings a touch of warmth. 2 teaspoons of pure vanilla extract are recommended for a delightful aroma.
- Baking Powder: The leavening agent that makes our cupcakes light and fluffy. 2 ½ teaspoons of baking powder will ensure they rise beautifully.
- Salt: Balances the sweetness and enhances all the other flavors. Just ½ teaspoon of salt is enough to make a difference.
- Buttercream Frosting: The canvas for our floral masterpiece! You’ll need approximately 3-4 cups of your favorite buttercream frosting. You can use store-bought or homemade.
- Gel Food Coloring: To tint your frosting and create vibrant flower petals. Choose a variety of colors to make your flowers pop. Gel food coloring is recommended as it’s more concentrated and won’t thin out your frosting.
- Candy Melts or Small Candies: For creating the flower petals. Candy melts in various colors, or small round candies like M&Ms or Sixlets, work wonderfully. You can also use sprinkles, edible pearls, or even small pieces of fruit for variety.
- Piping Bag and Tips (Optional): For more intricate frosting designs and easier application, a piping bag and tips (especially a leaf tip and a round tip) can be helpful but are not essential for basic flower designs.
Instructions
- Preheat and Prepare: Begin by preheating your oven to 350°F (175°C). This ensures the oven is at the correct temperature when you place your cupcakes in, leading to even baking. While the oven is preheating, prepare your mini muffin tin by lining it with paper liners. This step is crucial for easy cupcake removal and cleanup. If you don’t have liners, you can grease and flour the muffin tin to prevent sticking, although liners are highly recommended for mini cupcakes as they are delicate.
- Dry Ingredients Unite: In a medium-sized mixing bowl, whisk together the all-purpose flour, granulated sugar, baking powder, and salt. Whisking is important here to ensure the baking powder and salt are evenly distributed throughout the flour. This prevents pockets of baking powder that could lead to uneven rising and ensures consistent flavor in every cupcake. Make sure to measure your flour correctly by spooning it into the measuring cup and leveling it off, rather than scooping directly from the bag, which can pack the flour and result in too much flour in the recipe.
- Cream the Butter and Sugar: In a separate large mixing bowl, cream together the softened unsalted butter and the remaining granulated sugar using an electric mixer (hand mixer or stand mixer) on medium speed. Creaming butter and sugar is a vital step in creating light and fluffy cupcakes. Continue mixing until the mixture is light and fluffy, pale in color, and has increased in volume. This process incorporates air into the butter and sugar, which contributes to the cupcakes’ texture. This usually takes about 2-3 minutes. Scrape down the sides of the bowl occasionally to ensure everything is evenly combined.
- Incorporate the Eggs: Add the large eggs one at a time to the creamed butter and sugar mixture, beating well after each addition. Make sure each egg is fully incorporated before adding the next. This ensures a smooth batter and prevents the mixture from curdling. Beating well after each egg helps to further emulsify the batter, contributing to a tender and moist final product. If the mixture looks slightly curdled at any point, don’t worry, it will come together as you add the dry ingredients and milk.
- Vanilla Infusion: Stir in the vanilla extract to the wet ingredients. Vanilla extract enhances the overall flavor of the cupcakes and adds a warm, comforting aroma. Ensure it’s well combined into the wet mixture. You can also experiment with other extracts like almond or lemon for different flavor variations in the future.
- Alternate Wet and Dry: Gradually add the dry ingredients to the wet ingredients, alternating with the whole milk. Begin by adding about one-third of the dry ingredients to the wet mixture and mix until just combined. Then, add half of the milk and mix again. Continue alternating, adding another third of the dry ingredients, then the remaining milk, and finally the last third of the dry ingredients. Mix until just combined after each addition. Be careful not to overmix the batter at this stage. Overmixing develops gluten, which can result in tough cupcakes. Mix until the dry ingredients are just incorporated and no streaks of flour remain. The batter should be smooth and lump-free.
- Fill the Mini Muffin Tin: Using a spoon or a small cookie scoop, fill each mini muffin liner about two-thirds full with the cupcake batter. Filling them to two-thirds full allows room for the cupcakes to rise without overflowing. Using a cookie scoop helps to ensure uniform cupcake sizes, which leads to even baking. If you overfill the liners, the cupcakes may spill over the sides and become misshapen.
- Bake to Perfection: Place the filled mini muffin tin in the preheated oven and bake for 12-15 minutes, or until a wooden skewer inserted into the center of a cupcake comes out clean. Baking times can vary slightly depending on your oven, so it’s always best to check for doneness using the skewer test. The cupcakes should be lightly golden brown on top and spring back lightly when gently pressed. Avoid opening the oven door frequently during baking as this can cause temperature fluctuations and affect the cupcakes’ rise.
- Cool Down Completely: Once baked, remove the muffin tin from the oven and let it cool in the tin for a few minutes. This allows the cupcakes to set slightly and makes them easier to remove from the tin without breaking. After a few minutes, carefully transfer the cupcakes from the muffin tin to a wire rack to cool completely. Cooling them on a wire rack allows air to circulate around them, preventing condensation and ensuring they cool evenly. Make sure the cupcakes are completely cool before frosting, as frosting warm cupcakes will cause it to melt and slide off.
- Frosting Fantasy: While the cupcakes are cooling, prepare your buttercream frosting and divide it into several bowls, depending on how many different colors you want for your flowers. Tint each bowl of frosting with gel food coloring to achieve your desired shades. Start with a small amount of gel food coloring and gradually add more until you reach the desired color intensity. Remember that gel food coloring is concentrated, so a little goes a long way.
- Petal Power: Once the cupcakes are completely cooled, it’s time to decorate! Frost each cupcake with a thin layer of buttercream frosting as a base. This base layer helps the flower petals adhere better. Now, get creative with your candy melts or small candies to create flower petals. For a simple daisy, for example, arrange candy melts around the edge of the cupcake to form petals and place a yellow candy in the center for the flower’s center. You can create various flower designs using different colored candies and arranging them in different patterns. Use your imagination and have fun experimenting with different flower types and colors. If using a piping bag, you can pipe buttercream petals using a leaf tip for more realistic looking flower petals. A round tip can be used to pipe small dots or swirls in the center of the flowers.
- Finishing Touches: Add any finishing touches you desire! Sprinkles, edible pearls, or even small pieces of fresh fruit can be added to the center of the flowers or scattered around the petals for extra sparkle and visual appeal. Get the kids involved in this step – they’ll love adding their own creative flair to the flower cupcakes.
- Admire and Devour: Once decorated, your Mini Flower Cupcakes are ready to be admired and devoured! Arrange them beautifully on a platter or cupcake stand and watch as they bring smiles to everyone’s faces. These little floral delights are perfect for parties, celebrations, or simply a sweet treat any day of the week. Store leftover cupcakes in an airtight container at room temperature for up to 3 days or in the refrigerator for up to a week.
Nutrition
- Serving Size: one normal portion
- Calories: 120
- Fat: 5g