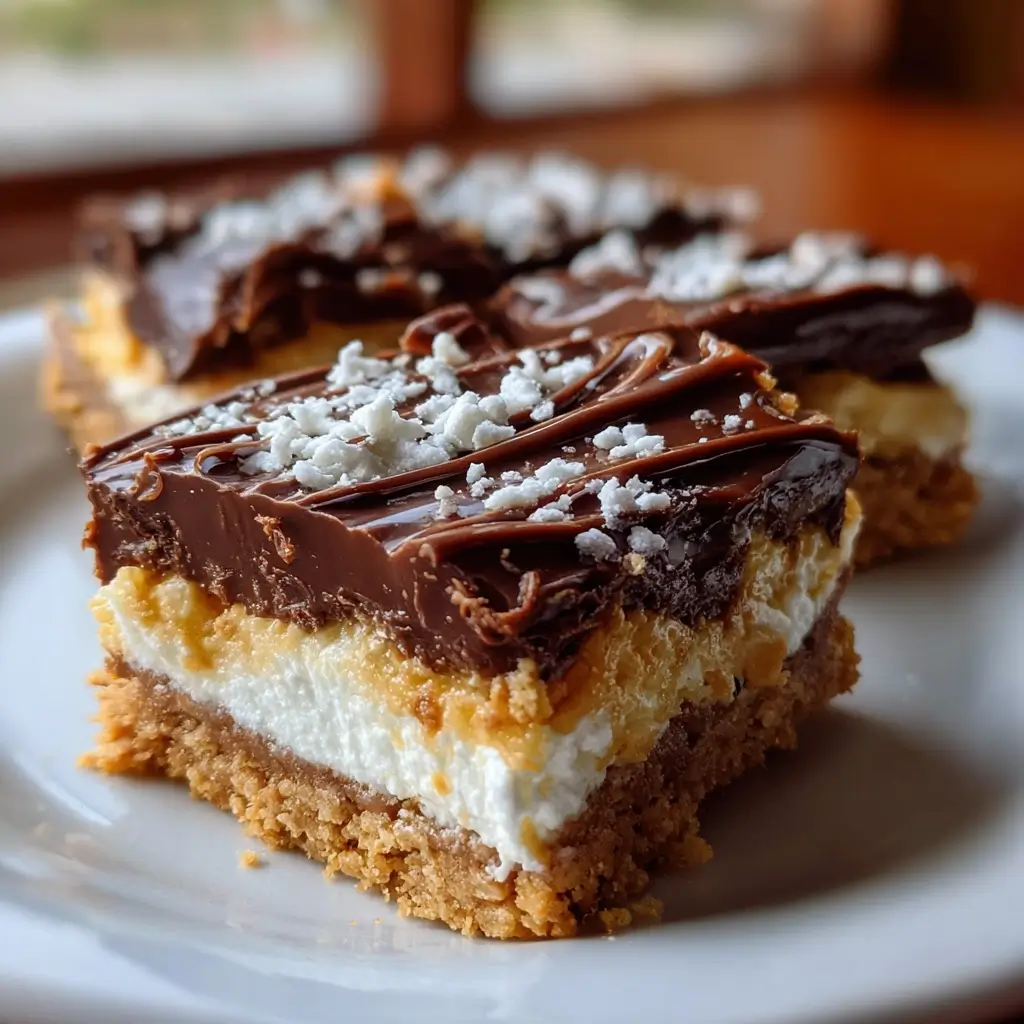
Of all the holidays, Halloween holds a special kind of magic in our house. It’s a whirlwind of costume planning, spooky decorations, and the ever-present question: “What fun treats are we making this year?” For years, I found myself wrestling with complicated recipes that promised ghoulishly good results but delivered mostly stress and a flour-dusted kitchen. That all changed the year I discovered the magic of these Mummy Graham Cracker Bars. I was looking for something simple, something the kids could help with, and something that would genuinely disappear from the plate at our annual neighborhood party. These bars were the answer. The moment I brought out the platter, a hush fell over the gaggle of little vampires and witches, followed by a chorus of “Whoa!” They are the perfect combination of textures and flavors: a buttery, crisp graham cracker crust forms the base, followed by a thick, chewy, marshmallow-and-chocolate layer that’s reminiscent of a s’more, all topped with a final layer of rich chocolate. The “mummy” decoration, a simple drizzle of white chocolate with two candy eyes peeking out, is what transforms them from a delicious dessert into a Halloween masterpiece. They are ridiculously easy, require no baking, and have become our non-negotiable Halloween tradition. They are the first treat to vanish at parties and the one recipe I get asked for year after year.
Ingredients
- Graham Cracker Crumbs (2 ½ cups): These form the crunchy, slightly sweet, and perfectly sandy foundation of our bars. You can buy pre-made crumbs or make your own by pulsing about 18 full graham cracker sheets in a food processor.
- Unsalted Butter (1 ½ cups, melted and divided): This rich, creamy butter is the essential binding agent for the crust and adds a silky, melt-in-your-mouth quality to the marshmallow filling. We’ll use 1 cup for the crust and ½ cup for the filling.
- Mini Marshmallows (one 16-ounce bag): The heart of our bars! These melt down into a wonderfully gooey, chewy, and sweet layer that perfectly complements the crunchy crust.
- Semi-Sweet Chocolate Chips (2 cups, divided): We use 1 ½ cups melted into the marshmallow layer for a deep, rich chocolate flavor, and the remaining ½ cup is sprinkled on top for an extra chocolatey bite.
- Milk Chocolate Chips (1 cup): Melted and spread as the final top layer, this adds a smoother, creamier chocolate finish that provides the perfect dark canvas for our mummy decorations.
- White Chocolate Melting Wafers or Chips (1 cup): This is our “mummy bandage.” Melted and drizzled over the top, it creates the iconic spooky look. Melting wafers are often easier to work with as they are designed to melt smoothly without seizing.
- Candy Eyeballs (approx. 48): The finishing touch that brings our mummies to life! These small edible sugar decorations are essential for achieving the cute, spooky look.
Instructions
Part 1: Creating the Buttery Graham Cracker Crust
- Prepare the Pan: Begin by lining a 9×13-inch baking pan with parchment paper, leaving a couple of inches of overhang on the two long sides. This overhang will act as “handles,” making it incredibly easy to lift the entire slab of bars out of the pan for clean cutting later. Lightly grease the parchment paper and the sides of the pan to ensure nothing sticks.
- Combine Crust Ingredients: In a medium-sized mixing bowl, combine the 2 ½ cups of graham cracker crumbs with 1 cup of the melted unsalted butter. Use a fork or a spatula to mix until all the crumbs are evenly moistened. The mixture should resemble wet sand.
- Press the Crust: Pour the buttery crumb mixture into your prepared pan. Using the bottom of a flat measuring cup or the back of a spoon, press the crumbs down firmly and evenly across the entire bottom of the pan. A tightly packed crust is key to ensuring your bars hold together perfectly. Place the pan in the refrigerator to chill and set while you prepare the next layer.
Part 2: Making the Chewy Chocolate Marshmallow Filling
- Melt the Core Ingredients: In a large, microwave-safe bowl (or in a saucepan over low heat), combine the entire 16-ounce bag of mini marshmallows, the remaining ½ cup of unsalted butter, and 1 ½ cups of the semi-sweet chocolate chips.
- Heat and Stir: If using a microwave, heat the mixture in 30-second intervals, stirring thoroughly after each interval. It’s crucial to stir well to distribute the heat and prevent the chocolate and marshmallows from scorching. Continue this process until the mixture is completely melted, smooth, and glossy. If using a stovetop, keep the heat on low and stir constantly until everything is melted and well combined.
- Add Final Chocolate Touch: Once the marshmallow mixture is smooth, remove it from the heat. Stir in the remaining ½ cup of semi-sweet chocolate chips. These chips won’t melt completely, leaving delightful little pockets of solid chocolate throughout the chewy filling.
Part 3: Assembling and Chilling the Bars
- Pour the Filling: Retrieve your chilled crust from the refrigerator. Pour the warm chocolate marshmallow mixture over the crust. Work quickly, as the mixture will begin to set. Use a greased spatula to spread it evenly all the way to the edges.
- Add the Top Chocolate Layer: In a separate small, microwave-safe bowl, melt the 1 cup of milk chocolate chips. Heat in 20-second intervals, stirring in between, until smooth. Pour the melted milk chocolate over the marshmallow layer and spread it into a thin, even coating.
- Chill to Set: Place the pan back into the refrigerator. Let the bars chill for a minimum of 2 hours, or until the layers are completely firm to the touch. This chilling time is essential for the bars to set properly and allow for clean slicing.
Part 4: Decorating Your Mummies
- Lift and Slice: Once the bars are fully chilled and firm, use the parchment paper handles to lift the entire block out of the pan and onto a cutting board. Using a large, sharp knife, cut the block into 24 even rectangular bars (a 4×6 grid is usually perfect).
- Melt the White Chocolate: In a small, microwave-safe bowl, melt the 1 cup of white chocolate wafers or chips. Again, use short intervals (15-20 seconds), stirring frequently, until perfectly smooth and pourable. Be extra careful with white chocolate, as it can seize or burn more easily than other chocolates.
- Create the Bandages: Transfer the melted white chocolate into a small ziplock bag and snip a tiny corner off, or use a piping bag with a small round tip. Drizzle the white chocolate back and forth across the top of each bar in a random, crisscrossing pattern to create the look of mummy bandages.
- Add the Eyes: While the white chocolate is still wet, gently press two candy eyeballs onto each bar, allowing them to peek out from between the “bandages.”
- Final Set: Allow the bars to sit at room temperature for about 15-20 minutes, or until the white chocolate drizzle has completely set. Your adorable and delicious Mummy Graham Cracker Bars are now ready to be devoured!
Nutrition Facts
Servings: 24 bars
Calories per serving: Approximately 280 kcal
- Carbohydrates (approx. 35g): The primary source of energy in these bars, coming from the graham crackers, sugar in the marshmallows, and chocolate. They provide the quick fuel needed for a night of trick-or-treating!
- Fat (approx. 15g): Sourced from the butter and chocolate, fat is essential for the rich flavor, creamy texture, and satisfying mouthfeel of these decadent treats.
- Sugar (approx. 25g): A key component that makes these bars a sweet and irresistible dessert. The sugar from the marshmallows and chocolate is what makes them a true Halloween indulgence.
- Protein (approx. 2g): A small amount of protein is present, primarily from the milk solids in the chocolate and butter, contributing to the overall structure.
- Sodium (approx. 120mg): The salt present in the graham crackers and butter helps to balance the sweetness and enhance the overall flavor profile of the bars.
Preparation Time
These no-bake bars are wonderfully quick to assemble, with most of the time being hands-off chilling.
- Active Preparation Time: Approximately 25-30 minutes. This includes preparing the pan, making the crust, melting the fillings, and assembling the layers.
- Chilling & Setting Time: Approximately 2 hours 30 minutes. This is crucial for the bars to firm up properly for slicing and decorating.
Total Time: Approximately 3 hours
How to Serve
These versatile mummy bars can be presented in numerous fun and festive ways to delight your guests.
- The Classic Halloween Party Platter:
- Arrange the Mummy Graham Cracker Bars on a large black or orange platter.
- Scatter plastic spiders, gummy worms, or candy corn around the bars for a more decorative and spooky effect.
- Place them alongside other Halloween-themed treats like “Witch Finger” pretzels, clementine “pumpkins,” or a bowl of “monster munch” popcorn mix.
- A Spooky Dessert “Charcuterie” Board:
- Make the mummy bars the star of a sweet-themed board.
- Surround them with bowls of different colored frostings for dipping, a variety of Halloween candies, chocolate-covered strawberries decorated like ghosts, and an assortment of cookies.
- Add a small bowl of “blood” (strawberry or raspberry coulis) for a dramatic touch.
- Individual Party Favors:
- Wrap each bar individually in a clear cellophane bag.
- Tie the bag with a festive orange and black ribbon.
- Attach a small tag that says “Thanks for a spooky good time!” for a perfect take-home treat for party guests.
- The Ultimate After-School Snack:
- Surprise your kids by packing one in their lunchbox during the week of Halloween for a special, festive treat.
- Serve one on a plate with a tall glass of milk or a steaming mug of hot cocoa topped with whipped cream and orange sprinkles after a chilly afternoon of playing in the leaves.
Additional Tips
- The Perfect Press for Your Crust: For an ultra-compact and even crust that won’t crumble, use the bottom of a flat, heavy glass or a metal measuring cup to firmly press the graham cracker mixture into the pan. Press down in the center first, then work your way to the edges and corners to ensure it’s uniform and dense.
- Marshmallow Melting Mastery: The key to a perfectly smooth marshmallow filling is low, slow heat and constant stirring. If you’re using a microwave, never heat for more than 30 seconds at a time without stirring. This prevents hot spots that can scorch the marshmallows and chocolate, which would create a bitter taste and grainy texture.
- For Flawless, Clean Slices: The secret to cutting these rich, layered bars without making a mess is a hot knife. Fill a tall glass with hot water and dip a long, sharp knife into it for about 10 seconds. Wipe the blade dry with a paper towel and make a cut. The heat from the blade will melt the chocolate just enough to slice through cleanly. Repeat this process, cleaning and heating the knife between each cut.
- White Chocolate Wisdom: White chocolate is notoriously finicky and can “seize” (become a thick, grainy paste) if it gets too hot or comes into contact with even a drop of water. For best results, use high-quality white chocolate melting wafers. If using chips, add about half a teaspoon of coconut oil or vegetable shortening to the bowl before melting to help it become smoother and more fluid.
- Get the Kids Involved: This is a fantastic recipe for little helpers. Let them crush the graham crackers (in a sealed bag with a rolling pin), stir the crust ingredients, press the crust into the pan, and, most importantly, place the candy eyeballs on the mummies. It makes the process a fun family activity and gives them pride in the final product.
- Make-Ahead Magic: You can easily prepare these bars ahead of a busy party day. Assemble the bars completely through the chilling of the milk chocolate top layer. Cover the pan tightly with plastic wrap and store it in the refrigerator for up to two days. When you’re ready to serve, simply lift, slice, and decorate. This breaks up the work and saves you time.
- Customize Your Mummies: Don’t be afraid to get creative! If you can’t find candy eyeballs, a dot of black icing or a mini chocolate chip can work in a pinch. You can also add a pinch of orange or black sprinkles over the white chocolate “bandages” while they’re still wet for an extra pop of Halloween color.
- Storage Secrets for Lasting Freshness: Store the finished Mummy Graham Cracker Bars in a single layer in an airtight container at room temperature for up to 4-5 days. Avoid stacking them, as the decorations can get smudged. There’s no need to refrigerate them after they’re set, as this can make the graham cracker crust lose some of its crispness.
FAQ Section
1. Can I use different types of cookies or crackers for the crust?
Absolutely! This recipe is very adaptable. For a different flavor profile, you could use crushed Oreo cookies (no need to remove the filling), Biscoff cookies for a spiced flavor, or even chocolate graham crackers for a double-chocolate version. Simply substitute the same measurement (2 ½ cups of crumbs) and proceed with the recipe as written.
2. My marshmallow layer was extremely sticky and hard to spread. What went wrong?
This usually happens if the marshmallow mixture is overheated or cooked for too long. Overcooking can cause the sugar to caramelize and become tough and sticky. The key is to melt the marshmallows, butter, and chocolate together over low heat (or in short microwave bursts) just until they are smooth and combined, then immediately pour it over the crust. Using a spatula lightly greased with butter or non-stick spray can also make spreading the layer much easier.
3. Is it possible to make these Mummy Graham Cracker Bars gluten-free?
Yes, it’s quite simple to make a gluten-free version. Just substitute the regular graham crackers with your favorite brand of gluten-free graham-style crackers. Ensure your chocolate chips and marshmallows are also certified gluten-free, as some brands can contain trace amounts of gluten. The rest of the recipe and instructions remain exactly the same.
4. How far in advance can I make these for a Halloween party?
These bars are perfect for making ahead. You can fully assemble and chill them (without the final mummy decorations) up to 2 days in advance. Keep them uncut in the pan, covered tightly with plastic wrap in the refrigerator. On the day of the party, allow them to sit at room temperature for about 20 minutes to make slicing easier, then decorate them with the white chocolate and candy eyes. This keeps the decorations looking fresh and crisp.
5. I can’t find candy eyeballs anywhere. What are some good alternatives?
If candy eyeballs are elusive, you have several creative options! You can use mini chocolate chips (pointy-side down), the round candy confetti sprinkles (use two black ones), or simply use a toothpick dipped in melted dark chocolate or a black decorating gel to dot on two small eyes after the white chocolate has set.
6. Can I use milk chocolate or dark chocolate instead of semi-sweet in the filling?
Of course. The type of chocolate you use is up to your personal preference. Using all milk chocolate will result in a sweeter, creamier bar. Using dark chocolate (60% cacao or higher) will create a richer, more intense, and less sweet bar that adults often prefer. Semi-sweet offers a nice balance, but feel free to experiment to find your perfect chocolate combination.
7. My bars seem too soft and didn’t set properly in the fridge. What should I do?
The most common reason for bars not setting is insufficient chilling time. They really do need a solid 2 hours (or more) in the refrigerator for all the layers to become firm. Another possibility is that the ratio of butter or marshmallows to crumbs was slightly off. If they still feel too soft after adequate chilling, you can try placing them in the freezer for 30-45 minutes to help them firm up quickly before slicing.
8. Can I freeze these Mummy Graham Cracker Bars for later?
Yes, these bars freeze surprisingly well. For best results, freeze them before adding the white chocolate and candy eye decorations. Place the sliced, undecorated bars on a baking sheet in a single layer and freeze until solid. Then, transfer them to a freezer-safe bag or container, with parchment paper between the layers, for up to 3 months. When you’re ready to serve, let them thaw at room temperature for an hour or two, then decorate them as usual.


