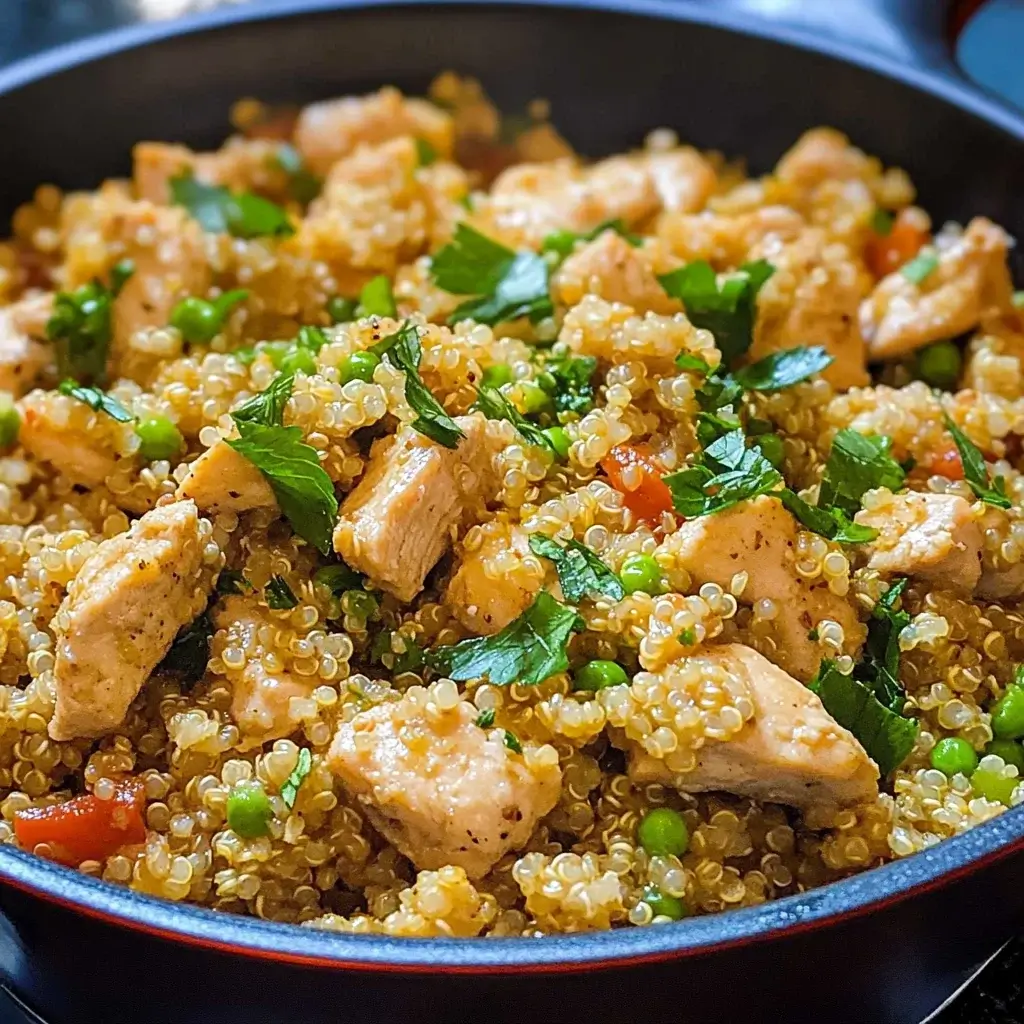
Honestly, weeknight dinners can be a real battlefield, can’t they? Between juggling work, kids, and just plain exhaustion, the thought of cooking something healthy and delicious often feels like a Herculean task. That’s why I’m always on the lookout for recipes that are both easy and satisfying. Enter this One-Pot Garlic Chicken Quinoa. I stumbled upon this gem a few weeks ago, and let me tell you, it’s been a game-changer in our house. Even my picky eaters (yes, the ones who think vegetables are the enemy) cleaned their plates! The aroma of garlic wafting through the kitchen is just divine, and the best part? Minimal cleanup! It’s become a regular in our rotation, and I’m excited to share this simple yet flavorful recipe with you – a guaranteed crowd-pleaser that will make your weeknights a whole lot easier and tastier.
Ingredients
- Chicken Breast: 1.5 lbs, boneless, skinless chicken breasts, cut into bite-sized pieces. Provides lean protein, the star of our dish, ensuring a satisfying and hearty meal.
- Quinoa: 1 cup, uncooked, rinsed. A nutritious grain, offering a complete protein and fiber, adding a wonderful texture and nutty flavor.
- Chicken Broth: 2 cups, low sodium. The liquid base for cooking the quinoa and chicken, infusing flavor and moisture into the dish.
- Garlic: 6 cloves, minced. The aromatic powerhouse of this recipe, delivering a pungent and savory flavor that elevates the entire dish.
- Onion: 1 medium, chopped. A foundational aromatic, providing a subtle sweetness and depth of flavor to the base of the recipe.
- Bell Pepper: 1 large, any color, chopped. Adds sweetness, crunch, and vibrant color, contributing essential vitamins and antioxidants.
- Spinach: 5 oz, fresh, baby spinach. A leafy green powerhouse, packed with nutrients, adding a subtle earthy flavor and wilting beautifully into the dish.
- Olive Oil: 2 tablespoons. Used for sautéing and adding richness, a healthy fat that enhances flavor and prevents sticking.
- Dried Oregano: 1 teaspoon. A classic Mediterranean herb, adding a warm, slightly peppery note that complements the garlic and chicken.
- Dried Thyme: 1 teaspoon. Another aromatic herb, providing an earthy, slightly minty flavor that pairs perfectly with chicken and garlic.
- Salt: 1 teaspoon, or to taste. Essential for seasoning and enhancing the flavors of all the ingredients.
- Black Pepper: ½ teaspoon, or to taste. Adds a touch of spice and depth, balancing the flavors and enhancing the overall taste.
- Red Pepper Flakes (Optional): ¼ teaspoon, or to taste. For a hint of heat, adding a subtle kick to the dish, especially if you enjoy a bit of spice.
- Fresh Parsley (Optional): 2 tablespoons, chopped, for garnish. Adds a fresh, vibrant finish and a pop of color when serving.
- Lemon Juice (Optional): 1 tablespoon, fresh, for brightness. A squeeze of lemon juice at the end brightens the flavors and adds a zesty touch.
Instructions
- Sauté Aromatics: Heat olive oil in a large pot or Dutch oven over medium heat. Add chopped onion and cook for about 3-4 minutes, until softened and translucent, stirring occasionally to prevent burning. Sautéing the onion first releases its natural sugars and builds a flavorful base for the dish. You’ll know it’s ready when it becomes soft and slightly see-through, releasing a sweet aroma. Don’t rush this step, as a well-sautéed onion is key to a flavorful dish.
- Add Garlic and Bell Pepper: Add minced garlic and chopped bell pepper to the pot. Cook for another 2-3 minutes, until fragrant and the bell pepper is slightly softened. Stir frequently to prevent the garlic from burning, as burnt garlic can become bitter. The garlic will release its pungent aroma, and the bell pepper will begin to soften, adding sweetness and color to the mix. This step further layers the flavor profile of the dish.
- Brown the Chicken: Add the bite-sized chicken pieces to the pot. Season with salt, black pepper, oregano, and thyme. Cook, stirring occasionally, until the chicken is browned on all sides. Browning the chicken is crucial for developing flavor and sealing in the juices. Don’t overcrowd the pot; if necessary, brown the chicken in batches to ensure even browning. The spices will coat the chicken and infuse it with aromatic flavors as it cooks. You are not cooking the chicken through at this point, just browning the exterior.
- Add Quinoa and Broth: Pour in the rinsed quinoa and chicken broth into the pot. Stir well to combine all ingredients, ensuring the quinoa is evenly distributed in the broth. Make sure all the quinoa is submerged in the liquid for even cooking. Stirring ensures that all the flavors meld together and the quinoa will cook properly in the broth.
- Bring to a Boil and Simmer: Bring the mixture to a boil over high heat. Once boiling, reduce the heat to low, cover the pot, and let it simmer for 15-20 minutes, or until the quinoa is cooked through and the liquid is absorbed. Reducing the heat to a simmer after boiling is essential to prevent the bottom from scorching and to allow the quinoa to cook gently and absorb the broth. Keep the pot covered to trap steam and ensure even cooking. The quinoa is cooked when it’s fluffy and translucent, and most of the liquid has been absorbed.
- Stir in Spinach: Remove the pot from the heat and stir in the fresh spinach. Cover the pot again and let it sit for 2-3 minutes, or until the spinach is wilted. The residual heat from the cooked quinoa and chicken is enough to wilt the spinach beautifully. Covering the pot helps to steam the spinach gently and retain its vibrant green color and nutrients. Stir gently to incorporate the wilted spinach throughout the dish.
- Fluff and Serve: Fluff the quinoa with a fork. This step helps to separate the grains and create a light and airy texture. Fluffing also distributes the spinach and chicken evenly throughout the dish.
- Optional Garnishes: If desired, stir in fresh parsley and a squeeze of lemon juice before serving. Fresh parsley adds a bright, herbaceous note and a pop of color. Lemon juice adds a touch of acidity that brightens the overall flavors and balances the richness of the dish. These garnishes are optional but highly recommended to elevate the final dish.
- Serve Hot: Serve immediately while hot. This dish is best enjoyed fresh and warm. It can be served as a complete meal on its own or with a side salad for a more balanced dinner.
Nutrition Facts
(Per Serving, approximately based on 6 servings)
- Servings: 6
- Calories: 420 kcal
- Protein: 40g
(Please note: Nutritional values are estimates and can vary based on specific ingredients and portion sizes. For precise nutritional information, use a nutrition calculator with the specific brands and quantities of ingredients used.)
Preparation Time
- Prep Time: 15 minutes (Chopping vegetables, cutting chicken, measuring ingredients). This includes all the initial steps of getting your ingredients ready – washing, chopping, and measuring. Efficient prep work makes the cooking process smoother and faster.
- Cook Time: 30 minutes (Sautéing, browning chicken, simmering quinoa). This is the active cooking time on the stove. The majority of this time is hands-off simmering, allowing you to focus on other tasks while the dish cooks.
- Total Time: 45 minutes (From start to finish, a quick and convenient meal). In under an hour, you can have a healthy, delicious, and satisfying meal on the table, perfect for busy weeknights.
How to Serve
This One-Pot Garlic Chicken Quinoa is incredibly versatile and can be served in numerous delicious ways. Here are a few ideas to elevate your meal:
- As a Complete Meal:
- Serve it as is! It’s a perfectly balanced meal with protein, carbohydrates, and vegetables all in one pot.
- Garnish with extra fresh parsley and a lemon wedge on the side for added freshness and flavor.
- A dollop of plain Greek yogurt or a spoonful of pesto can add a creamy or herby element, respectively.
- With Side Salads:
- Simple Green Salad: A light vinaigrette-dressed green salad with mixed greens, cucumber, and tomatoes provides a refreshing contrast to the warm quinoa dish.
- Mediterranean Salad: Pair it with a Mediterranean salad featuring cucumbers, tomatoes, red onion, olives, and feta cheese for a complementary flavor profile.
- Arugula Salad with Lemon Dressing: The peppery arugula and zesty lemon dressing cut through the richness of the quinoa and chicken.
- Alongside Roasted Vegetables:
- Roasted Broccoli or Asparagus: Roast broccoli or asparagus with olive oil, salt, and pepper for a simple and healthy side that adds extra vegetables to your meal.
- Roasted Brussels Sprouts: Crispy roasted Brussels sprouts offer a slightly bitter and nutty flavor that complements the garlic and chicken.
- Roasted Sweet Potatoes: Sweet roasted sweet potatoes provide a touch of sweetness and a different texture contrast to the quinoa.
- In Bowls with Toppings:
- Grain Bowl Style: Serve the quinoa mixture in bowls and let everyone customize their toppings.
- Topping Ideas: Consider adding avocado slices, crumbled feta cheese, sun-dried tomatoes, Kalamata olives, toasted pine nuts, or a drizzle of balsamic glaze.
- As Meal Prep:
- Prepare Ahead: This recipe is excellent for meal prepping. Make a big batch on Sunday and portion it out for lunches or dinners throughout the week.
- Reheat Instructions: Reheat gently in the microwave or on the stovetop with a splash of broth or water if needed to maintain moisture.
Additional Tips
Here are 8 helpful tips to make your One-Pot Garlic Chicken Quinoa even better:
- Rinse Your Quinoa: Always rinse quinoa before cooking it. Rinsing removes saponin, a natural coating that can make quinoa taste bitter. Use a fine-mesh sieve and rinse under cold water for a minute or two until the water runs clear. This simple step significantly improves the flavor of your quinoa.
- Don’t Overcook the Quinoa: Overcooked quinoa can become mushy. Follow the cooking time instructions closely and check for doneness around the 15-minute mark. The quinoa is cooked when it’s fluffy and the white germ ring is visible around the grain. If there’s still liquid remaining after 20 minutes, continue simmering uncovered until the liquid is absorbed.
- Use Fresh Garlic: Freshly minced garlic provides the best flavor. Garlic powder can be used in a pinch, but fresh garlic delivers a much more pungent and aromatic flavor that is central to this recipe.
- Customize Your Vegetables: Feel free to swap or add other vegetables based on your preferences and what you have on hand. Diced carrots, zucchini, mushrooms, or peas would all be delicious additions. Consider the cooking time of different vegetables and add them accordingly; harder vegetables like carrots may need to be added earlier.
- Spice it Up: If you like a spicier dish, increase the amount of red pepper flakes or add a pinch of cayenne pepper. You can also add a dash of hot sauce at the end for extra heat. Experiment with different chili flakes or sauces to find your preferred level of spice.
- Make it Cheesy (Optional): For a creamier and richer dish, stir in ½ cup of shredded Parmesan cheese or crumbled feta cheese at the end, along with the spinach. The cheese will melt into the hot quinoa, adding a cheesy and savory element.
- Add Sun-Dried Tomatoes: For a more intense flavor, add ½ cup of oil-packed sun-dried tomatoes, drained and chopped, along with the bell peppers and garlic. Sun-dried tomatoes add a chewy texture and a concentrated tomato flavor that complements the garlic and chicken beautifully.
- Make it Ahead for Meal Prep: This recipe is perfect for meal prepping. It stores well in the refrigerator for up to 4 days. Store in airtight containers and reheat as needed. The flavors often meld together even more overnight, making it even tastier the next day.
Frequently Asked Questions (FAQ)
Q1: Can I use brown rice instead of quinoa?
A: Yes, you can substitute brown rice for quinoa. However, brown rice requires a longer cooking time. You will likely need to increase the cooking time to around 40-45 minutes. Also, brown rice will absorb more liquid, so you might need to add a bit more broth to ensure it cooks properly and doesn’t dry out. The texture and nutritional profile will be slightly different, but it will still be a delicious and hearty meal.
Q2: Can I make this recipe vegetarian or vegan?
A: Absolutely! To make this recipe vegetarian, simply omit the chicken. For a vegan version, omit the chicken and ensure you are using vegetable broth instead of chicken broth. To maintain the protein content, you can add a can of drained and rinsed chickpeas or white beans along with the quinoa. You can also add more vegetables like mushrooms or diced sweet potatoes to make it even heartier.
Q3: Can I use frozen spinach instead of fresh?
A: Yes, you can use frozen spinach. If using frozen spinach, you’ll need about 10 ounces of frozen spinach, thawed and squeezed dry to remove excess water. Add the thawed spinach to the pot at the same time as you would fresh spinach, stirring it in and letting it heat through. Be sure to squeeze out as much excess water as possible from the thawed spinach to prevent the dish from becoming watery.
Q4: How do I store leftover One-Pot Garlic Chicken Quinoa?
A: Store leftover One-Pot Garlic Chicken Quinoa in an airtight container in the refrigerator for up to 3-4 days. Ensure it has cooled down completely before refrigerating. For longer storage, you can freeze it in freezer-safe containers for up to 2-3 months. Thaw overnight in the refrigerator before reheating.
Q5: How do I reheat leftover quinoa?
A: Reheat leftover One-Pot Garlic Chicken Quinoa in the microwave or on the stovetop. For microwaving, heat in 1-2 minute intervals, stirring in between, until heated through. For stovetop reheating, add a splash of chicken broth or water to the pot to prevent it from drying out and heat over medium-low heat, stirring occasionally, until warmed through.
Q6: Can I use different types of quinoa for this recipe?
A: Yes, you can use different types of quinoa such as white, red, or black quinoa. White quinoa is the most common and cooks the quickest. Red and black quinoa have a slightly nuttier flavor and may take a minute or two longer to cook. Follow the cooking instructions on the quinoa package for best results. The overall recipe will work well with any type of quinoa.
Q7: Can I add cheese to this recipe?
A: Yes, adding cheese can make this dish even more delicious and creamy. Stir in ½ cup of shredded Parmesan cheese, mozzarella, or crumbled feta cheese during the last few minutes of cooking or right before serving. The cheese will melt into the hot quinoa and add a rich, savory flavor. You can also sprinkle cheese on top as a garnish when serving.
Q8: Is this recipe gluten-free and dairy-free?
A: Yes, this recipe is naturally gluten-free as quinoa is a gluten-free grain. It is also dairy-free as written. To ensure it remains dairy-free if adding cheese, use a dairy-free cheese alternative or omit the cheese. Always double-check the labels of your broth and spices to ensure they are gluten-free and dairy-free if you have strict dietary restrictions.
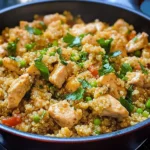
One-Pot Garlic Chicken Quinoa
Ingredients
- Chicken Breast: 1.5 lbs, boneless, skinless chicken breasts, cut into bite-sized pieces. Provides lean protein, the star of our dish, ensuring a satisfying and hearty meal.
- Quinoa: 1 cup, uncooked, rinsed. A nutritious grain, offering a complete protein and fiber, adding a wonderful texture and nutty flavor.
- Chicken Broth: 2 cups, low sodium. The liquid base for cooking the quinoa and chicken, infusing flavor and moisture into the dish.
- Garlic: 6 cloves, minced. The aromatic powerhouse of this recipe, delivering a pungent and savory flavor that elevates the entire dish.
- Onion: 1 medium, chopped. A foundational aromatic, providing a subtle sweetness and depth of flavor to the base of the recipe.
- Bell Pepper: 1 large, any color, chopped. Adds sweetness, crunch, and vibrant color, contributing essential vitamins and antioxidants.
- Spinach: 5 oz, fresh, baby spinach. A leafy green powerhouse, packed with nutrients, adding a subtle earthy flavor and wilting beautifully into the dish.
- Olive Oil: 2 tablespoons. Used for sautéing and adding richness, a healthy fat that enhances flavor and prevents sticking.
- Dried Oregano: 1 teaspoon. A classic Mediterranean herb, adding a warm, slightly peppery note that complements the garlic and chicken.
- Dried Thyme: 1 teaspoon. Another aromatic herb, providing an earthy, slightly minty flavor that pairs perfectly with chicken and garlic.
- Salt: 1 teaspoon, or to taste. Essential for seasoning and enhancing the flavors of all the ingredients.
- Black Pepper: ½ teaspoon, or to taste. Adds a touch of spice and depth, balancing the flavors and enhancing the overall taste.
- Red Pepper Flakes (Optional): ¼ teaspoon, or to taste. For a hint of heat, adding a subtle kick to the dish, especially if you enjoy a bit of spice.
- Fresh Parsley (Optional): 2 tablespoons, chopped, for garnish. Adds a fresh, vibrant finish and a pop of color when serving.
- Lemon Juice (Optional): 1 tablespoon, fresh, for brightness. A squeeze of lemon juice at the end brightens the flavors and adds a zesty touch.
Instructions
- Sauté Aromatics: Heat olive oil in a large pot or Dutch oven over medium heat. Add chopped onion and cook for about 3-4 minutes, until softened and translucent, stirring occasionally to prevent burning. Sautéing the onion first releases its natural sugars and builds a flavorful base for the dish. You’ll know it’s ready when it becomes soft and slightly see-through, releasing a sweet aroma. Don’t rush this step, as a well-sautéed onion is key to a flavorful dish.
- Add Garlic and Bell Pepper: Add minced garlic and chopped bell pepper to the pot. Cook for another 2-3 minutes, until fragrant and the bell pepper is slightly softened. Stir frequently to prevent the garlic from burning, as burnt garlic can become bitter. The garlic will release its pungent aroma, and the bell pepper will begin to soften, adding sweetness and color to the mix. This step further layers the flavor profile of the dish.
- Brown the Chicken: Add the bite-sized chicken pieces to the pot. Season with salt, black pepper, oregano, and thyme. Cook, stirring occasionally, until the chicken is browned on all sides. Browning the chicken is crucial for developing flavor and sealing in the juices. Don’t overcrowd the pot; if necessary, brown the chicken in batches to ensure even browning. The spices will coat the chicken and infuse it with aromatic flavors as it cooks. You are not cooking the chicken through at this point, just browning the exterior.
- Add Quinoa and Broth: Pour in the rinsed quinoa and chicken broth into the pot. Stir well to combine all ingredients, ensuring the quinoa is evenly distributed in the broth. Make sure all the quinoa is submerged in the liquid for even cooking. Stirring ensures that all the flavors meld together and the quinoa will cook properly in the broth.
- Bring to a Boil and Simmer: Bring the mixture to a boil over high heat. Once boiling, reduce the heat to low, cover the pot, and let it simmer for 15-20 minutes, or until the quinoa is cooked through and the liquid is absorbed. Reducing the heat to a simmer after boiling is essential to prevent the bottom from scorching and to allow the quinoa to cook gently and absorb the broth. Keep the pot covered to trap steam and ensure even cooking. The quinoa is cooked when it’s fluffy and translucent, and most of the liquid has been absorbed.
- Stir in Spinach: Remove the pot from the heat and stir in the fresh spinach. Cover the pot again and let it sit for 2-3 minutes, or until the spinach is wilted. The residual heat from the cooked quinoa and chicken is enough to wilt the spinach beautifully. Covering the pot helps to steam the spinach gently and retain its vibrant green color and nutrients. Stir gently to incorporate the wilted spinach throughout the dish.
- Fluff and Serve: Fluff the quinoa with a fork. This step helps to separate the grains and create a light and airy texture. Fluffing also distributes the spinach and chicken evenly throughout the dish.
- Optional Garnishes: If desired, stir in fresh parsley and a squeeze of lemon juice before serving. Fresh parsley adds a bright, herbaceous note and a pop of color. Lemon juice adds a touch of acidity that brightens the overall flavors and balances the richness of the dish. These garnishes are optional but highly recommended to elevate the final dish.
- Serve Hot: Serve immediately while hot. This dish is best enjoyed fresh and warm. It can be served as a complete meal on its own or with a side salad for a more balanced dinner.
Nutrition
- Serving Size: one normal portion
- Calories: 420
- Protein: 40g