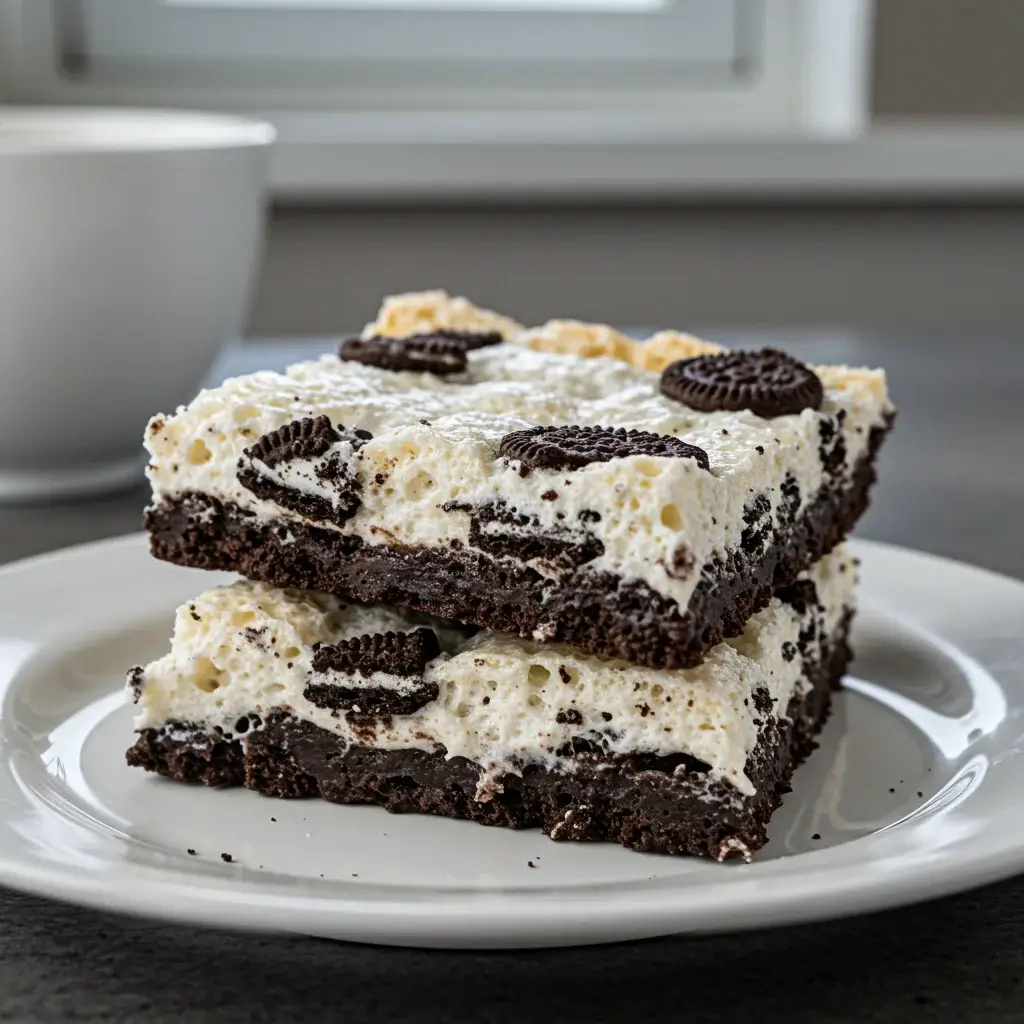
If you’re a fan of delectable desserts that combine the best of gooey marshmallows and crunchy Oreo cookies, then you’re in for a treat! Oreo Marshmallow Dream Bars are a dessert lover’s fantasy come true. These bars are not only deliciously satisfying but also incredibly easy to make. In this article, we’ll dive into everything you need to know about creating these delightful treats, from the ingredients needed to the best ways to serve them. Let’s embark on this sweet journey!
Ingredients
Before you start making these heavenly bars, ensure you have all the necessary ingredients on hand. Here’s what you’ll need:
- 24 Oreo cookies: crushed into chunky pieces
- 1/2 cup (1 stick) of unsalted butter: melted
- 10 cups of mini marshmallows
- 1/2 cup of sweetened condensed milk
- 1 teaspoon of vanilla extract
- 1/4 teaspoon of salt
- 1 cup of semi-sweet chocolate chips (optional)
- 1/2 cup of white chocolate chips (optional)
These ingredients come together to create an indulgent treat that’s guaranteed to be a hit at any gathering or as a sweet personal indulgence.
Instructions
Creating Oreo Marshmallow Dream Bars is a straightforward process. Simply follow these steps to bring the magic to life:
Step 1: Prepare Your Baking Dish
- Line a 9×13-inch baking dish with parchment paper or aluminum foil, allowing some overhang for easy removal later. Lightly grease the lining to prevent sticking.
Step 2: Crush the Oreos
- Place the Oreo cookies in a resealable plastic bag and crush them using a rolling pin. Aim for a mix of fine crumbs and chunkier pieces for texture.
Step 3: Melt the Butter and Marshmallows
- In a large saucepan over medium heat, melt the butter.
- Once the butter has melted, add 8 cups of mini marshmallows to the saucepan, stirring continuously until they are completely melted and smooth.
Step 4: Combine Ingredients
- Remove the saucepan from the heat and stir in the sweetened condensed milk, vanilla extract, and salt until well combined.
- Fold in the crushed Oreos and the remaining 2 cups of mini marshmallows. Mix until the ingredients are evenly distributed.
Step 5: Bake the Bars
- Transfer the mixture into the prepared baking dish, pressing it down gently with a spatula to create an even layer.
- (Optional) Sprinkle the semi-sweet and white chocolate chips evenly over the top.
- Bake in a preheated oven at 350°F (175°C) for about 15 minutes or until the edges are lightly golden.
Step 6: Cool and Serve
- Allow the bars to cool in the baking dish for about 20 minutes.
- Use the overhang from the parchment paper or foil to lift the bars out of the dish.
- Cut into squares and serve.
Nutrition Facts
Understanding the nutritional content of your indulgence can help you enjoy it responsibly. Here’s an approximate breakdown of the nutrition per serving (based on 24 servings):
- Calories: 180
- Total Fat: 8g
- Cholesterol: 15mg
- Sodium: 120mg
Please note that these values can vary based on the specific brands and types of ingredients used.
How to Serve
Oreo Marshmallow Dream Bars are incredibly versatile and can be served in various delightful ways, making them a perfect addition to any gathering or celebration. Here are some comprehensive suggestions to elevate your serving experience:
Classic Presentation
Start with a simple yet elegant presentation that showcases the bars’ rich textures and vibrant colors. Cut the bars into uniform squares, approximately 2 inches by 2 inches, to ensure each piece is easy to handle. Arrange the squares on a large, decorative platter or cake stand, which can elevate the overall aesthetic of your dessert table. Consider placing a few fresh mint leaves or edible flowers around the bars to add a touch of color and freshness. For an added visual pop, you can use a contrasting colored plate or tablecloth to highlight the dark chocolate and creamy marshmallow layers.
A La Mode
For a truly indulgent dessert experience, serve the Oreo Marshmallow Dream Bars with a scoop of creamy vanilla ice cream. The contrast between the warm, gooey bars and the cold ice cream creates a delightful balance of temperatures and textures. To take it a step further, consider using flavored ice cream such as cookies and cream, chocolate fudge, or even a salted caramel variety to complement the chocolatey goodness of the bars. You can also serve the ice cream in a waffle cone or cup on the side for a fun, interactive element that guests will love.
Drizzle with Chocolate
Enhance the already rich flavor of the Oreo Marshmallow Dream Bars by drizzling them with melted chocolate just before serving. Choose high-quality dark, milk, or white chocolate to create a luxurious finish. To do this, melt the chocolate in a microwave-safe bowl in short bursts, stirring between intervals until smooth. Once melted, transfer the chocolate to a piping bag or a small ziplock bag with a corner snipped off for precision. Drizzle the chocolate over the bars in a zigzag pattern for a beautiful presentation. For an added touch, sprinkle crushed Oreos or chocolate shavings over the top while the chocolate is still warm, allowing them to adhere beautifully.
Festive Toppings
Elevate the visual appeal of your Oreo Marshmallow Dream Bars with seasonal toppings that match the occasion. For a birthday party, consider adding colorful sprinkles or edible glitter on top of the chocolate drizzle to create a festive look. During holidays, you can switch it up with themed toppings—red and green sprinkles for Christmas, pastel-colored candies for Easter, or orange and black sprinkles for Halloween. You can also incorporate fresh fruit such as raspberries or strawberries on the side, which not only adds a pop of color but also provides a fresh contrast to the richness of the bars.
Individual Portions
For a more personalized serving option, consider cutting the bars into smaller rectangles or squares and serving them in individual paper or cupcake liners. This approach not only makes for easy serving but also gives each guest their own delightful treat. You can even label each dessert with a cute tag to make it more interactive, perhaps allowing guests to choose their favorite toppings or drizzles.
Pairings
To enhance the overall serving experience, consider offering beverage pairings that complement the sweet flavors of the bars. A glass of cold milk is a classic choice that never goes out of style. For a more adult twist, try serving the bars alongside a rich, dark roast coffee or an espresso. If you’re in the mood for something festive, consider a dessert wine or a sweet liqueur that pairs well with chocolate, such as Irish cream or hazelnut liqueur.
By exploring these various serving methods, you can ensure that your Oreo Marshmallow Dream Bars are not only delicious but also an eye-catching centerpiece that will delight your guests and leave a lasting impression. Whether you opt for a classic presentation or get creative with toppings and pairings, these bars are sure to be a hit!
Additional Tips
To ensure your Oreo Marshmallow Dream Bars turn out perfectly every time, consider these valuable tips that will enhance both the flavor and presentation of your treats:
Use Fresh Ingredients
One of the most crucial aspects of baking is the quality of your ingredients. Fresh marshmallows and Oreos not only contribute to the best possible taste but also affect the texture of your bars. Stale marshmallows can become hard and chewy, rather than soft and gooey, while expired Oreos may lack their signature crunch. Always check the expiration dates and, if possible, purchase your ingredients shortly before you plan to bake. For the best results, look for marshmallows that are soft and puffy, as they will melt beautifully when combined with your other ingredients.
Experiment with Flavors
Don’t be afraid to get creative when it comes to flavors! While the classic Oreo is a delicious choice, there are numerous Oreo varieties available that can add an exciting twist to your bars. For instance, using Mint Oreos will impart a refreshing minty flavor, while Golden Oreos can provide a lighter, buttery taste. Additionally, you could consider incorporating seasonal flavors, such as Pumpkin Spice Oreos in the fall or Gingerbread Oreos around the holidays. For a more adventurous approach, think about adding complementary flavors like peanut butter chips, chocolate chips, or even a sprinkle of sea salt to enhance the overall taste experience.
Storage Tips
Proper storage is essential for maintaining the freshness of your Oreo Marshmallow Dream Bars. After they have cooled completely, place them in an airtight container. This will help to prevent them from drying out and keep them soft and chewy. At room temperature, these bars can last for up to a week. If you find that you have leftovers or want to prepare them in advance, freezing is a fantastic option. Individually wrap each bar in plastic wrap, then place them in a freezer-safe bag. This method not only preserves their flavor and texture but also allows for easy portioning when you’re craving a sweet treat. When you’re ready to enjoy a frozen bar, simply let it thaw at room temperature for about 30 minutes.
Less Sweet Option
For those who prefer a less sweet dessert, you can easily adjust the sweetness of your Oreo Marshmallow Dream Bars by modifying the amount of sweetened condensed milk used in the recipe. Reducing the quantity of sweetened condensed milk will result in a less sugary treat while still maintaining a creamy texture. You can start by decreasing the amount by a quarter and taste-testing the mixture before baking. Additionally, consider balancing the sweetness by incorporating ingredients like unsweetened cocoa powder or dark chocolate chips, which can add depth and richness while counteracting the overall sweetness.
Add Texture
Texture plays a significant role in the enjoyment of any dessert. To add a delightful crunch to your Oreo Marshmallow Dream Bars, consider mixing in chopped nuts such as pecans, walnuts, or almonds. Alternatively, you could fold in some crushed pretzels for a salty-sweet combination that contrasts beautifully with the creamy filling. This not only elevates the flavor profile but also gives the bars an interesting texture that makes each bite more enjoyable.
Presentation Matters
Lastly, don’t underestimate the power of presentation. Once your bars are cooled and set, cut them into uniform squares or rectangles for a polished look. For an added touch, drizzle melted chocolate or white chocolate over the top and sprinkle with crushed Oreos or colorful sprinkles before serving. This simple enhancement makes your dessert visually appealing and perfect for sharing at parties, gatherings, or special occasions.
By following these tips, you can elevate your Oreo Marshmallow Dream Bars from delicious to extraordinary, impressing family and friends with every bite. Enjoy the process of baking and feel free to make these bars your own!
FAQs
Can I use large marshmallows instead of mini ones?
Yes, you can use large marshmallows, but mini marshmallows melt more evenly and are easier to measure. If using large marshmallows, be sure to cut them into smaller pieces before melting.
What if I don’t have sweetened condensed milk?
You can substitute sweetened condensed milk with an equal amount of heavy cream, though the bars will be less sweet.
Can these bars be made gluten-free?
Yes, use gluten-free Oreos and ensure all other ingredients are certified gluten-free to make this recipe suitable for those with gluten sensitivities.
How do I keep the bars from sticking to the pan?
Lining your baking dish with parchment paper or foil and lightly greasing it will help prevent sticking when removing the bars.
Conclusion
Oreo Marshmallow Dream Bars are the perfect treat for any occasion, combining the gooey goodness of marshmallows with the irresistible crunch of Oreo cookies. Whether you’re serving them at a party or enjoying them as a personal indulgence, these bars are sure to satisfy any sweet tooth. With simple ingredients and straightforward instructions, anyone can make these delectable bars and enjoy their sweet rewards. Try them today and let your taste buds revel in the dreamlike flavors of Oreo Marshmallow Dream Bars!
Print
Oreo Marshmallow Dream Bars
Ingredients
Before you start making these heavenly bars, ensure you have all the necessary ingredients on hand. Here’s what you’ll need:
- 24 Oreo cookies: crushed into chunky pieces
- 1/2 cup (1 stick) of unsalted butter: melted
- 10 cups of mini marshmallows
- 1/2 cup of sweetened condensed milk
- 1 teaspoon of vanilla extract
- 1/4 teaspoon of salt
- 1 cup of semi-sweet chocolate chips (optional)
- 1/2 cup of white chocolate chips (optional)
Instructions
Creating Oreo Marshmallow Dream Bars is a straightforward process. Simply follow these steps to bring the magic to life:
Step 1: Prepare Your Baking Dish
- Line a 9×13-inch baking dish with parchment paper or aluminum foil, allowing some overhang for easy removal later. Lightly grease the lining to prevent sticking.
Step 2: Crush the Oreos
- Place the Oreo cookies in a resealable plastic bag and crush them using a rolling pin. Aim for a mix of fine crumbs and chunkier pieces for texture.
Step 3: Melt the Butter and Marshmallows
- In a large saucepan over medium heat, melt the butter.
- Once the butter has melted, add 8 cups of mini marshmallows to the saucepan, stirring continuously until they are completely melted and smooth.
Step 4: Combine Ingredients
- Remove the saucepan from the heat and stir in the sweetened condensed milk, vanilla extract, and salt until well combined.
- Fold in the crushed Oreos and the remaining 2 cups of mini marshmallows. Mix until the ingredients are evenly distributed.
Step 5: Bake the Bars
- Transfer the mixture into the prepared baking dish, pressing it down gently with a spatula to create an even layer.
- (Optional) Sprinkle the semi-sweet and white chocolate chips evenly over the top.
- Bake in a preheated oven at 350°F (175°C) for about 15 minutes or until the edges are lightly golden.
Step 6: Cool and Serve
- Allow the bars to cool in the baking dish for about 20 minutes.
- Use the overhang from the parchment paper or foil to lift the bars out of the dish.
- Cut into squares and serve.
Nutrition
- Serving Size: one normal portion
- Calories: 180
- Sodium: 120mg
- Fat: 8g
- Cholesterol: 15mg