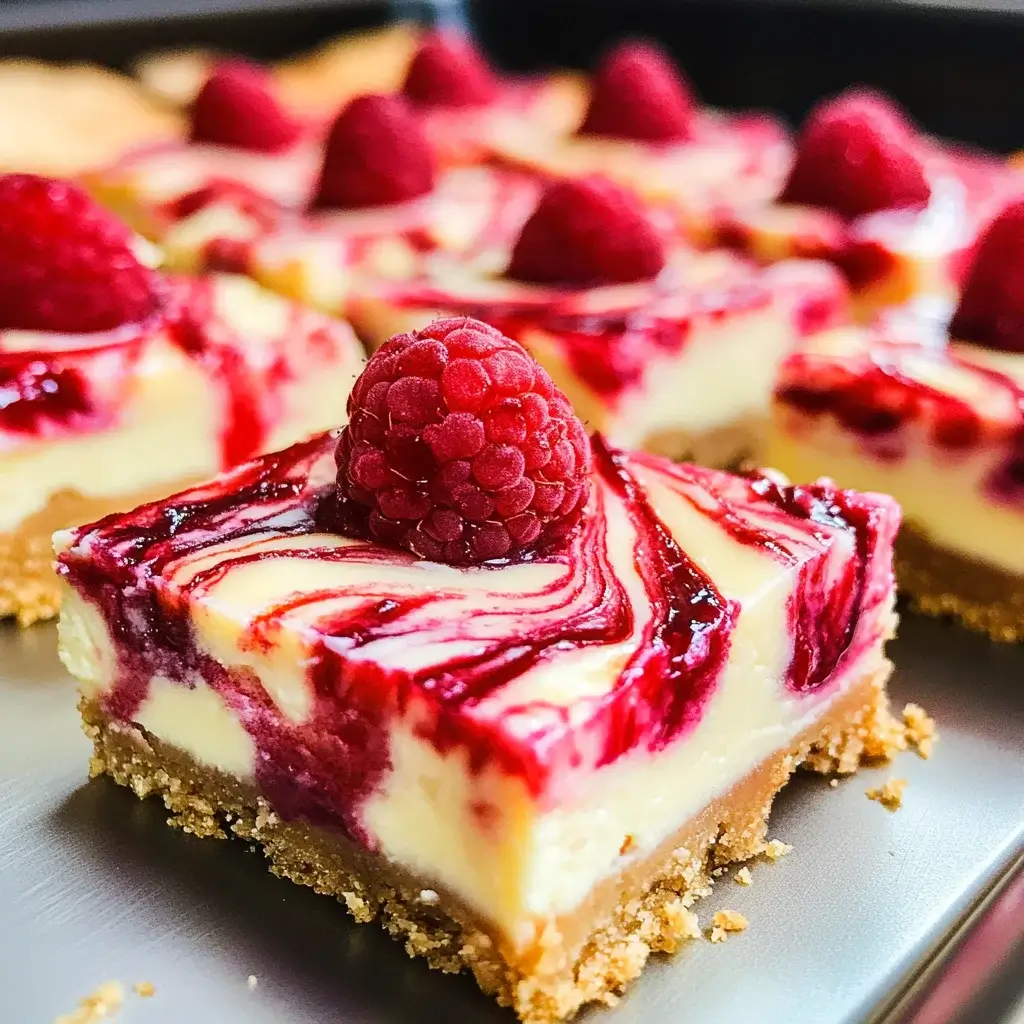
I still remember the first time I made these Raspberry Swirl Cheesecake Bars for a family gathering. I was slightly nervous – cheesecake can be finicky, and translating it into bar form felt like an extra challenge. But the moment I pulled that pan from the oven, with its beautifully marbled ruby-red swirls atop a creamy, golden-baked cheesecake layer, I had a good feeling. That feeling turned into pure satisfaction when I saw the reactions. My kids, usually picky eaters, devoured them. My husband, a tough cheesecake critic, declared them “perfectly balanced.” Even my mother-in-law asked for the recipe! They were creamy without being heavy, tangy from the raspberries, perfectly sweet, with that essential buttery, crunchy graham cracker crust providing the ideal textural contrast. Since then, these bars have become my go-to dessert for potlucks, holidays, or just a special weeknight treat. They offer all the luxurious indulgence of a full cheesecake but are far easier to make, serve, and share. The vibrant raspberry swirl isn’t just visually stunning; it cuts through the richness of the cream cheese filling, creating a flavour explosion that is simply irresistible. If you’re looking for a dessert that looks impressive, tastes incredible, and is guaranteed to win rave reviews, you’ve absolutely found it with these Raspberry Swirl Cheesecake Bars.
Ingredients
Here’s what you’ll need to create these delightful cheesecake bars:
For the Graham Cracker Crust:
- 1 ½ cups (about 150g) Graham Cracker Crumbs: Finely ground crumbs from approximately 10-12 full graham cracker sheets. Provides the classic buttery, slightly sweet base.
- ¼ cup (50g) Granulated Sugar: Adds a touch of sweetness to complement the graham crackers.
- 6 tablespoons (85g) Unsalted Butter, Melted: Binds the crumbs and sugar together, creating a firm yet tender crust upon baking.
For the Cheesecake Filling:
- 16 ounces (452g) Full-Fat Cream Cheese, Softened: Two standard blocks, crucial for a rich, creamy texture. Ensure it’s fully softened to room temperature for a lump-free batter.
- ¾ cup (150g) Granulated Sugar: Sweetens the filling; adjust slightly based on personal preference.
- 2 large Eggs, Room Temperature: Act as binders and add richness. Room temperature eggs incorporate more easily and create a smoother texture.
- ¼ cup (60ml) Sour Cream or Full-Fat Greek Yogurt, Room Temperature: Adds moisture and a subtle tang, enhancing the creaminess. Ensure it’s at room temperature.
- 1 teaspoon Vanilla Extract: Enhances the overall flavour profile of the cheesecake.
- Pinch of Salt: Balances the sweetness and brings out the other flavours.
For the Raspberry Swirl:
- 1 cup (about 125g) Fresh or Frozen Raspberries: Provides the vibrant colour and tart flavour contrast. If using frozen, do not thaw.
- 2 tablespoons Granulated Sugar: Helps sweeten the raspberries and create a slightly syrupy consistency.
- 1 tablespoon Lemon Juice: Brightens the raspberry flavour and helps the sauce thicken slightly.
- 1 teaspoon Cornstarch (optional, mixed with 1 tbsp cold water): If you prefer a thicker swirl that holds its shape more distinctly, use this slurry.
Instructions
Follow these steps carefully for perfect Raspberry Swirl Cheesecake Bars:
1. Prepare the Pan and Oven:
- Preheat your oven to 325°F (160°C).
- Line an 8×8 inch (20×20 cm) square baking pan with parchment paper, leaving an overhang on two opposite sides. This overhang will act as “handles” to easily lift the bars out later. Lightly grease the bottom and sides of the pan before lining to help the paper stick.
2. Make the Graham Cracker Crust:
- In a medium bowl, combine the graham cracker crumbs and ¼ cup granulated sugar.
- Pour the melted unsalted butter over the crumb mixture. Stir with a fork until all the crumbs are evenly moistened. The mixture should resemble wet sand.
- Transfer the mixture to the prepared baking pan. Press it firmly and evenly onto the bottom of the pan using the bottom of a measuring cup or glass. Ensure the edges are packed slightly tighter.
- Bake the crust for 8-10 minutes, just until it’s lightly golden and set.
- Remove the crust from the oven and set it aside to cool slightly while you prepare the filling. Keep the oven on.
3. Prepare the Raspberry Swirl:
- In a small saucepan, combine the raspberries (fresh or frozen), 2 tablespoons granulated sugar, and 1 tablespoon lemon juice.
- Cook over medium heat, stirring occasionally, until the raspberries break down and the mixture begins to simmer. This usually takes about 5-8 minutes. Mash the raspberries gently with the back of a spoon as they cook.
- (Optional Thickener): If using cornstarch for a thicker sauce, whisk the cornstarch with 1 tablespoon of cold water in a small bowl until smooth. Pour this slurry into the simmering raspberry mixture and cook, stirring constantly, for another 1-2 minutes until the sauce thickens slightly.
- Remove the raspberry sauce from the heat. For a smoother swirl, you can strain the sauce through a fine-mesh sieve to remove the seeds. This is optional; some prefer the texture of the seeds. Let the sauce cool slightly while you make the filling.
4. Make the Cheesecake Filling:
- In a large bowl, using an electric hand mixer or a stand mixer fitted with the paddle attachment, beat the softened cream cheese on medium-low speed until completely smooth and creamy. Scrape down the sides and bottom of the bowl frequently to ensure there are no lumps. This step is crucial for a smooth cheesecake.
- Gradually add the ¾ cup granulated sugar and the pinch of salt. Continue beating on medium-low speed until just combined and smooth. Avoid overmixing.
- Add the room temperature eggs one at a time, beating on low speed just until each egg is incorporated. Do not beat vigorously after adding the eggs, as this incorporates too much air, which can lead to cracks.
- Stir in the room temperature sour cream (or Greek yogurt) and vanilla extract on low speed until just combined. The final batter should be smooth, thick, and creamy. Again, scrape the bowl to ensure everything is incorporated, but be gentle.
5. Assemble the Cheesecake Bars:
- Pour the cheesecake filling evenly over the slightly cooled graham cracker crust in the baking pan. Spread it into an even layer using an offset spatula or the back of a spoon.
- Dollop small spoonfuls of the cooled raspberry sauce randomly over the top of the cheesecake filling. You likely won’t use all the sauce; reserve any extra for serving.
- Using a thin knife, skewer, or toothpick, gently swirl the raspberry sauce into the cheesecake batter. Create marbled patterns by dragging the tool through the dollops. Be careful not to over-swirl, or the colours will become muddy. Aim for distinct ribbons of red against the white background.
6. Bake the Cheesecake Bars:
- Carefully place the pan into the preheated 325°F (160°C) oven.
- Bake for 30-40 minutes. The edges of the cheesecake should look set and slightly puffed, and the center should still have a slight wobble when you gently shake the pan. It should not be completely liquid, but it shouldn’t be firm either. Overbaking leads to a dry texture and potential cracks.
- Do not open the oven door frequently during baking.
7. Cool the Cheesecake Bars (Very Important!):
- Turn off the oven. Prop the oven door open slightly (using a wooden spoon handle works well) and let the cheesecake bars cool slowly in the turned-off oven for 1 hour. This gradual cooling process helps prevent cracking.
- After 1 hour, remove the pan from the oven and let it cool completely on a wire rack at room temperature (about another 1-2 hours).
- Once completely cool, cover the pan loosely with plastic wrap (don’t let it touch the surface) or foil and transfer it to the refrigerator.
- Chill for at least 4 hours, but preferably overnight (6-8 hours). Chilling is essential for the cheesecake to fully set and for the flavours to meld. Do not skip this step!
8. Slice and Serve:
- Once thoroughly chilled, use the parchment paper overhangs to carefully lift the entire cheesecake slab out of the pan and onto a cutting board.
- For clean cuts, use a large, sharp knife. Wipe the knife blade clean with a damp paper towel between each cut.
- Cut the slab into squares or bars (e.g., 9 large squares, 12 smaller bars, or 16 bite-sized squares).
- Serve chilled, plain or with desired toppings (see “How to Serve” section).
Nutrition Facts
- Servings: This recipe typically yields 12 standard-sized bars.
- Calories per Serving: Approximately 300-350 kcal (estimated, will vary based on specific ingredients like fat content of dairy and final serving size).
Key Nutritional Information (Estimates per serving):
- Fat: Contains a significant amount, primarily from cream cheese, butter, and eggs, contributing to the rich flavour and texture. (Approx. 20-25g)
- Saturated Fat: A notable portion of the fat content comes from saturated fats found in dairy and butter. (Approx. 12-15g)
Disclaimer: Nutritional information is an estimate only and can vary depending on ingredient brands, specific measurements, and potential substitutions.
Preparation Time
- Active Preparation Time: Approximately 25-35 minutes (making crust, raspberry sauce, and filling).
- Baking Time: 30-40 minutes.
- Cooling Time: 1 hour in the oven + 1-2 hours at room temperature.
- Chilling Time: Minimum 4 hours, preferably 6-8 hours or overnight.
- Total Time: While the hands-on time is relatively short, the total time including cooling and crucial chilling is significant (around 7-12 hours). Plan accordingly!
How to Serve
These Raspberry Swirl Cheesecake Bars are fantastic on their own, but here are some ways to elevate their presentation and enjoyment:
- Keep it Simple:
- Serve chilled, straight from the refrigerator, for the best texture and flavour.
- Dust lightly with powdered sugar just before serving for an elegant finish.
- Enhance the Raspberry Flavour:
- Garnish each bar with a few fresh raspberries.
- Drizzle with any leftover raspberry sauce you reserved (warm it slightly if desired).
- Add Creaminess:
- Top with a dollop of freshly whipped cream (lightly sweetened or unsweetened).
- A small scoop of high-quality vanilla bean ice cream alongside the bar creates a decadent dessert experience.
- Introduce Contrasting Flavours:
- Add a drizzle of melted white chocolate or dark chocolate for extra indulgence.
- Sprinkle with toasted slivered almonds or chopped pistachios for nutty crunch.
- A few fresh mint leaves add a pop of colour and freshness.
- Pairing Suggestions:
- Serve with coffee, espresso, or a latte.
- Enjoy with a cup of black tea or a fruity herbal tea.
- For an adult treat, pair with a dessert wine like a late-harvest Riesling or even a sparkling Rosé.
- Occasion Serving:
- Arrange neatly on a platter for parties or potlucks.
- Cut into smaller, bite-sized squares for a dessert buffet or afternoon tea.
Additional Tips
Maximize your Raspberry Swirl Cheesecake Bar success with these helpful tips:
- Room Temperature is Key: Seriously, don’t rush this! Softened cream cheese, room temperature eggs, and room temperature sour cream/yogurt are non-negotiable for a smooth, homogenous, lump-free cheesecake filling. Cold ingredients don’t emulsify properly. Take them out of the fridge at least 1-2 hours before you start mixing.
- Don’t Overmix: Especially after adding the eggs! Overmixing incorporates too much air into the batter, which expands during baking and then collapses upon cooling, leading to cracks. Mix on low speed and stop as soon as ingredients are just combined.
- Perfecting the Swirl: Less is often more. Dollop the raspberry sauce evenly, but don’t cover the entire surface. Use a light touch with your skewer or knife; aim for distinct ribbons rather than blending everything together. If your sauce seems too thin, consider using the cornstarch thickener or letting it cool completely before swirling.
- No Water Bath Needed (Usually): Bar cheesecakes baked in smaller pans like an 8×8 are generally less prone to cracking than full-sized cheesecakes, especially if you follow the room temperature ingredient rule and the slow cooling method. This makes the process much simpler! If you are prone to cracks or using a different pan size, a water bath can still be used as extra insurance.
- Graham Cracker Crust Variations: Feel free to experiment! Substitute gingersnaps, vanilla wafers, or even chocolate cookies (like Oreos, scraping out the filling) for the graham crackers. Adjust the sugar accordingly (Oreo crusts need less added sugar).
- Berry Swirl Alternatives: Not a raspberry fan? This recipe works beautifully with other berry sauces. Try strawberry, blueberry, blackberry, or even a mixed berry swirl. Adjust the sugar in the sauce based on the sweetness of the fruit. You could also try a salted caramel or chocolate fudge swirl.
- Clean Cuts Every Time: For bakery-perfect squares, ensure the cheesecake is thoroughly chilled (overnight is best). Use a large, thin, sharp knife. Dip the knife in hot water, wipe it completely dry with a paper towel, make one cut, and repeat the hot water/wipe dry process for every single cut. This prevents dragging and keeps the layers distinct.
- Make-Ahead and Storage: These bars are perfect for making ahead! They need to chill anyway. Store them covered in the refrigerator for up to 4-5 days. For longer storage, freeze the unsliced or sliced bars (see FAQ for freezing details).
FAQ Section
Here are answers to some frequently asked questions about Raspberry Swirl Cheesecake Bars:
Q1: Why did my cheesecake crack?
A1: Cracking is usually caused by one or more factors:
Overmixing: Incorporating too much air, especially after adding eggs. Mix on low speed and stop when just combined.
Overbaking: Baking until the center is completely firm. The center should still have a slight wobble when removed from the oven.
Ingredients Too Cold: Using cold cream cheese, eggs, or sour cream can lead to a lumpy batter that doesn’t bake evenly.
Cooling Too Quickly: Drastic temperature changes cause contraction. Follow the slow cooling process: 1 hour in the turned-off oven with the door ajar, then cool completely at room temperature before chilling.
Q2: Can I use low-fat or fat-free cream cheese?
A2: While you technically can, it’s strongly discouraged for optimal results. Full-fat cream cheese is essential for the rich flavour and dense, creamy texture characteristic of cheesecake. Low-fat or fat-free versions contain more water and stabilizers, which can result in a runnier, less flavourful, and potentially grainy texture. The fat content is crucial for structure and mouthfeel.
Q3: My raspberry swirl sank or looks muddy. What went wrong?
A3: This can happen if:
Sauce Was Too Thin/Warm: A thin or warm sauce will bleed more easily into the batter. Let the sauce cool completely, and consider using the optional cornstarch thickener if you want very distinct swirls.
Over-Swirling: Swirling too vigorously or too much will blend the colours instead of creating ribbons. A few gentle passes with the knife/skewer are usually enough.
Dolloping Technique: Try smaller, more numerous dollops rather than large pools of sauce.
Q4: Can I make these gluten-free?
A4: Absolutely! To make gluten-free Raspberry Swirl Cheesecake Bars, simply substitute the graham cracker crumbs with gluten-free graham cracker crumbs or crumbs made from your favourite gluten-free cookies (like gluten-free vanilla wafers or shortbread). Ensure your vanilla extract is also certified gluten-free. The cheesecake filling and raspberry swirl are naturally gluten-free.
Q5: How do I know when the cheesecake bars are perfectly baked?
A5: The key is the wobble test. When baking is complete, the edges of the cheesecake should appear set and slightly puffed. The center area (about the size of a silver dollar) should still jiggle slightly, like set Jell-O, when you gently nudge the pan. If the center looks completely liquid, it needs more time. If it looks completely firm and dry, it’s likely overbaked. Remember it will continue to set as it cools and chills.
Q6: Can I use a different size pan?
A6: Yes, but adjustments are needed.
9×9 inch pan: The bars will be slightly thinner, reduce baking time by 5-10 minutes.
9×13 inch pan: You’ll need to double the entire recipe (crust, filling, swirl) for appropriately thick bars. Baking time will likely increase slightly (start checking around 35-40 minutes).
Muffin Tin (for mini cheesecakes): Reduce crust ingredients slightly, line muffin cups with paper liners, press crust in, fill, swirl, and bake for about 15-20 minutes.
Q7: Can I freeze Raspberry Swirl Cheesecake Bars?
A7: Yes, cheesecake bars freeze quite well!
Cool and Chill Completely: Follow the recipe through the full chilling step.
Slice or Freeze Whole: You can freeze the entire slab (unsliced) or individual bars.
Wrap Tightly: For individual bars, place them on a baking sheet lined with parchment paper and freeze until firm (about 1 hour). Then, wrap each bar tightly in plastic wrap, followed by a layer of aluminum foil or place them in an airtight freezer container or bag. For a whole slab, wrap tightly in plastic wrap then foil.
Freeze: Store in the freezer for up to 1-2 months for best quality.
Thaw: Thaw overnight in the refrigerator (do not thaw at room temperature, as condensation can make the crust soggy).
Q8: Can I make the raspberry sauce ahead of time?
A8: Yes, absolutely! The raspberry sauce can be made up to 3-4 days in advance. Let it cool completely, then store it in an airtight container in the refrigerator. You might want to gently warm it slightly or let it sit at room temperature for a short while before swirling if it has thickened considerably in the fridge, just to make swirling easier.

Raspberry Swirl Cheesecake Bars
Ingredients
Here’s what you’ll need to create these delightful cheesecake bars:
For the Graham Cracker Crust:
- 1 ½ cups (about 150g) Graham Cracker Crumbs: Finely ground crumbs from approximately 10-12 full graham cracker sheets. Provides the classic buttery, slightly sweet base.
- ¼ cup (50g) Granulated Sugar: Adds a touch of sweetness to complement the graham crackers.
- 6 tablespoons (85g) Unsalted Butter, Melted: Binds the crumbs and sugar together, creating a firm yet tender crust upon baking.
For the Cheesecake Filling:
- 16 ounces (452g) Full-Fat Cream Cheese, Softened: Two standard blocks, crucial for a rich, creamy texture. Ensure it’s fully softened to room temperature for a lump-free batter.
- ¾ cup (150g) Granulated Sugar: Sweetens the filling; adjust slightly based on personal preference.
- 2 large Eggs, Room Temperature: Act as binders and add richness. Room temperature eggs incorporate more easily and create a smoother texture.
- ¼ cup (60ml) Sour Cream or Full-Fat Greek Yogurt, Room Temperature: Adds moisture and a subtle tang, enhancing the creaminess. Ensure it’s at room temperature.
- 1 teaspoon Vanilla Extract: Enhances the overall flavour profile of the cheesecake.
- Pinch of Salt: Balances the sweetness and brings out the other flavours.
For the Raspberry Swirl:
- 1 cup (about 125g) Fresh or Frozen Raspberries: Provides the vibrant colour and tart flavour contrast. If using frozen, do not thaw.
- 2 tablespoons Granulated Sugar: Helps sweeten the raspberries and create a slightly syrupy consistency.
- 1 tablespoon Lemon Juice: Brightens the raspberry flavour and helps the sauce thicken slightly.
- 1 teaspoon Cornstarch (optional, mixed with 1 tbsp cold water): If you prefer a thicker swirl that holds its shape more distinctly, use this slurry.
Instructions
Follow these steps carefully for perfect Raspberry Swirl Cheesecake Bars:
1. Prepare the Pan and Oven:
- Preheat your oven to 325°F (160°C).
- Line an 8×8 inch (20×20 cm) square baking pan with parchment paper, leaving an overhang on two opposite sides. This overhang will act as “handles” to easily lift the bars out later. Lightly grease the bottom and sides of the pan before lining to help the paper stick.
2. Make the Graham Cracker Crust:
- In a medium bowl, combine the graham cracker crumbs and ¼ cup granulated sugar.
- Pour the melted unsalted butter over the crumb mixture. Stir with a fork until all the crumbs are evenly moistened. The mixture should resemble wet sand.
- Transfer the mixture to the prepared baking pan. Press it firmly and evenly onto the bottom of the pan using the bottom of a measuring cup or glass. Ensure the edges are packed slightly tighter.
- Bake the crust for 8-10 minutes, just until it’s lightly golden and set.
- Remove the crust from the oven and set it aside to cool slightly while you prepare the filling. Keep the oven on.
3. Prepare the Raspberry Swirl:
- In a small saucepan, combine the raspberries (fresh or frozen), 2 tablespoons granulated sugar, and 1 tablespoon lemon juice.
- Cook over medium heat, stirring occasionally, until the raspberries break down and the mixture begins to simmer. This usually takes about 5-8 minutes. Mash the raspberries gently with the back of a spoon as they cook.
- (Optional Thickener): If using cornstarch for a thicker sauce, whisk the cornstarch with 1 tablespoon of cold water in a small bowl until smooth. Pour this slurry into the simmering raspberry mixture and cook, stirring constantly, for another 1-2 minutes until the sauce thickens slightly.
- Remove the raspberry sauce from the heat. For a smoother swirl, you can strain the sauce through a fine-mesh sieve to remove the seeds. This is optional; some prefer the texture of the seeds. Let the sauce cool slightly while you make the filling.
4. Make the Cheesecake Filling:
- In a large bowl, using an electric hand mixer or a stand mixer fitted with the paddle attachment, beat the softened cream cheese on medium-low speed until completely smooth and creamy. Scrape down the sides and bottom of the bowl frequently to ensure there are no lumps. This step is crucial for a smooth cheesecake.
- Gradually add the ¾ cup granulated sugar and the pinch of salt. Continue beating on medium-low speed until just combined and smooth. Avoid overmixing.
- Add the room temperature eggs one at a time, beating on low speed just until each egg is incorporated. Do not beat vigorously after adding the eggs, as this incorporates too much air, which can lead to cracks.
- Stir in the room temperature sour cream (or Greek yogurt) and vanilla extract on low speed until just combined. The final batter should be smooth, thick, and creamy. Again, scrape the bowl to ensure everything is incorporated, but be gentle.
5. Assemble the Cheesecake Bars:
- Pour the cheesecake filling evenly over the slightly cooled graham cracker crust in the baking pan. Spread it into an even layer using an offset spatula or the back of a spoon.
- Dollop small spoonfuls of the cooled raspberry sauce randomly over the top of the cheesecake filling. You likely won’t use all the sauce; reserve any extra for serving.
- Using a thin knife, skewer, or toothpick, gently swirl the raspberry sauce into the cheesecake batter. Create marbled patterns by dragging the tool through the dollops. Be careful not to over-swirl, or the colours will become muddy. Aim for distinct ribbons of red against the white background.
6. Bake the Cheesecake Bars:
- Carefully place the pan into the preheated 325°F (160°C) oven.
- Bake for 30-40 minutes. The edges of the cheesecake should look set and slightly puffed, and the center should still have a slight wobble when you gently shake the pan. It should not be completely liquid, but it shouldn’t be firm either. Overbaking leads to a dry texture and potential cracks.
- Do not open the oven door frequently during baking.
7. Cool the Cheesecake Bars (Very Important!):
- Turn off the oven. Prop the oven door open slightly (using a wooden spoon handle works well) and let the cheesecake bars cool slowly in the turned-off oven for 1 hour. This gradual cooling process helps prevent cracking.
- After 1 hour, remove the pan from the oven and let it cool completely on a wire rack at room temperature (about another 1-2 hours).
- Once completely cool, cover the pan loosely with plastic wrap (don’t let it touch the surface) or foil and transfer it to the refrigerator.
- Chill for at least 4 hours, but preferably overnight (6-8 hours). Chilling is essential for the cheesecake to fully set and for the flavours to meld. Do not skip this step!
8. Slice and Serve:
- Once thoroughly chilled, use the parchment paper overhangs to carefully lift the entire cheesecake slab out of the pan and onto a cutting board.
- For clean cuts, use a large, sharp knife. Wipe the knife blade clean with a damp paper towel between each cut.
- Cut the slab into squares or bars (e.g., 9 large squares, 12 smaller bars, or 16 bite-sized squares).
- Serve chilled, plain or with desired toppings (see “How to Serve” section).
Nutrition
- Serving Size: one normal portion
- Calories: 350
- Fat: 25g
- Saturated Fat: 15g