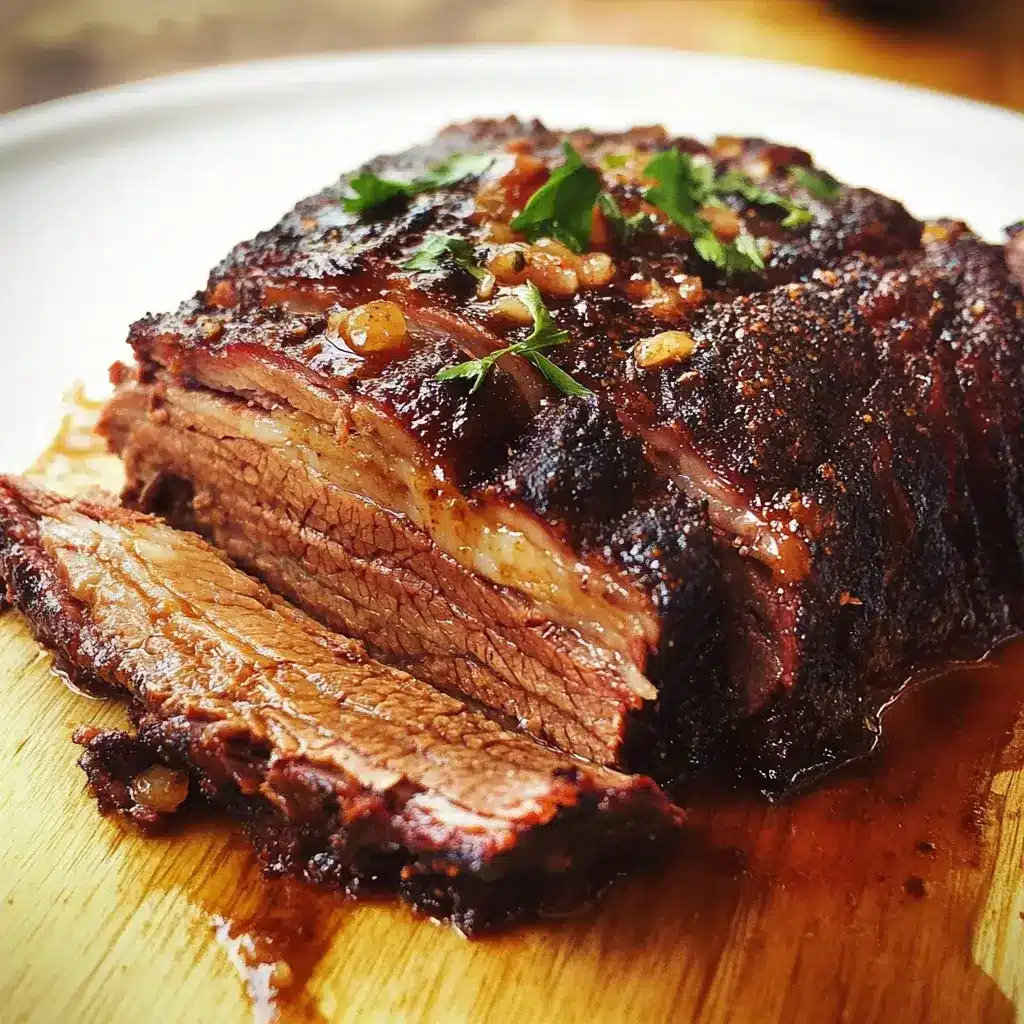
It’s a weekend afternoon, the sun is shining, and the aroma wafting from the backyard smoker is simply intoxicating. Just thinking about it brings a smile to my face. Last Sunday, we decided to tackle the legendary Slow-Smoked Texas-Style Brisket, and let me tell you, it was an absolute triumph. From the moment the smoky, peppery bark gave way to the melt-in-your-mouth tenderness inside, we were hooked. Even my notoriously picky kids devoured it, proclaiming it the “best meat ever!” This isn’t just a recipe; it’s an experience, a journey into the heart of Texas BBQ that will transform your understanding of brisket. Prepare to dedicate some time, embrace the smoke, and be rewarded with a culinary masterpiece that will have everyone begging for seconds. This slow-smoked Texas-style brisket recipe is not just food; it’s a labor of love, and the results are undeniably worth every minute.
Ingredients for Authentic Texas Brisket
To embark on this flavorful journey, you’ll need to gather a few key ingredients. Simplicity is key in Texas BBQ, letting the quality of the beef and the magic of smoke shine through.
- Beef Brisket Packer Cut: The star of the show, a whole packer brisket includes both the point (fattier, marbled part) and the flat (leaner part). Aim for a 12-16 pound brisket with good marbling for optimal flavor and tenderness.
- Coarse Kosher Salt: Essential for seasoning and drawing out moisture, kosher salt’s larger crystals distribute flavor evenly and create a beautiful crust.
- Coarsely Ground Black Pepper: The perfect partner to salt, black pepper provides a robust, peppery bite that complements the rich beef flavor. Freshly cracked is highly recommended for the best aroma.
- (Optional) Garlic Powder: A touch of garlic powder can add a subtle savory depth to the rub, enhancing the overall flavor profile without overpowering the classic Texas taste. Use sparingly if desired.
- (Optional) Onion Powder: Similar to garlic powder, a hint of onion powder can contribute a mild sweetness and umami note, rounding out the rub. Again, use it judiciously to maintain the focus on salt and pepper.
- (Optional) Paprika (Sweet or Smoked): A pinch of paprika can add a touch of color and a very subtle smoky sweetness or warmth, depending on whether you choose sweet or smoked paprika. This is entirely optional and for subtle flavor enhancement.
Step-by-Step Instructions for Slow-Smoked Texas-Style Brisket
Smoking a brisket is a marathon, not a sprint. Patience and attention to detail are your best friends in this process. Follow these instructions carefully to achieve BBQ perfection.
Step 1: Trimming the Brisket – The Foundation for Success
- Prepare Your Workspace: Lay down butcher paper or a large cutting board. Have a sharp trimming knife and gloves ready.
- Identify Hard Fat and Silver Skin: Examine your brisket. You’ll notice hard, thick fat deposits and shiny, membrane-like silver skin. These areas don’t render well and can impede smoke penetration and tenderness.
- Trim the Hard Fat: Using your knife, carefully trim away the thick, hard fat. Aim to reduce the fat cap to about ¼ inch thickness in most areas. You don’t need to remove all fat, as some fat is essential for moisture and flavor. Focus on removing the hard, impenetrable sections.
- Remove Silver Skin: Locate the silver skin and slide your knife underneath it, lifting it away from the meat. Trim it off, being careful not to remove too much meat along with it. Silver skin is tough and won’t break down during smoking, so removing it is crucial for tenderness.
- Shape the Brisket (Optional): You can subtly shape the brisket for more even cooking. Remove any overly thin edges that might dry out quickly. The goal is a more uniform shape for consistent smoking.
- Don’t Over-Trim: Remember, fat is flavor and moisture. Don’t be tempted to remove too much fat. You want a balance of fat and lean for the best results. A little intramuscular fat (marbling) is highly desirable.
Step 2: Seasoning the Brisket – The Texas Trinity Rub
- Keep it Simple: True Texas-style brisket relies on a simple rub of salt and pepper. This “Texas Trinity” allows the natural beef flavor and smoke to shine.
- Generous Seasoning: Brisket is a large cut of meat, so don’t be shy with the seasoning. You need enough salt and pepper to penetrate and flavor the entire brisket.
- Salt First: Apply the coarse kosher salt generously to all sides of the brisket, ensuring even coverage. Don’t just sprinkle; actually rub it in slightly.
- Pepper Next: Follow with a generous coating of coarsely ground black pepper, again ensuring even coverage on all sides, including the edges. Rub it in slightly as well.
- (Optional Spices): If using garlic powder, onion powder, or paprika, sprinkle these sparingly after the salt and pepper, ensuring they are evenly distributed.
- Rest the Seasoning (Optional): You can let the seasoned brisket rest at room temperature for about 30-60 minutes or in the refrigerator for a few hours (or even overnight) before smoking. This allows the salt to penetrate the meat, enhancing flavor and moisture retention.
Step 3: Preparing the Smoker – Setting the Stage for Smoke
- Choose Your Smoker: Offset smokers are traditional for Texas brisket, but pellet smokers, kamado grills, or even electric smokers can work. The key is consistent low and slow heat and good smoke.
- Fuel Up: For offset smokers, use hardwood logs like oak or hickory for authentic Texas flavor. Pellet smokers use wood pellets, and kamado grills can use lump charcoal with wood chunks.
- Preheat the Smoker: Preheat your smoker to a consistent temperature of 225-250°F (107-121°C). This low temperature is crucial for slow rendering of fat and tenderizing the brisket.
- Stabilize the Temperature: Allow the smoker to stabilize at the desired temperature before placing the brisket inside. Use a reliable thermometer to monitor the smoker temperature throughout the cooking process.
- Clean Smoke is Key: Ensure you have clean, blue smoke. Thick, white smoke indicates incomplete combustion and can impart a bitter taste to the meat. Adjust airflow and fuel to achieve clean smoke.
- Water Pan (Optional but Recommended): Placing a water pan in the smoker helps maintain humidity, preventing the brisket from drying out and promoting even cooking.
Step 4: Smoking the Brisket – The Long, Slow Journey
- Place the Brisket in the Smoker: Once the smoker is preheated and stable, place the brisket fat-side up directly on the smoker grate. Fat-side up helps baste the leaner flat as the fat renders.
- Monitor Temperature: Use a leave-in meat thermometer to monitor the internal temperature of the brisket, inserting the probe into the thickest part of the flat, avoiding large fat pockets.
- Maintain Smoker Temperature: Maintain the smoker temperature consistently between 225-250°F (107-121°C) throughout the smoking process. Adjust vents or fuel as needed.
- Smoke Management: Keep an eye on the smoke. Replenish wood as needed to maintain a consistent, clean smoke. Avoid over-smoking, which can also lead to bitterness.
- The Stall: Around 150-170°F (66-77°C) internal temperature, the brisket will likely enter “the stall.” This is when evaporative cooling slows down the cooking process, and the internal temperature may plateau or even slightly decrease. Don’t panic; this is normal.
Step 5: The Texas Crutch – Wrapping for Tenderness (Optional but Recommended)
- When to Wrap: The Texas Crutch involves wrapping the brisket to push through the stall and enhance tenderness. Wrap when the brisket reaches an internal temperature of around 165-175°F (74-79°C) and has developed a good bark (dark, firm crust). This is usually around 5-7 hours into the smoke, but rely on temperature and bark development, not just time.
- Wrapping Materials: Use pink butcher paper (preferred for breathability and bark preservation) or heavy-duty aluminum foil (more effective at speeding up cooking but can soften the bark slightly).
- Wrap Tightly: Wrap the brisket tightly in butcher paper or foil, creating a sealed package. If using foil, you can add a tablespoon or two of beef broth or water to the foil packet to add moisture (optional).
- Return to Smoker: Return the wrapped brisket to the smoker, maintaining the 225-250°F (107-121°C) temperature.
Step 6: Continuing the Smoke and Checking for Tenderness
- Continue Cooking: Continue smoking the wrapped brisket until it reaches an internal temperature of around 200-205°F (93-96°C).
- Tenderness Check – The Probe Test: The internal temperature is a guide, but tenderness is the ultimate indicator of doneness. Use a probe (meat thermometer probe or skewer) to check for tenderness. The probe should slide into the thickest part of the flat with very little resistance, like inserting it into softened butter. Check in multiple spots to ensure consistent tenderness.
- Adjust Cooking Time: Cooking time can vary depending on the size and thickness of the brisket, smoker temperature fluctuations, and other factors. Be patient and cook until tender, regardless of time.
Step 7: Resting the Brisket – The Secret to Juicy Perfection
- Crucial Rest: Resting is absolutely essential for tender and juicy brisket. It allows the muscle fibers to relax and reabsorb juices, resulting in a significantly better texture and flavor.
- Resting Methods:
- Cooler Rest (Recommended): Wrap the brisket in a towel and place it in a cooler for at least 2-4 hours, or even longer (up to 6-8 hours). This slow rest keeps the brisket warm while allowing for maximum tenderization and juice redistribution.
- Oven Rest (Warm Setting): Alternatively, you can rest the brisket in a warm oven (around 170°F/77°C) for 1-2 hours.
- Room Temperature Rest (Minimum): If time is short, rest the brisket loosely tented with foil at room temperature for at least 1 hour, but longer is better.
- Don’t Skip the Rest: Resist the temptation to slice the brisket immediately after removing it from the smoker. Resting is not optional; it’s a critical step for optimal results.
Step 8: Slicing and Serving – The Grand Finale
- Identify the Grain: Before slicing, identify the direction of the muscle fibers (the grain) in both the flat and the point. The grain usually runs in different directions in these two sections.
- Slice Against the Grain: Slice the brisket against the grain. This shortens the muscle fibers, making the brisket incredibly tender and easy to chew. If you slice with the grain, it will be tough and stringy.
- Separate the Point and Flat (Optional): You can separate the point from the flat before slicing. The point is fattier and can be used for burnt ends or chopped brisket. The flat is leaner and ideal for slices.
- Slicing Thickness: Slice the brisket to your desired thickness, typically around ¼ to ⅜ inch thick.
- Serve Warm: Serve the brisket warm immediately after slicing for the best flavor and texture.
Nutrition Facts (Per Serving, Estimated)
(Note: Nutritional values are estimates and can vary based on brisket size, trimming, and other factors. Serving size is estimated at 4 ounces of cooked brisket.)
- Servings: 12-16 (depending on brisket size and serving size)
- Calories per Serving: Approximately 450-550 kcal
- Iron: 3-4mg
Preparation Time
- Prep Time (Trimming & Seasoning): 30-45 minutes
- Cook Time (Smoking): 12-16 hours (or longer, depending on brisket size and smoker)
- Rest Time: 2-4 hours (minimum, longer is better)
- Total Time: 14-20+ hours (plan accordingly for a weekend smoke!)
How to Serve Texas-Style Brisket
Texas brisket is best served simply, allowing its smoky, beefy flavor to shine. Here are some classic and delicious ways to serve it:
- Classic Sliced Brisket:
- Pile slices of brisket high on a platter.
- Serve with simple sides like white bread, pickles, onions, and jalapenos.
- Offer a mild Texas-style BBQ sauce on the side, but brisket this good is often enjoyed without sauce.
- Brisket Sandwiches:
- Pile sliced brisket on toasted buns or rolls.
- Add toppings like sliced onions, pickles, coleslaw, or BBQ sauce.
- Consider a simple creamy coleslaw to complement the rich brisket.
- Brisket Tacos or Burritos:
- Shred or chop leftover brisket.
- Use it as a filling for tacos or burritos with your favorite toppings: salsa, onions, cilantro, cheese, guacamole.
- Brisket tacos are a fantastic way to repurpose leftovers.
- Traditional Texas BBQ Sides:
- Coleslaw: Creamy or vinegar-based coleslaw provides a refreshing contrast to the rich brisket.
- Potato Salad: Classic potato salad is a BBQ staple.
- Mac and Cheese: Rich and cheesy mac and cheese is always a crowd-pleaser.
- BBQ Beans: Slow-cooked BBQ beans are a perfect smoky side.
- Pickles and Onions: Simple sliced pickles and onions are essential for a true Texas BBQ experience.
- Jalapenos: For those who like a bit of heat, pickled or fresh jalapenos are a great addition.
- Cornbread: Slightly sweet cornbread complements the savory brisket beautifully.
Additional Tips for Perfect Texas Brisket
Mastering Texas brisket takes practice, but these tips will help you on your way to BBQ greatness:
- 1. Start with Quality Brisket: The quality of your brisket is paramount. Invest in a good quality packer brisket with good marbling. Look for USDA Prime or Choice grades for better flavor and tenderness.
- 2. Don’t Over-Trim (Initially): While trimming is necessary, don’t remove too much fat, especially on your first few briskets. You can always trim more after cooking if needed. Fat renders and bastes the meat, contributing to flavor and moisture.
- 3. Embrace the Simple Rub: Resist the urge to over-complicate the rub. Salt and pepper are the foundation of Texas brisket for a reason. Let the beef and smoke flavors be the stars.
- 4. Temperature Control is King: Maintaining a consistent smoker temperature is crucial for even cooking and preventing the brisket from drying out. Invest in a good smoker thermometer and learn to manage your smoker’s airflow.
- 5. Use a Reliable Meat Thermometer: Don’t rely solely on time. Use a reliable leave-in meat thermometer and a probe thermometer to monitor the internal temperature and tenderness of the brisket throughout the cooking process.
- 6. Master the Texas Crutch (Wrapping): Wrapping in butcher paper or foil is a valuable technique to push through the stall and enhance tenderness. Learn when and how to wrap effectively to achieve optimal results.
- 7. Patience is a Virtue (and Key to Brisket): Smoking brisket is a slow process. Don’t rush it. Low and slow is the mantra. Be patient, monitor your brisket, and let it cook until it’s probe-tender, regardless of time.
Frequently Asked Questions (FAQ) About Slow-Smoked Texas Brisket
Got questions about smoking brisket? Here are some common queries and answers to help you along the way:
Q1: What type of smoker is best for smoking brisket?
A: Offset smokers are traditional and highly regarded for Texas brisket due to their excellent smoke flavor and temperature control. However, pellet smokers offer convenience and consistent temperature, while kamado grills and even electric smokers can also produce great brisket with proper technique. The best smoker is the one you are most comfortable and proficient with.
Q2: What temperature should I smoke brisket at?
A: The ideal smoking temperature for brisket is between 225-250°F (107-121°C). This low and slow temperature allows the fat to render slowly, tenderizing the meat and infusing it with smoke flavor without drying it out.
Q3: How long does it take to smoke a brisket?
A: Smoking time varies greatly depending on the size and thickness of the brisket, smoker temperature fluctuations, and other factors. As a general guideline, expect 12-16 hours of cooking time for a 12-16 pound brisket, plus resting time. Focus on internal temperature and tenderness rather than just time.
Q4: When should I wrap my brisket?
A: Wrap your brisket when it reaches an internal temperature of around 165-175°F (74-79°C) and has developed a good bark. This is typically around 5-7 hours into the smoke, but monitor the brisket’s progress and wrap when the bark looks set and the temperature stall occurs.
Q5: How do I know when brisket is done?
A: Brisket is done when it reaches an internal temperature of around 200-205°F (93-96°C) and, most importantly, is probe-tender. The probe should slide into the thickest part of the flat with very little resistance, like inserting it into softened butter. Tenderness is the key indicator, not just temperature.
Q6: How should I store leftover brisket?
A: To store leftover brisket, allow it to cool slightly, then wrap it tightly in butcher paper or foil and place it in an airtight container in the refrigerator. It will keep well for 3-4 days. To reheat, you can steam it, wrap it in foil with a little beef broth and reheat in a low oven, or gently microwave it, being careful not to dry it out.
Print
Slow-Smoked Texas-Style Brisket
Ingredients
To embark on this flavorful journey, you’ll need to gather a few key ingredients. Simplicity is key in Texas BBQ, letting the quality of the beef and the magic of smoke shine through.
- Beef Brisket Packer Cut: The star of the show, a whole packer brisket includes both the point (fattier, marbled part) and the flat (leaner part). Aim for a 12-16 pound brisket with good marbling for optimal flavor and tenderness.
- Coarse Kosher Salt: Essential for seasoning and drawing out moisture, kosher salt’s larger crystals distribute flavor evenly and create a beautiful crust.
- Coarsely Ground Black Pepper: The perfect partner to salt, black pepper provides a robust, peppery bite that complements the rich beef flavor. Freshly cracked is highly recommended for the best aroma.
- (Optional) Garlic Powder: A touch of garlic powder can add a subtle savory depth to the rub, enhancing the overall flavor profile without overpowering the classic Texas taste. Use sparingly if desired.
- (Optional) Onion Powder: Similar to garlic powder, a hint of onion powder can contribute a mild sweetness and umami note, rounding out the rub. Again, use it judiciously to maintain the focus on salt and pepper.
- (Optional) Paprika (Sweet or Smoked): A pinch of paprika can add a touch of color and a very subtle smoky sweetness or warmth, depending on whether you choose sweet or smoked paprika. This is entirely optional and for subtle flavor enhancement.
Instructions
Smoking a brisket is a marathon, not a sprint. Patience and attention to detail are your best friends in this process. Follow these instructions carefully to achieve BBQ perfection.
Step 1: Trimming the Brisket – The Foundation for Success
- Prepare Your Workspace: Lay down butcher paper or a large cutting board. Have a sharp trimming knife and gloves ready.
- Identify Hard Fat and Silver Skin: Examine your brisket. You’ll notice hard, thick fat deposits and shiny, membrane-like silver skin. These areas don’t render well and can impede smoke penetration and tenderness.
- Trim the Hard Fat: Using your knife, carefully trim away the thick, hard fat. Aim to reduce the fat cap to about ¼ inch thickness in most areas. You don’t need to remove all fat, as some fat is essential for moisture and flavor. Focus on removing the hard, impenetrable sections.
- Remove Silver Skin: Locate the silver skin and slide your knife underneath it, lifting it away from the meat. Trim it off, being careful not to remove too much meat along with it. Silver skin is tough and won’t break down during smoking, so removing it is crucial for tenderness.
- Shape the Brisket (Optional): You can subtly shape the brisket for more even cooking. Remove any overly thin edges that might dry out quickly. The goal is a more uniform shape for consistent smoking.
- Don’t Over-Trim: Remember, fat is flavor and moisture. Don’t be tempted to remove too much fat. You want a balance of fat and lean for the best results. A little intramuscular fat (marbling) is highly desirable.
Step 2: Seasoning the Brisket – The Texas Trinity Rub
- Keep it Simple: True Texas-style brisket relies on a simple rub of salt and pepper. This “Texas Trinity” allows the natural beef flavor and smoke to shine.
- Generous Seasoning: Brisket is a large cut of meat, so don’t be shy with the seasoning. You need enough salt and pepper to penetrate and flavor the entire brisket.
- Salt First: Apply the coarse kosher salt generously to all sides of the brisket, ensuring even coverage. Don’t just sprinkle; actually rub it in slightly.
- Pepper Next: Follow with a generous coating of coarsely ground black pepper, again ensuring even coverage on all sides, including the edges. Rub it in slightly as well.
- (Optional Spices): If using garlic powder, onion powder, or paprika, sprinkle these sparingly after the salt and pepper, ensuring they are evenly distributed.
- Rest the Seasoning (Optional): You can let the seasoned brisket rest at room temperature for about 30-60 minutes or in the refrigerator for a few hours (or even overnight) before smoking. This allows the salt to penetrate the meat, enhancing flavor and moisture retention.
Step 3: Preparing the Smoker – Setting the Stage for Smoke
- Choose Your Smoker: Offset smokers are traditional for Texas brisket, but pellet smokers, kamado grills, or even electric smokers can work. The key is consistent low and slow heat and good smoke.
- Fuel Up: For offset smokers, use hardwood logs like oak or hickory for authentic Texas flavor. Pellet smokers use wood pellets, and kamado grills can use lump charcoal with wood chunks.
- Preheat the Smoker: Preheat your smoker to a consistent temperature of 225-250°F (107-121°C). This low temperature is crucial for slow rendering of fat and tenderizing the brisket.
- Stabilize the Temperature: Allow the smoker to stabilize at the desired temperature before placing the brisket inside. Use a reliable thermometer to monitor the smoker temperature throughout the cooking process.
- Clean Smoke is Key: Ensure you have clean, blue smoke. Thick, white smoke indicates incomplete combustion and can impart a bitter taste to the meat. Adjust airflow and fuel to achieve clean smoke.
- Water Pan (Optional but Recommended): Placing a water pan in the smoker helps maintain humidity, preventing the brisket from drying out and promoting even cooking.
Step 4: Smoking the Brisket – The Long, Slow Journey
- Place the Brisket in the Smoker: Once the smoker is preheated and stable, place the brisket fat-side up directly on the smoker grate. Fat-side up helps baste the leaner flat as the fat renders.
- Monitor Temperature: Use a leave-in meat thermometer to monitor the internal temperature of the brisket, inserting the probe into the thickest part of the flat, avoiding large fat pockets.
- Maintain Smoker Temperature: Maintain the smoker temperature consistently between 225-250°F (107-121°C) throughout the smoking process. Adjust vents or fuel as needed.
- Smoke Management: Keep an eye on the smoke. Replenish wood as needed to maintain a consistent, clean smoke. Avoid over-smoking, which can also lead to bitterness.
- The Stall: Around 150-170°F (66-77°C) internal temperature, the brisket will likely enter “the stall.” This is when evaporative cooling slows down the cooking process, and the internal temperature may plateau or even slightly decrease. Don’t panic; this is normal.
Step 5: The Texas Crutch – Wrapping for Tenderness (Optional but Recommended)
- When to Wrap: The Texas Crutch involves wrapping the brisket to push through the stall and enhance tenderness. Wrap when the brisket reaches an internal temperature of around 165-175°F (74-79°C) and has developed a good bark (dark, firm crust). This is usually around 5-7 hours into the smoke, but rely on temperature and bark development, not just time.
- Wrapping Materials: Use pink butcher paper (preferred for breathability and bark preservation) or heavy-duty aluminum foil (more effective at speeding up cooking but can soften the bark slightly).
- Wrap Tightly: Wrap the brisket tightly in butcher paper or foil, creating a sealed package. If using foil, you can add a tablespoon or two of beef broth or water to the foil packet to add moisture (optional).
- Return to Smoker: Return the wrapped brisket to the smoker, maintaining the 225-250°F (107-121°C) temperature.
Step 6: Continuing the Smoke and Checking for Tenderness
- Continue Cooking: Continue smoking the wrapped brisket until it reaches an internal temperature of around 200-205°F (93-96°C).
- Tenderness Check – The Probe Test: The internal temperature is a guide, but tenderness is the ultimate indicator of doneness. Use a probe (meat thermometer probe or skewer) to check for tenderness. The probe should slide into the thickest part of the flat with very little resistance, like inserting it into softened butter. Check in multiple spots to ensure consistent tenderness.
- Adjust Cooking Time: Cooking time can vary depending on the size and thickness of the brisket, smoker temperature fluctuations, and other factors. Be patient and cook until tender, regardless of time.
Step 7: Resting the Brisket – The Secret to Juicy Perfection
- Crucial Rest: Resting is absolutely essential for tender and juicy brisket. It allows the muscle fibers to relax and reabsorb juices, resulting in a significantly better texture and flavor.
- Resting Methods:
- Cooler Rest (Recommended): Wrap the brisket in a towel and place it in a cooler for at least 2-4 hours, or even longer (up to 6-8 hours). This slow rest keeps the brisket warm while allowing for maximum tenderization and juice redistribution.
- Oven Rest (Warm Setting): Alternatively, you can rest the brisket in a warm oven (around 170°F/77°C) for 1-2 hours.
- Room Temperature Rest (Minimum): If time is short, rest the brisket loosely tented with foil at room temperature for at least 1 hour, but longer is better.
- Don’t Skip the Rest: Resist the temptation to slice the brisket immediately after removing it from the smoker. Resting is not optional; it’s a critical step for optimal results.
Step 8: Slicing and Serving – The Grand Finale
- Identify the Grain: Before slicing, identify the direction of the muscle fibers (the grain) in both the flat and the point. The grain usually runs in different directions in these two sections.
- Slice Against the Grain: Slice the brisket against the grain. This shortens the muscle fibers, making the brisket incredibly tender and easy to chew. If you slice with the grain, it will be tough and stringy.
- Separate the Point and Flat (Optional): You can separate the point from the flat before slicing. The point is fattier and can be used for burnt ends or chopped brisket. The flat is leaner and ideal for slices.
- Slicing Thickness: Slice the brisket to your desired thickness, typically around ¼ to ⅜ inch thick.
- Serve Warm: Serve the brisket warm immediately after slicing for the best flavor and texture.
Nutrition
- Serving Size: one normal portion
- Calories: 550