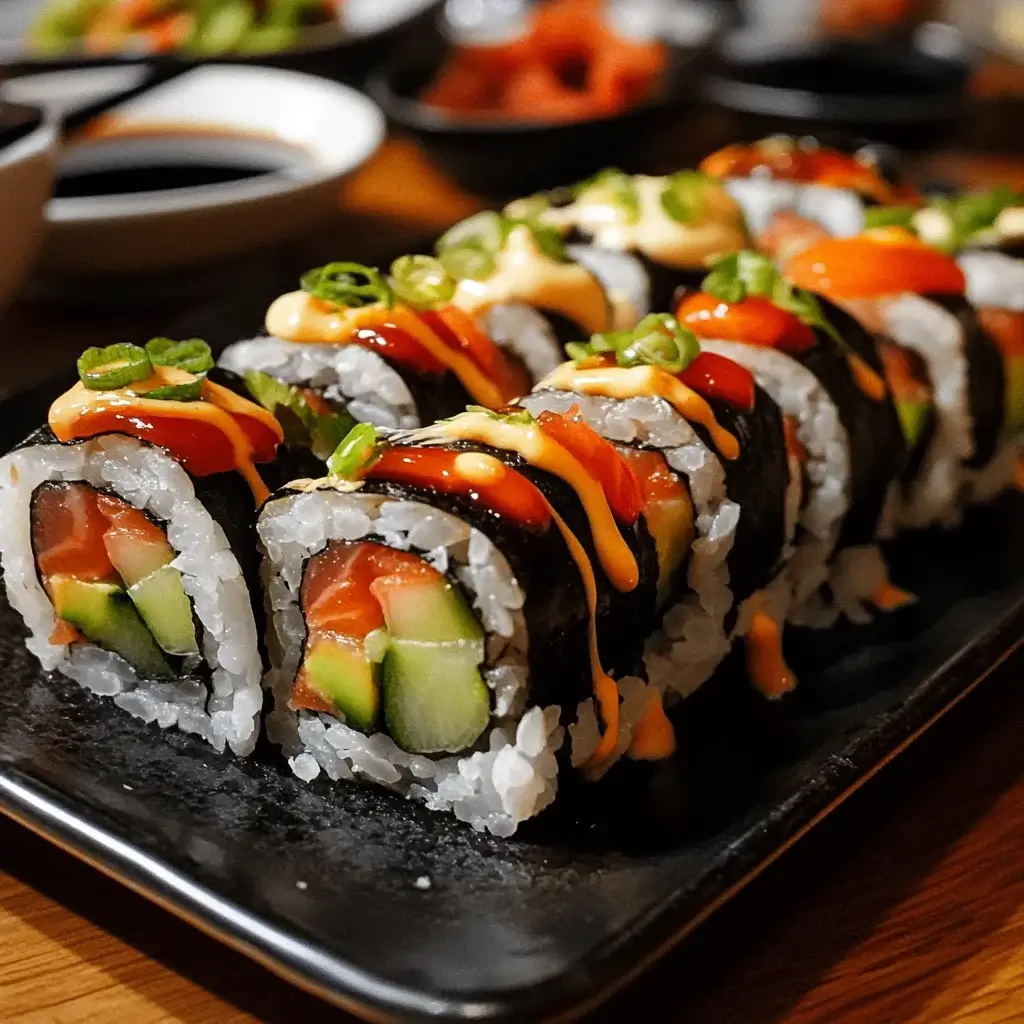
I still remember the slight intimidation I felt the first time I decided to try making sushi rolls at home. It seemed like an art form reserved for skilled chefs in bustling restaurants. But driven by a craving for that fresh, clean taste and a desire for a healthier snack option for my family, I decided to give vegetarian sushi rolls a go. The result? Surprisingly simple, incredibly fun, and an absolute hit! My kids, initially skeptical, were soon eagerly choosing their fillings and even attempting (with messy but hilarious results) to roll their own. These vibrant, customizable rolls quickly became a requested favorite for light lunches, after-school snacks, and even casual party appetizers. They offer a delightful combination of textures and flavors – the slightly chewy, seasoned rice, the crisp freshness of the vegetables, and the subtle oceanic note from the nori, all dipped in savory soy sauce with a hint of wasabi kick. Making them at home is not only cost-effective but also allows complete control over the ingredients, ensuring they are perfectly tailored to your taste and dietary needs. This recipe demystifies the process, proving that delicious, healthy, and satisfying vegetarian sushi snacks are well within reach for any home cook.
Ingredients
Here’s what you’ll need to create these delightful vegetarian sushi rolls:
- 1.5 cups Japanese Short-Grain Rice (Sushi Rice): This specific type of rice is crucial as its high starch content makes it sticky when cooked, allowing the rolls to hold together perfectly.
- 2 cups Water: For cooking the rice to the correct consistency. Using the right water-to-rice ratio is key.
- ¼ cup Rice Vinegar: Provides the characteristic tangy flavor essential for authentic sushi rice. Do not substitute with other vinegars.
- 2 tablespoons Granulated Sugar: Balances the tartness of the vinegar and adds a subtle sweetness to the rice.
- ½ teaspoon Salt: Enhances the overall flavor of the seasoned sushi rice.
- 4-5 sheets Nori (Dried Seaweed): These are the dark green wrappers that hold the sushi roll together. Look for sheets specifically labeled for sushi.
- 1 medium Carrot: Peeled and julienned (cut into long, thin matchsticks) for a sweet crunch and vibrant color.
- ½ large Cucumber: Seeded and julienned. Removing the watery seeds helps prevent soggy rolls. English or Persian cucumbers work well.
- 1 ripe Avocado: Peeled, pitted, and sliced thinly. Adds a creamy texture and healthy fats. Choose one that is ripe but still firm.
- Optional Fillings (Choose 1-2 more):
- Thinly sliced Bell Pepper (any color): Adds sweetness and crunch.
- Marinated Baked Tofu Strips: For a protein boost and savory flavor.
- Pickled Daikon Radish (Takuan): Offers a unique sweet, tangy, and crunchy element (often found in Asian markets).
- Fresh Mango Strips: Adds a surprising tropical sweetness that pairs well with avocado.
- Blanched Asparagus Spears: Provides a fresh, slightly grassy flavor and snap.
- Roasted Sweet Potato Strips: Offers a naturally sweet and earthy flavor profile.
- For Serving:
- Soy Sauce or Tamari (for gluten-free): The classic salty dipping sauce.
- Wasabi Paste: A pungent Japanese horseradish paste for a spicy kick (use sparingly!).
- Pickled Ginger (Gari): Served alongside sushi to cleanse the palate between bites.
- Equipment:
- Bamboo Sushi Mat (Makisu): Essential for rolling the sushi tightly and evenly. Often wrapped in plastic wrap for easy cleanup.
- Sharp Knife: Crucial for clean cuts through the finished rolls.
Instructions
Follow these steps carefully for perfect vegetarian sushi rolls every time:
- Prepare the Sushi Rice:
- Place the sushi rice in a fine-mesh sieve and rinse it under cold running water. Gently swirl the rice with your hand. Continue rinsing until the water runs mostly clear (this removes excess starch, preventing gummy rice). Drain thoroughly.
- Transfer the rinsed rice to a medium saucepan or rice cooker. Add the 2 cups of water.
- If using a saucepan: Bring the water to a boil over medium-high heat. Once boiling, reduce the heat to the lowest setting, cover tightly, and simmer for 15-20 minutes, or until all the water is absorbed. Do not lift the lid during this time.
- If using a rice cooker: Simply follow the manufacturer’s instructions for cooking white rice.
- Once cooked, remove the rice from the heat (or turn off the cooker) and let it stand, covered, for another 10-15 minutes. This allows the steam to finish cooking the rice evenly.
- Season the Sushi Rice:
- While the rice is standing, prepare the sushi vinegar seasoning. In a small saucepan, gently heat the rice vinegar, sugar, and salt over low heat. Stir continuously until the sugar and salt are completely dissolved. Do not let it boil. Remove from heat.
- Transfer the cooked rice to a large, non-metallic bowl (wood, glass, or plastic is ideal – metal can react with the vinegar).
- Gradually pour the warm vinegar mixture over the hot rice. Using a rice paddle or flat spatula, gently “cut” and fold the vinegar mixture into the rice using slicing motions. Avoid stirring or mashing the rice. Fan the rice simultaneously (traditionally done with a hand fan, but a piece of cardboard or fanning with the spatula works) as you mix; this helps cool the rice quickly, gives it a glossy sheen, and helps evaporate excess moisture.
- Continue folding and fanning until the rice has cooled to roughly room temperature or slightly warm. Cover the bowl with a damp cloth to prevent the rice from drying out while you prepare the fillings.
- Prepare the Fillings:
- Wash, peel (if necessary), and prepare all your chosen vegetables and other fillings. Cut them into long, thin matchsticks or strips, roughly ¼ inch thick. Consistency in size helps with even rolling. Slice the avocado just before assembly to prevent browning.
- Assemble the Sushi Rolls:
- Place the bamboo sushi mat (makisu) on a clean, dry work surface. Many people find it helpful to wrap the mat tightly in plastic wrap for easier cleanup and to prevent rice from sticking.
- Place one sheet of nori shiny-side down on the plastic-wrapped mat, with the lines on the nori (if visible) running parallel to the bamboo sticks.
- Have a small bowl of water nearby (called “tezu,” sometimes with a splash of rice vinegar added). Dip your fingers lightly in the water to prevent the rice from sticking to them. Shake off excess water.
- Take a handful of seasoned sushi rice (about ¾ to 1 cup per roll, depending on nori size) and spread it evenly over the nori sheet. Leave about a ½ to 1-inch border clear along the top edge (the edge furthest from you). Spread the rice gently; don’t press down too hard, or you’ll crush the grains. Aim for a layer about ¼ inch thick.
- Arrange your chosen fillings in a horizontal line across the rice, about an inch from the bottom edge (the edge closest to you). Don’t overfill, as this makes rolling difficult and can cause the roll to burst. A combination of 2-4 fillings usually works best. For example, layer strips of carrot, cucumber, and avocado.
- Roll the Sushi:
- Carefully lift the edge of the bamboo mat closest to you (along with the nori and rice) using your thumbs. Use your fingers to hold the fillings in place.
- Begin rolling the mat forward, tucking the nori edge tightly over the fillings to start the roll.
- Continue rolling the mat away from you, applying gentle but firm pressure to create a compact cylinder. Keep the roll tight as you go.
- When you reach the clear nori border at the top, lightly dampen the edge with a fingertip dipped in water. This will help seal the roll.
- Finish rolling completely. Gently squeeze the rolled mat all along its length to shape and further compact the sushi roll.
- Slice the Sushi Roll:
- Carefully unroll the bamboo mat, revealing your completed sushi roll.
- Transfer the roll to a clean cutting board.
- Dip the blade of a very sharp knife into your bowl of water (tezu) and shake off the excess. A wet blade prevents sticking and ensures clean cuts.
- First, trim off the uneven ends (chef’s snack!). Then, slice the roll in half. Place the two halves side-by-side and slice them both into thirds, yielding 6 equal-sized pieces per roll. Alternatively, cut the whole roll into 6 or 8 pieces directly.
- Wipe and re-wet the knife blade between cuts as needed for the cleanest results.
- Repeat and Serve:
- Repeat steps 4-6 with the remaining nori sheets, rice, and fillings.
- Arrange the cut sushi pieces attractively on a platter and serve immediately.
Nutrition Facts
(Approximate values per serving; assumes recipe makes 4 rolls, serving size = 1 roll / 6 pieces)
- Servings: 4
- Calories per serving: Approximately 300-350 kcal (will vary based on fillings like avocado or tofu)
- Description: A relatively low-calorie snack or light meal option, especially compared to fried snacks.
- Fiber: Approximately 4-6g per serving. Primarily from vegetables, nori, and rice, aiding digestion and promoting fullness.
- Healthy Fats: Primarily from avocado (if used), contributing monounsaturated fats beneficial for heart health. Amount varies significantly with avocado usage.
- Vitamin A: Good source, especially from carrots, contributing to vision health and immune function.
- Complex Carbohydrates: Around 50-60g per serving. Sushi rice provides sustained energy release.
Disclaimer: Nutritional information is an estimate only and can vary greatly depending on specific ingredients, portion sizes, and optional additions.
Preparation Time
- Active Preparation Time: Approximately 30-45 minutes (rinsing rice, chopping vegetables, assembling/rolling sushi).
- Rice Cooking & Cooling Time: Approximately 45-60 minutes (15-20 min cooking, 10-15 min standing, 20-30 min cooling).
- Total Time: Approximately 1 hour 15 minutes to 1 hour 45 minutes.
- Short Description: While the rice needs time to cook and cool properly (which can be done passively), the active hands-on time for making these vegetarian sushi rolls is relatively quick, making it feasible for a dedicated snack time or light meal prep.
How to Serve
Serving these Vegetarian Sushi Rolls is part of the fun! Here are some ideas:
- Classic Presentation:
- Arrange the cut sushi pieces neatly on a clean platter or traditional Japanese rectangular plate.
- Provide small individual dishes for soy sauce or tamari.
- Offer small mounds of wasabi paste and pickled ginger (gari) alongside the rolls. Guests can mix wasabi into their soy sauce if desired.
- Utensils:
- Offer chopsticks for an authentic experience.
- Have forks available for those less comfortable with chopsticks. Remember, sushi can also be eaten respectfully with clean hands!
- Occasions:
- Healthy Snack: Perfect for an after-school or mid-afternoon pick-me-up.
- Appetizer: Serve before a main Asian-inspired meal or as part of a larger appetizer spread at parties.
- Light Lunch or Dinner: Pair 1-2 rolls per person with a side of miso soup or edamame for a complete, light meal.
- Picnics & Packed Lunches: While best fresh, they can hold for a few hours if kept cool (see tips below). Pack soy sauce separately.
- Garnishes:
- Sprinkle toasted sesame seeds (white, black, or a mix) over the rolls just before serving for added texture and nutty flavor.
- A very light drizzle of spicy mayo (mayonnaise mixed with sriracha) or eel sauce (vegetarian versions exist) can add extra flavor dimensions, though purists might prefer them plain.
- Accompaniments:
- Serve with a bowl of steamed, salted edamame.
- A simple seaweed salad (wakame).
- A cup of warm miso soup.
- Japanese green tea (sencha or matcha).
Additional Tips
Mastering homemade sushi comes with practice. Here are 8 tips to enhance your vegetarian sushi roll making:
- Rice is King: Don’t skimp on rinsing the sushi rice thoroughly. This step is non-negotiable for achieving the right non-gummy texture. Also, ensure you use Japanese short-grain rice specifically labeled for sushi.
- Cool Rice Correctly: Allow the seasoned rice to cool to room temperature or just slightly warm before spreading it on the nori. Hot rice will make the nori tough or tear easily and can start to cook the fresh fillings. Covering with a damp cloth prevents a dry crust from forming.
- Nori Handling: Always place the nori sheet shiny-side down on the bamboo mat. The slightly rougher texture on the inside helps the rice adhere better. Handle nori with dry hands as moisture makes it wrinkle and difficult to work with.
- Don’t Overfill: It’s tempting to load up on fillings, but this is the most common reason for rolls falling apart or being impossible to close. Stick to 2-4 thin strips of fillings, arranged neatly near the bottom edge. Less is often more!
- Sharp, Wet Knife: A truly sharp knife is essential for slicing sushi. A dull knife will squash the roll instead of cutting cleanly. Keep a bowl of water nearby and dip/wipe the blade frequently between cuts to prevent rice from sticking and tearing the nori.
- Master the Mat (or Improvise): The bamboo mat (makisu) helps apply even pressure for a tight roll. Wrap it in plastic wrap for super easy cleanup. If you don’t have one, you can try using a flexible plastic cutting board or even a clean kitchen towel lined with plastic wrap, though it’s trickier to get a perfectly round, tight roll.
- Ingredient Variation Fun: Get creative! Beyond the basics, try adding strips of omelet (tamagoyaki – vegetarian version), seasoned shiitake mushrooms, crunchy tempura bits (ensure vegetarian batter), or even cream cheese (though less traditional for Japanese style). Play with color and texture combinations.
- Best Eaten Fresh: Sushi is ideally consumed within a few hours of making it for the best texture and flavor. The rice tends to harden in the refrigerator, and the nori can become chewy or soggy. If you must store leftovers, wrap them tightly in plastic wrap and refrigerate for up to 24 hours, but be aware the quality will diminish. Let them sit at room temperature for 20-30 minutes before eating to take the chill off the rice. Making components (cooked rice, chopped veggies) ahead and assembling just before serving is often a better strategy.
FAQ Section
Here are answers to some frequently asked questions about making Vegetarian Sushi Rolls:
- Q: Do I absolutely need a bamboo sushi mat (makisu) to make sushi rolls?
- A: While highly recommended for achieving a tight, evenly compressed roll, it’s not strictly impossible without one. You can try using a clean kitchen towel overlaid with plastic wrap or a flexible chopping mat as a substitute, but it requires more practice and care to get a good result. The mat makes the process significantly easier and more consistent, especially for beginners.
- Q: Can I use regular long-grain rice like Basmati or Jasmine instead of sushi rice?
- A: It’s strongly discouraged. Regular long-grain rice lacks the necessary high starch content (amylopectin) that makes sushi rice sticky when cooked. Using other types of rice will result in rolls that are difficult to form and likely to fall apart as the grains won’t cling together properly. Always opt for Japanese short-grain or medium-grain rice labeled “sushi rice.”
- Q: How do I store leftover vegetarian sushi rolls?
- A: Sushi is best enjoyed fresh. However, if you have leftovers, wrap the cut rolls tightly in plastic wrap (individually or grouped closely) and store them in an airtight container in the refrigerator for up to 24 hours. Be aware that the rice will harden, and the nori may become slightly soggy. Let them sit at room temperature for about 20-30 minutes before eating to improve the texture slightly. Avoid freezing sushi rolls.
- Q: Can I make these sushi rolls gluten-free?
- A: Yes, absolutely! The core ingredients (rice, nori, vegetables, avocado) are naturally gluten-free. The key substitution is using Tamari instead of regular soy sauce for dipping, as most soy sauces contain wheat. Double-check that your rice vinegar is gluten-free (most are, but it’s worth verifying). If using prepared fillings like tofu, ensure they were marinated or prepared without gluten-containing ingredients.
- Q: Are these Vegetarian Sushi Rolls also vegan?
- A: Yes, this specific recipe as written (using rice, nori, vegetables, avocado, plant-based fillings like tofu) is entirely vegan. Ensure any optional processed fillings (like certain pickled items or sauces) are confirmed vegan if needed. Avoid non-vegan additions like cream cheese or egg omelet (unless using a vegan egg substitute).
- Q: My sushi roll isn’t tight enough and falls apart when I cut or eat it. What did I do wrong?
- A: This usually happens for a few reasons: the rice wasn’t spread evenly or pressed down slightly, the roll wasn’t tucked tightly at the beginning, not enough pressure was applied while rolling with the mat, or it was overfilled. Focus on tucking that initial edge firmly over the fillings and applying consistent, gentle pressure as you roll the mat forward. Also, ensure you’re leaving that clean nori border at the top to seal properly.
- Q: Can I add some protein to these vegetarian rolls?
- A: Certainly! Great vegetarian protein options include strips of marinated and baked or pan-fried tofu, crumbled or strips of tempeh (steamed or pan-fried), edamame beans (shelled, incorporated into the filling), or even cooked quinoa mixed sparingly with the rice (though this alters texture). For pescetarians, cooked shrimp or crab sticks are common additions, but keep it vegetarian with plant-based choices!
- Q: What are some other interesting filling combinations for vegetarian sushi?
- A: The possibilities are vast! Try:
- Roasted sweet potato, avocado, and black sesame seeds.
- Mango, avocado, and red bell pepper for a tropical twist.
- Marinated shiitake mushrooms, cucumber, and carrot.
- Pickled daikon (takuan), cucumber, and shiso leaf (if available).
- Blanched asparagus, cream cheese (or vegan alternative), and bell pepper.
- Spinach (blanched and squeezed dry), carrot, and tofu.
Experiment with flavors and textures you enjoy!
- A: The possibilities are vast! Try:

Sushi Rolls Vegetarian Snack
Ingredients
Here’s what you’ll need to create these delightful vegetarian sushi rolls:
- 1.5 cups Japanese Short-Grain Rice (Sushi Rice): This specific type of rice is crucial as its high starch content makes it sticky when cooked, allowing the rolls to hold together perfectly.
- 2 cups Water: For cooking the rice to the correct consistency. Using the right water-to-rice ratio is key.
- ¼ cup Rice Vinegar: Provides the characteristic tangy flavor essential for authentic sushi rice. Do not substitute with other vinegars.
- 2 tablespoons Granulated Sugar: Balances the tartness of the vinegar and adds a subtle sweetness to the rice.
- ½ teaspoon Salt: Enhances the overall flavor of the seasoned sushi rice.
- 4–5 sheets Nori (Dried Seaweed): These are the dark green wrappers that hold the sushi roll together. Look for sheets specifically labeled for sushi.
- 1 medium Carrot: Peeled and julienned (cut into long, thin matchsticks) for a sweet crunch and vibrant color.
- ½ large Cucumber: Seeded and julienned. Removing the watery seeds helps prevent soggy rolls. English or Persian cucumbers work well.
- 1 ripe Avocado: Peeled, pitted, and sliced thinly. Adds a creamy texture and healthy fats. Choose one that is ripe but still firm.
- Optional Fillings (Choose 1-2 more):
- Thinly sliced Bell Pepper (any color): Adds sweetness and crunch.
- Marinated Baked Tofu Strips: For a protein boost and savory flavor.
- Pickled Daikon Radish (Takuan): Offers a unique sweet, tangy, and crunchy element (often found in Asian markets).
- Fresh Mango Strips: Adds a surprising tropical sweetness that pairs well with avocado.
- Blanched Asparagus Spears: Provides a fresh, slightly grassy flavor and snap.
- Roasted Sweet Potato Strips: Offers a naturally sweet and earthy flavor profile.
- For Serving:
- Soy Sauce or Tamari (for gluten-free): The classic salty dipping sauce.
- Wasabi Paste: A pungent Japanese horseradish paste for a spicy kick (use sparingly!).
- Pickled Ginger (Gari): Served alongside sushi to cleanse the palate between bites.
- Equipment:
- Bamboo Sushi Mat (Makisu): Essential for rolling the sushi tightly and evenly. Often wrapped in plastic wrap for easy cleanup.
- Sharp Knife: Crucial for clean cuts through the finished rolls.
Instructions
Follow these steps carefully for perfect vegetarian sushi rolls every time:
- Prepare the Sushi Rice:
- Place the sushi rice in a fine-mesh sieve and rinse it under cold running water. Gently swirl the rice with your hand. Continue rinsing until the water runs mostly clear (this removes excess starch, preventing gummy rice). Drain thoroughly.
- Transfer the rinsed rice to a medium saucepan or rice cooker. Add the 2 cups of water.
- If using a saucepan: Bring the water to a boil over medium-high heat. Once boiling, reduce the heat to the lowest setting, cover tightly, and simmer for 15-20 minutes, or until all the water is absorbed. Do not lift the lid during this time.
- If using a rice cooker: Simply follow the manufacturer’s instructions for cooking white rice.
- Once cooked, remove the rice from the heat (or turn off the cooker) and let it stand, covered, for another 10-15 minutes. This allows the steam to finish cooking the rice evenly.
- Season the Sushi Rice:
- While the rice is standing, prepare the sushi vinegar seasoning. In a small saucepan, gently heat the rice vinegar, sugar, and salt over low heat. Stir continuously until the sugar and salt are completely dissolved. Do not let it boil. Remove from heat.
- Transfer the cooked rice to a large, non-metallic bowl (wood, glass, or plastic is ideal – metal can react with the vinegar).
- Gradually pour the warm vinegar mixture over the hot rice. Using a rice paddle or flat spatula, gently “cut” and fold the vinegar mixture into the rice using slicing motions. Avoid stirring or mashing the rice. Fan the rice simultaneously (traditionally done with a hand fan, but a piece of cardboard or fanning with the spatula works) as you mix; this helps cool the rice quickly, gives it a glossy sheen, and helps evaporate excess moisture.
- Continue folding and fanning until the rice has cooled to roughly room temperature or slightly warm. Cover the bowl with a damp cloth to prevent the rice from drying out while you prepare the fillings.
- Prepare the Fillings:
- Wash, peel (if necessary), and prepare all your chosen vegetables and other fillings. Cut them into long, thin matchsticks or strips, roughly ¼ inch thick. Consistency in size helps with even rolling. Slice the avocado just before assembly to prevent browning.
- Assemble the Sushi Rolls:
- Place the bamboo sushi mat (makisu) on a clean, dry work surface. Many people find it helpful to wrap the mat tightly in plastic wrap for easier cleanup and to prevent rice from sticking.
- Place one sheet of nori shiny-side down on the plastic-wrapped mat, with the lines on the nori (if visible) running parallel to the bamboo sticks.
- Have a small bowl of water nearby (called “tezu,” sometimes with a splash of rice vinegar added). Dip your fingers lightly in the water to prevent the rice from sticking to them. Shake off excess water.
- Take a handful of seasoned sushi rice (about ¾ to 1 cup per roll, depending on nori size) and spread it evenly over the nori sheet. Leave about a ½ to 1-inch border clear along the top edge (the edge furthest from you). Spread the rice gently; don’t press down too hard, or you’ll crush the grains. Aim for a layer about ¼ inch thick.
- Arrange your chosen fillings in a horizontal line across the rice, about an inch from the bottom edge (the edge closest to you). Don’t overfill, as this makes rolling difficult and can cause the roll to burst. A combination of 2-4 fillings usually works best. For example, layer strips of carrot, cucumber, and avocado.
- Roll the Sushi:
- Carefully lift the edge of the bamboo mat closest to you (along with the nori and rice) using your thumbs. Use your fingers to hold the fillings in place.
- Begin rolling the mat forward, tucking the nori edge tightly over the fillings to start the roll.
- Continue rolling the mat away from you, applying gentle but firm pressure to create a compact cylinder. Keep the roll tight as you go.
- When you reach the clear nori border at the top, lightly dampen the edge with a fingertip dipped in water. This will help seal the roll.
- Finish rolling completely. Gently squeeze the rolled mat all along its length to shape and further compact the sushi roll.
- Slice the Sushi Roll:
- Carefully unroll the bamboo mat, revealing your completed sushi roll.
- Transfer the roll to a clean cutting board.
- Dip the blade of a very sharp knife into your bowl of water (tezu) and shake off the excess. A wet blade prevents sticking and ensures clean cuts.
- First, trim off the uneven ends (chef’s snack!). Then, slice the roll in half. Place the two halves side-by-side and slice them both into thirds, yielding 6 equal-sized pieces per roll. Alternatively, cut the whole roll into 6 or 8 pieces directly.
- Wipe and re-wet the knife blade between cuts as needed for the cleanest results.
- Repeat and Serve:
- Repeat steps 4-6 with the remaining nori sheets, rice, and fillings.
- Arrange the cut sushi pieces attractively on a platter and serve immediately.
Nutrition
- Serving Size: one normal portion
- Calories: 350
- Carbohydrates: 60g
- Fiber: 6g