
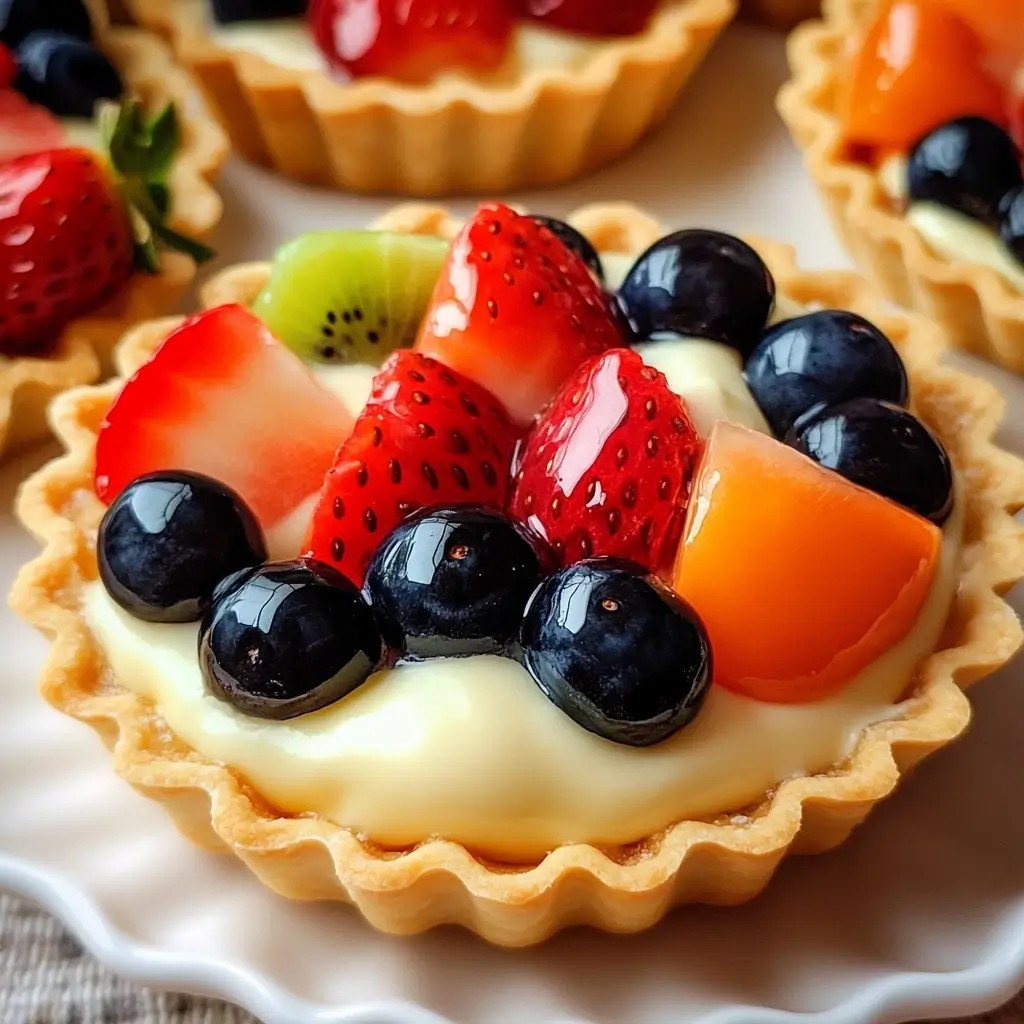
These Mini Fruit Tarts with Cream Filling have become an absolute sensation in my household, and I’m thrilled to share the magic with you. The first time I made them, it was for a small family get-together. I watched, with a baker’s quiet satisfaction, as eyes widened with the first bite. The buttery, crumbly shortcrust pastry giving way to a lusciously smooth, vanilla-kissed cream filling, all crowned with a vibrant medley of fresh, juicy fruits – it was pure delight. My kids, who can be notoriously picky, devoured them, asking when I’d make them again before the plate was even empty! Since then, they’ve graced our table for birthday celebrations, quiet weekend treats, and even as a “just because” pick-me-up. What I love most is their versatility; they look incredibly elegant and sophisticated, making them perfect for impressing guests, yet they’re surprisingly straightforward to create. The combination of textures and the burst of fresh fruit flavor make each bite an experience. They are, quite simply, little jewels of dessert perfection that bring a smile to everyone’s face.
Ingredients
For the Sweet Shortcrust Pastry (Pâte Sablée):
- 1 ½ cups (180g) All-Purpose Flour: The structural base of our tender, crumbly tart shells.
- ¼ cup (30g) Powdered Sugar (Icing Sugar): For a delicate sweetness and finer texture in the crust.
- ¼ teaspoon Salt: Balances the sweetness and enhances overall flavor.
- ½ cup (113g) Unsalted Butter: Very cold and cut into small cubes, crucial for a flaky, tender crust.
- 1 Large Egg Yolk: Adds richness, tenderness, and helps bind the dough.
- 2-3 tablespoons Ice Water: Just enough to bring the dough together; coldness is key.
For the Vanilla Cream Filling (Pastry Cream/Crème Pâtissière):
- 1 ½ cups (360ml) Whole Milk: The base for our rich and creamy filling.
- ½ Vanilla Bean, split and scraped (or 1 ½ teaspoons Vanilla Extract): Infuses a deep, aromatic vanilla flavor.
- 3 Large Egg Yolks: Provide richness, color, and thickening power.
- ½ cup (100g) Granulated Sugar: Sweetens the cream filling perfectly.
- ¼ cup (30g) Cornstarch: The primary thickening agent for a smooth, stable pastry cream.
- 1 tablespoon Unsalted Butter, softened: Added at the end for extra richness and a glossy finish.
For the Fruit Topping & Glaze (Optional):
- 2-3 cups Mixed Fresh Fruits: Such as berries (strawberries, blueberries, raspberries, blackberries), kiwi, mandarin oranges, sliced peaches, grapes. Choose your favorites, ensuring they are ripe and colorful.
- 2 tablespoons Apricot Jam or Redcurrant Jelly (Optional, for glaze): Provides a beautiful shine and helps preserve the fruit.
- 1 teaspoon Water (Optional, for glaze): To thin the jam for easier brushing.
Instructions
Part 1: Making the Sweet Shortcrust Pastry (Pâte Sablée)
- Combine Dry Ingredients: In a large mixing bowl, whisk together the all-purpose flour, powdered sugar, and salt until well combined.
- Cut in the Butter: Add the cold, cubed unsalted butter to the flour mixture. Using a pastry blender, your fingertips, or a food processor (on pulse mode), cut the butter into the flour until the mixture resembles coarse crumbs with some pea-sized pieces of butter still visible. This is key for a tender crust.
- Add Wet Ingredients: In a small bowl, lightly whisk the large egg yolk with 2 tablespoons of ice water. Create a well in the center of the flour-butter mixture and pour in the egg yolk mixture.
- Form the Dough: Gently mix with a fork or your hands until the dough just starts to come together. Be careful not to overmix. If the dough seems too dry, add the remaining tablespoon of ice water, one teaspoon at a time, until it holds together. The dough should be soft but not sticky.
- Chill the Dough: Turn the dough out onto a lightly floured surface and gently gather it into a disc. Wrap it tightly in plastic wrap and refrigerate for at least 1 hour (or up to 2 days). This chilling step is crucial; it allows the gluten to relax, making the dough easier to roll, and prevents shrinkage during baking.
Part 2: Baking the Tart Shells
- Preheat and Prepare Pans: Preheat your oven to 375°F (190°C). Lightly grease a 12-cup standard muffin tin or individual mini tart pans (approximately 3-4 inches in diameter).
- Roll Out the Dough: On a lightly floured surface, roll out the chilled dough to about ⅛-inch thickness. If the dough is too firm from chilling, let it sit at room temperature for 5-10 minutes.
- Cut and Fit Dough: Using a round cookie cutter (around 3.5-4 inches, depending on your muffin tin/tart pan size – it should be larger than the top of your tart mold to account for the sides), cut out circles of dough. Gently press each dough circle into the prepared muffin cups or tart pans, ensuring it fits snugly against the bottom and sides. Trim any excess dough from the top edges with a sharp knife or by rolling your rolling pin over the top.
- Prick and Chill (Again): Prick the bottom of each tart shell a few times with a fork. This prevents the pastry from puffing up too much during baking. Place the muffin tin or tart pans in the freezer for 15-20 minutes (or refrigerator for 30 minutes). This further helps prevent shrinkage.
- Blind Bake (Optional but Recommended): For an extra crisp crust, line each chilled tart shell with a small piece of parchment paper or a cupcake liner, and fill with pie weights, dried beans, or uncooked rice. Bake for 12-15 minutes.
- Bake Until Golden: Carefully remove the parchment paper and weights (if used). Continue baking for another 8-12 minutes, or until the tart shells are light golden brown and cooked through.
- Cool: Let the tart shells cool in the pans for 5-10 minutes before carefully removing them to a wire rack to cool completely. If they stick slightly, a gentle twist or a thin offset spatula run around the edge can help.
Part 3: Making the Vanilla Cream Filling (Pastry Cream)
- Infuse Milk (if using vanilla bean): In a medium saucepan, combine the whole milk and the scraped vanilla bean pod and seeds. Heat over medium heat until it just begins to simmer (small bubbles around the edges). Remove from heat, cover, and let steep for 15-20 minutes to infuse the vanilla flavor. If using vanilla extract, skip this steeping step and add the extract at the end.
- Whisk Yolks, Sugar, and Cornstarch: In a separate heatproof medium bowl, whisk together the large egg yolks and granulated sugar until pale and slightly thickened. Then, whisk in the cornstarch until smooth and no lumps remain.
- Temper the Eggs: If you steeped the milk with a vanilla bean, remove the pod. Gradually pour about half of the hot (or warm, if not steeped) milk into the egg yolk mixture, whisking constantly. This tempering process prevents the eggs from scrambling.
- Cook the Custard: Pour the tempered egg mixture back into the saucepan with the remaining milk. Cook over medium-low heat, whisking constantly and vigorously, especially around the edges and bottom, to prevent scorching and lumps. Continue whisking until the pastry cream thickens considerably and comes to a gentle boil. Boil for 1-2 minutes, still whisking, to fully cook out the cornstarch. It should be thick enough to coat the back of a spoon heavily.
- Finish and Chill: Remove the saucepan from the heat. Whisk in the softened tablespoon of unsalted butter until smooth. If you are using vanilla extract instead of a bean, stir it in now.
- Strain (Optional but Recommended): For an ultra-smooth pastry cream, strain it through a fine-mesh sieve into a clean bowl. This will remove any potential small lumps or bits of cooked egg.
- Chill the Cream: Press a piece of plastic wrap directly onto the surface of the pastry cream to prevent a skin from forming. Refrigerate for at least 2-3 hours, or until completely chilled and set. It will thicken further as it cools.
Part 4: Assembling the Mini Fruit Tarts
- Prepare the Cream: Once the pastry cream is thoroughly chilled, give it a good whisk to loosen it up and make it smooth and pipeable/spreadable.
- Fill the Tart Shells: Carefully spoon or pipe the chilled vanilla cream filling into each cooled tart shell, filling them almost to the top.
- Arrange the Fruit: Artfully arrange your chosen fresh fruits on top of the cream filling. Get creative with patterns and color combinations! You can slice larger fruits like strawberries or kiwis, and leave smaller berries whole.
- Glaze (Optional): If using, gently warm the apricot jam or redcurrant jelly with the teaspoon of water in a small saucepan or microwave until melted and smooth. Strain if necessary to remove any lumps. Lightly brush the warm glaze over the fruit using a pastry brush. This adds a beautiful shine and helps keep the fruit fresh.
- Chill Before Serving: Refrigerate the assembled mini fruit tarts for at least 30 minutes before serving. This allows the flavors to meld and the tarts to firm up slightly.
Nutrition Facts
- Servings: Approximately 12-15 mini tarts (depending on the size of your tart molds)
- Calories per serving (1 tart): Approximately 220-280 kcal (This is an estimate and can vary based on exact tart size, fruit choices, and specific ingredients used.)
- Fat: Primarily from the butter in the crust and filling, and egg yolks. Provides richness and flavor.
- Carbohydrates: From the flour, sugar, and fruits. Provides energy.
- Protein: Contributed mainly by the eggs and a small amount from flour. Essential for body structure and function.
- Sugar: From the powdered sugar in the crust, granulated sugar in the filling, and natural sugars in the fruit. Adds sweetness.
- Fiber: Primarily from the fresh fruit toppings. Aids in digestion.
(Note: Nutritional values are estimates. For precise information, use an online nutrition calculator with your specific ingredient brands and quantities.)
Preparation Time
- Active Preparation Time: Approximately 1 hour 15 minutes (includes making dough, rolling, making pastry cream, and assembly).
- Chilling/Resting Time (Dough & Cream): Minimum 3-4 hours (1 hour for dough, 2-3 hours for pastry cream). This can be done concurrently or overnight.
- Baking Time: Approximately 20-27 minutes for tart shells.
- Final Chilling Time (Assembled Tarts): Minimum 30 minutes.
- Total Estimated Time: Around 5-6 hours, including chilling periods. Much of this is inactive time, allowing you to work on other things or spread the process over two days. For instance, you can make the tart shells and pastry cream a day in advance and assemble them on the day of serving.
How to Serve
These Mini Fruit Tarts are delightful on their own, but here are some ideas to elevate their presentation and enjoyment:
- As the Star of a Dessert Platter:
- Arrange them beautifully on a tiered stand or a large platter, perhaps interspersed with other small sweets like macarons or mini éclairs.
- Dust lightly with powdered sugar just before serving for an elegant, frosted look.
- Garnish the platter with fresh mint leaves or edible flowers for a pop of color.
- Individual Dessert Portions:
- Serve each tart on a small, decorative dessert plate.
- Accompany with a tiny dollop of freshly whipped cream or a very small scoop of vanilla bean ice cream on the side.
- A drizzle of raspberry coulis or chocolate sauce around the plate can add an extra touch of sophistication.
- Perfect for Afternoon Tea or Brunch:
- Include them as part of an afternoon tea spread alongside scones, finger sandwiches, and other pastries.
- They make a refreshing and light sweet option for a brunch buffet.
- Party Favors (if making very small ones):
- For very small, bite-sized tarts, consider boxing them individually in small, clear pastry boxes as elegant take-home favors for guests at showers or parties.
- Beverage Pairings:
- Coffee: A good quality espresso, cappuccino, or a simple black coffee complements the sweetness beautifully.
- Tea: Delicate teas like Earl Grey, chamomile, or a fruity herbal tea pair wonderfully.
- Dessert Wine: A light, sweet dessert wine such as a Moscato d’Asti or a late-harvest Riesling can be an exquisite pairing for adult gatherings.
- Sparkling Cider or Juice: For a non-alcoholic option, especially for kids, a sparkling apple or grape cider is a great choice.
Additional Tips
- Keep it Cold for the Crust: The secret to a tender, flaky shortcrust pastry is keeping your butter and water ice-cold. Handle the dough as little as possible to prevent the butter from melting and the gluten from overdeveloping.
- Don’t Overbake the Shells: Bake the tart shells until they are just lightly golden. Overbaking can make them too hard or brittle. They will continue to crisp up slightly as they cool.
- Smooth Pastry Cream is Key: Whisk the pastry cream constantly while it’s cooking, especially the bottom and corners of the pan, to prevent lumps and scorching. Straining it afterwards is an extra step that guarantees silkiness.
- Fruit Selection Matters: Choose fruits that are ripe but still firm. Softer, overripe fruits can become mushy and release too much liquid. Consider a variety of colors and textures for visual appeal.
- Preventing a Soggy Bottom: Ensure tart shells are completely cool before filling. For extra protection, you can brush the inside of the cooled tart shells with a thin layer of melted white chocolate and let it set before adding the cream filling. The optional glaze also helps seal the fruit.
- Make-Ahead Strategy:
- Tart Shells: Can be baked up to 2-3 days in advance. Store them in an airtight container at room temperature once completely cooled.
- Pastry Cream: Can be made up to 2 days in advance. Keep it refrigerated with plastic wrap pressed directly onto the surface. Whisk well before using.
- Assembly: It’s best to assemble the tarts on the day you plan to serve them, ideally a few hours before, to keep the fruit fresh and the crust crisp.
- Flavor Variations for the Cream:
- Lemon or Orange: Add 1-2 teaspoons of finely grated lemon or orange zest to the milk when heating it for the pastry cream.
- Chocolate: Whisk in 2-3 ounces of finely chopped good-quality dark or milk chocolate into the hot pastry cream after removing it from the heat, until melted and smooth.
- Almond: Add ¼ to ½ teaspoon of almond extract along with the vanilla extract.
- Uniform Tart Shells: If using a muffin tin, after pressing the dough into the cups, you can use the bottom of a small, flat-bottomed glass (perhaps dusted lightly with flour) to gently even out the base of the dough in each cup for a more uniform thickness.
FAQ Section
Q1: Can I make these mini fruit tarts gluten-free?
A1: Yes, you absolutely can! To make them gluten-free, substitute the all-purpose flour in the shortcrust pastry with a good quality gluten-free all-purpose flour blend that contains xanthan gum (or add xanthan gum as per the blend’s recommendation). The pastry cream is naturally gluten-free as cornstarch is used as a thickener. Ensure your vanilla extract is also certified gluten-free if Celiac disease is a concern.
Q2: How far in advance can I assemble the tarts?
A2: For the best texture and freshness, it’s recommended to assemble the mini fruit tarts no more than 4-6 hours before serving. If assembled too far in advance, the crust can start to absorb moisture from the cream and fruit, potentially becoming soft. Keep them refrigerated after assembly.
Q3: What are the best fruits to use for topping?
A3: A wide variety of fruits work well! Berries (strawberries, blueberries, raspberries, blackberries) are classic choices. Sliced kiwi, mandarin orange segments, halved grapes, sliced peaches or nectarines (fresh or canned, well-drained), and even mango are excellent. Choose fruits that are colorful, ripe but firm, and complementary in flavor. Avoid fruits that brown quickly (like apples or bananas) unless you treat them with lemon juice, or use them just before serving.
Q4: How do I prevent my tart shells from shrinking during baking?
A4: There are a few key steps:
* Chill the dough thoroughly: At least 1 hour after making it, and then again for 15-20 minutes in the freezer (or 30 mins in the fridge) once the dough is in the tart pans/muffin tin.
* Don’t stretch the dough: When lining the pans, gently press the dough in rather than stretching it.
* Prick the base: Use a fork to prick the bottom of the dough to allow steam to escape.
* Blind bake with weights: This is very effective. Using pie weights or dried beans on parchment paper helps hold the shape.
Q5: My pastry cream is lumpy. Can I fix it?
A5: Yes! If your pastry cream has a few lumps, the first step is to whisk it vigorously. If that doesn’t work, you can usually salvage it by pressing it through a fine-mesh sieve. This will catch any lumps or bits of overcooked egg. To prevent lumps in the first place, ensure your cornstarch is fully dissolved in the egg yolk mixture and whisk constantly and thoroughly while cooking.
Q6: How should I store leftover mini fruit tarts?
A6: Leftover mini fruit tarts should be stored in an airtight container in the refrigerator. They are best consumed within 1-2 days, as the crust will gradually soften over time. The fruit may also start to weep a little.
Q7: Can I use a different type of filling instead of pastry cream?
A7: Certainly! While classic pastry cream is traditional, you could also fill the tart shells with:
* Lemon Curd: For a tangy and bright alternative.
* Chocolate Ganache: For a richer, more decadent tart.
* Cream Cheese Filling: A sweetened cream cheese mixture (like a no-bake cheesecake filling) would also be delicious.
* Mascarpone Cream: Sweetened mascarpone cheese whipped with a little cream and vanilla.
Q8: Can I make one large fruit tart instead of mini ones with this recipe?
A8: Yes, this recipe can be adapted for one large tart (e.g., a 9-inch tart pan with a removable bottom). You would follow the same principles for the crust and filling. The baking time for a large tart shell will likely be longer; blind bake for about 15-20 minutes with weights, then another 10-15 minutes without, until golden. The amount of pastry cream should be sufficient for a 9-inch tart. Assembly is the same, just on a larger scale.

Mini Fruit Tarts with Cream Filling
Ingredients
For the Sweet Shortcrust Pastry (Pâte Sablée):
- 1 ½ cups (180g) All-Purpose Flour: The structural base of our tender, crumbly tart shells.
- ¼ cup (30g) Powdered Sugar (Icing Sugar): For a delicate sweetness and finer texture in the crust.
- ¼ teaspoon Salt: Balances the sweetness and enhances overall flavor.
- ½ cup (113g) Unsalted Butter: Very cold and cut into small cubes, crucial for a flaky, tender crust.
- 1 Large Egg Yolk: Adds richness, tenderness, and helps bind the dough.
- 2–3 tablespoons Ice Water: Just enough to bring the dough together; coldness is key.
For the Vanilla Cream Filling (Pastry Cream/Crème Pâtissière):
- 1 ½ cups (360ml) Whole Milk: The base for our rich and creamy filling.
- ½ Vanilla Bean, split and scraped (or 1 ½ teaspoons Vanilla Extract): Infuses a deep, aromatic vanilla flavor.
- 3 Large Egg Yolks: Provide richness, color, and thickening power.
- ½ cup (100g) Granulated Sugar: Sweetens the cream filling perfectly.
- ¼ cup (30g) Cornstarch: The primary thickening agent for a smooth, stable pastry cream.
- 1 tablespoon Unsalted Butter, softened: Added at the end for extra richness and a glossy finish.
For the Fruit Topping & Glaze (Optional):
- 2–3 cups Mixed Fresh Fruits: Such as berries (strawberries, blueberries, raspberries, blackberries), kiwi, mandarin oranges, sliced peaches, grapes. Choose your favorites, ensuring they are ripe and colorful.
- 2 tablespoons Apricot Jam or Redcurrant Jelly (Optional, for glaze): Provides a beautiful shine and helps preserve the fruit.
- 1 teaspoon Water (Optional, for glaze): To thin the jam for easier brushing.
Instructions
Part 1: Making the Sweet Shortcrust Pastry (Pâte Sablée)
- Combine Dry Ingredients: In a large mixing bowl, whisk together the all-purpose flour, powdered sugar, and salt until well combined.
- Cut in the Butter: Add the cold, cubed unsalted butter to the flour mixture. Using a pastry blender, your fingertips, or a food processor (on pulse mode), cut the butter into the flour until the mixture resembles coarse crumbs with some pea-sized pieces of butter still visible. This is key for a tender crust.
- Add Wet Ingredients: In a small bowl, lightly whisk the large egg yolk with 2 tablespoons of ice water. Create a well in the center of the flour-butter mixture and pour in the egg yolk mixture.
- Form the Dough: Gently mix with a fork or your hands until the dough just starts to come together. Be careful not to overmix. If the dough seems too dry, add the remaining tablespoon of ice water, one teaspoon at a time, until it holds together. The dough should be soft but not sticky.
- Chill the Dough: Turn the dough out onto a lightly floured surface and gently gather it into a disc. Wrap it tightly in plastic wrap and refrigerate for at least 1 hour (or up to 2 days). This chilling step is crucial; it allows the gluten to relax, making the dough easier to roll, and prevents shrinkage during baking.
Part 2: Baking the Tart Shells
- Preheat and Prepare Pans: Preheat your oven to 375°F (190°C). Lightly grease a 12-cup standard muffin tin or individual mini tart pans (approximately 3-4 inches in diameter).
- Roll Out the Dough: On a lightly floured surface, roll out the chilled dough to about ⅛-inch thickness. If the dough is too firm from chilling, let it sit at room temperature for 5-10 minutes.
- Cut and Fit Dough: Using a round cookie cutter (around 3.5-4 inches, depending on your muffin tin/tart pan size – it should be larger than the top of your tart mold to account for the sides), cut out circles of dough. Gently press each dough circle into the prepared muffin cups or tart pans, ensuring it fits snugly against the bottom and sides. Trim any excess dough from the top edges with a sharp knife or by rolling your rolling pin over the top.
- Prick and Chill (Again): Prick the bottom of each tart shell a few times with a fork. This prevents the pastry from puffing up too much during baking. Place the muffin tin or tart pans in the freezer for 15-20 minutes (or refrigerator for 30 minutes). This further helps prevent shrinkage.
- Blind Bake (Optional but Recommended): For an extra crisp crust, line each chilled tart shell with a small piece of parchment paper or a cupcake liner, and fill with pie weights, dried beans, or uncooked rice. Bake for 12-15 minutes.
- Bake Until Golden: Carefully remove the parchment paper and weights (if used). Continue baking for another 8-12 minutes, or until the tart shells are light golden brown and cooked through.
- Cool: Let the tart shells cool in the pans for 5-10 minutes before carefully removing them to a wire rack to cool completely. If they stick slightly, a gentle twist or a thin offset spatula run around the edge can help.
Part 3: Making the Vanilla Cream Filling (Pastry Cream)
- Infuse Milk (if using vanilla bean): In a medium saucepan, combine the whole milk and the scraped vanilla bean pod and seeds. Heat over medium heat until it just begins to simmer (small bubbles around the edges). Remove from heat, cover, and let steep for 15-20 minutes to infuse the vanilla flavor. If using vanilla extract, skip this steeping step and add the extract at the end.
- Whisk Yolks, Sugar, and Cornstarch: In a separate heatproof medium bowl, whisk together the large egg yolks and granulated sugar until pale and slightly thickened. Then, whisk in the cornstarch until smooth and no lumps remain.
- Temper the Eggs: If you steeped the milk with a vanilla bean, remove the pod. Gradually pour about half of the hot (or warm, if not steeped) milk into the egg yolk mixture, whisking constantly. This tempering process prevents the eggs from scrambling.
- Cook the Custard: Pour the tempered egg mixture back into the saucepan with the remaining milk. Cook over medium-low heat, whisking constantly and vigorously, especially around the edges and bottom, to prevent scorching and lumps. Continue whisking until the pastry cream thickens considerably and comes to a gentle boil. Boil for 1-2 minutes, still whisking, to fully cook out the cornstarch. It should be thick enough to coat the back of a spoon heavily.
- Finish and Chill: Remove the saucepan from the heat. Whisk in the softened tablespoon of unsalted butter until smooth. If you are using vanilla extract instead of a bean, stir it in now.
- Strain (Optional but Recommended): For an ultra-smooth pastry cream, strain it through a fine-mesh sieve into a clean bowl. This will remove any potential small lumps or bits of cooked egg.
- Chill the Cream: Press a piece of plastic wrap directly onto the surface of the pastry cream to prevent a skin from forming. Refrigerate for at least 2-3 hours, or until completely chilled and set. It will thicken further as it cools.
Part 4: Assembling the Mini Fruit Tarts
- Prepare the Cream: Once the pastry cream is thoroughly chilled, give it a good whisk to loosen it up and make it smooth and pipeable/spreadable.
- Fill the Tart Shells: Carefully spoon or pipe the chilled vanilla cream filling into each cooled tart shell, filling them almost to the top.
- Arrange the Fruit: Artfully arrange your chosen fresh fruits on top of the cream filling. Get creative with patterns and color combinations! You can slice larger fruits like strawberries or kiwis, and leave smaller berries whole.
- Glaze (Optional): If using, gently warm the apricot jam or redcurrant jelly with the teaspoon of water in a small saucepan or microwave until melted and smooth. Strain if necessary to remove any lumps. Lightly brush the warm glaze over the fruit using a pastry brush. This adds a beautiful shine and helps keep the fruit fresh.
- Chill Before Serving: Refrigerate the assembled mini fruit tarts for at least 30 minutes before serving. This allows the flavors to meld and the tarts to firm up slightly.
Nutrition
- Serving Size: one normal portion
- Calories: 280


