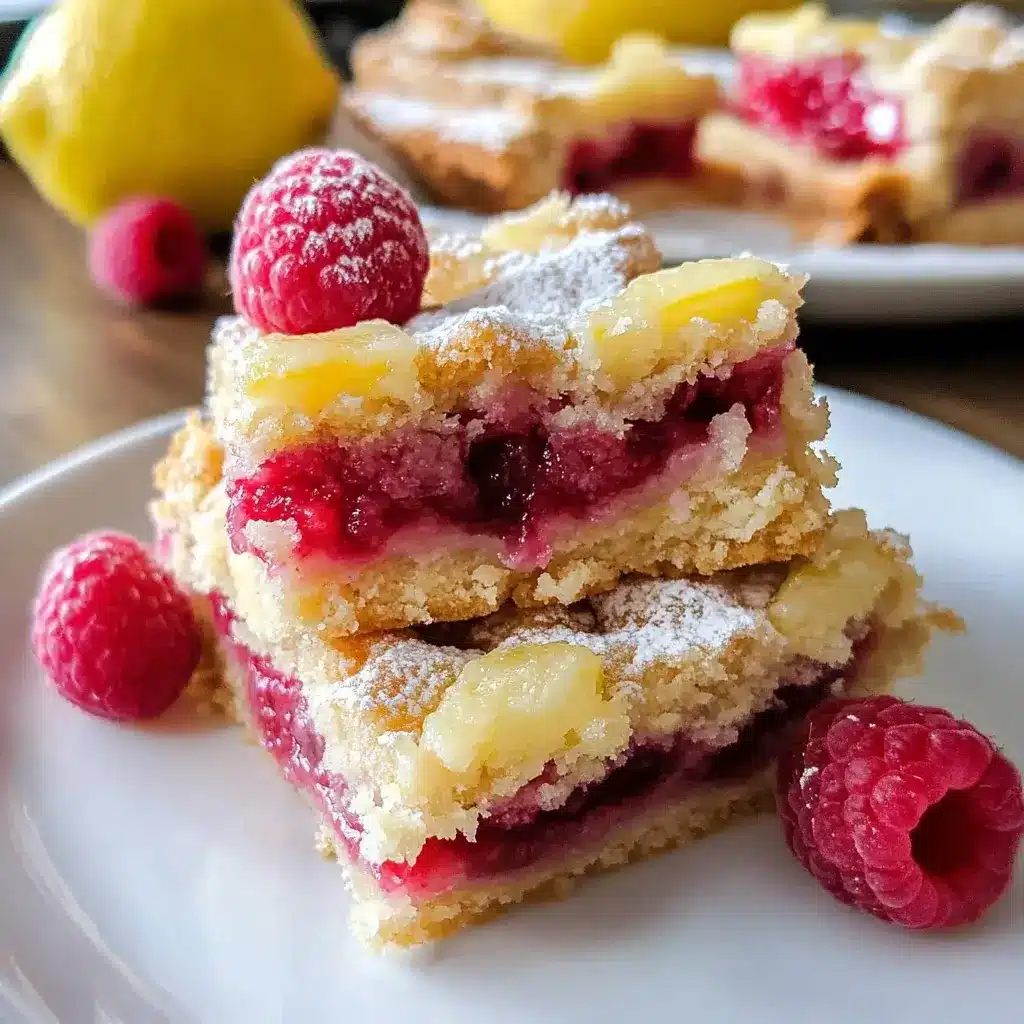
Raspberry Lemon Bars have become a staple in our home, especially when the days get longer and the sun shines brighter. There’s something inherently uplifting about the combination of tart lemon and sweet raspberries, and these bars capture that perfectly. I remember the first time I baked these; the kitchen filled with the most incredible citrusy aroma, instantly making everyone curious. My kids, usually picky eaters, couldn’t wait for them to cool down enough to try. The reaction? Pure joy! They vanished in a day, with requests for more echoing throughout the week. Since then, Raspberry Lemon Bars have been requested for every potluck, picnic, and summer gathering we attend. They’re not just a dessert; they are a little burst of sunshine on a plate, and I’m thrilled to share this recipe with you so you can bring that same sunshine into your kitchen.
Ingredients
- For the Crust:
- All-Purpose Flour: 2 ½ cups – Provides the structure for the crust, creating a sturdy base for the lemon and raspberry filling.
- Powdered Sugar: ½ cup – Adds sweetness and tenderness to the crust, giving it a melt-in-your-mouth texture.
- Salt: ¼ teaspoon – Enhances the flavors of the other ingredients in the crust and filling.
- Unsalted Butter: 1 cup (2 sticks), cold and cubed – Essential for a flaky and buttery crust. Cold butter is key for creating layers and a tender texture.
- For the Filling:
- Granulated Sugar: 1 ¾ cups – Sweetens the filling and balances the tartness of the lemon juice.
- All-Purpose Flour: ¼ cup – Helps to thicken the lemon filling, creating a smooth and cohesive texture.
- Large Eggs: 4 – Provide structure and richness to the filling, binding the ingredients together and adding a creamy consistency.
- Fresh Lemon Juice: ¾ cup (from about 4-5 lemons) – The star of the show! Freshly squeezed lemon juice delivers that bright, tangy flavor that defines lemon bars.
- Lemon Zest: 2 tablespoons (from about 2 lemons) – Amplifies the lemon flavor, adding aromatic oils that enhance the overall citrusy profile.
- Fresh Raspberries: 1 ½ cups – Bring a burst of juicy sweetness and a beautiful color contrast to the lemon bars. Frozen raspberries can be used if fresh are not available, but thaw and drain them well to avoid excess moisture.
- Powdered Sugar: For dusting (optional) – Adds a delicate sweetness and a beautiful finish to the bars.
Instructions
- Preheat the Oven and Prepare the Pan: Preheat your oven to 350°F (175°C). Position a rack in the center of the oven for even baking. Take an 9×13 inch baking pan and line it with parchment paper, leaving an overhang on the sides. This parchment paper sling will make it incredibly easy to lift the finished bars out of the pan later, ensuring clean edges and no sticking. Lightly grease the parchment paper with cooking spray or butter to further prevent sticking and ensure easy removal. Setting up your pan properly at the beginning makes the whole process smoother.
- Make the Crust Dough: In a large mixing bowl, whisk together the all-purpose flour, powdered sugar, and salt until well combined. This dry mixture forms the base of your crust. Adding powdered sugar instead of granulated sugar contributes to a more tender and less grainy crust. The salt is crucial for balancing the sweetness and enhancing all the flavors.
- Cut in the Cold Butter: Add the cold, cubed unsalted butter to the flour mixture. Using a pastry blender or your fingertips, cut the butter into the dry ingredients. The goal is to break down the butter into smaller pieces that are about the size of small peas. If using your fingertips, work quickly to keep the butter cold, as warm butter will result in a tougher crust. You’re looking for a mixture that resembles coarse crumbs. Don’t overmix at this stage; some small butter pieces are desirable for flakiness.
- Press the Crust into the Pan: Transfer the crumbly dough into the prepared baking pan. Using your fingers or the bottom of a measuring cup, firmly press the dough evenly into the bottom of the pan. Ensure the crust is uniformly thick across the entire pan and slightly up the sides to create a neat edge for the filling. A level crust is important for even baking and a professional-looking final product.
- Pre-bake the Crust: Place the pan in the preheated oven and bake the crust for 18-20 minutes, or until it is lightly golden brown around the edges. Pre-baking the crust is essential because it sets the base and prevents it from becoming soggy when the moist lemon filling is added. Keep an eye on it, as oven temperatures can vary. The crust should be just starting to color.
- Prepare the Lemon Filling while the Crust Bakes: While the crust is pre-baking, prepare the lemon filling. In a separate large mixing bowl, whisk together the granulated sugar and all-purpose flour until well combined. The flour in the filling helps to stabilize and thicken the lemon mixture as it bakes, preventing it from being too runny.
- Add Eggs and Lemon Juice: To the sugar and flour mixture, add the large eggs, fresh lemon juice, and lemon zest. Whisk everything together until the filling is smooth and well combined. Ensure there are no lumps of flour or sugar. The mixture should be bright yellow and smell wonderfully lemony. Fresh lemon juice is crucial for the best flavor; bottled lemon juice often lacks the same bright, zesty quality.
- Gently Fold in Raspberries: Once the lemon filling is smooth, gently fold in the fresh raspberries. Distribute them evenly throughout the filling. Be careful not to overmix at this stage, as you want to keep the raspberries intact and prevent them from bleeding too much color into the filling. Gently folding ensures they remain whole and juicy.
- Pour Filling over Pre-baked Crust: Once the crust is lightly golden and has finished pre-baking, carefully remove it from the oven. Pour the raspberry lemon filling evenly over the hot, pre-baked crust. Ensure the filling is spread uniformly to ensure even baking and a consistent texture across the bars.
- Bake the Bars: Return the pan to the oven and bake for another 25-30 minutes, or until the filling is set and no longer jiggly in the center. The edges should be lightly golden, and the center should be firm to the touch but still slightly soft. The baking time can vary depending on your oven, so start checking for doneness around 25 minutes. If the edges are browning too quickly, you can loosely tent the pan with foil for the last part of the baking time.
- Cool Completely: Once baked, remove the Raspberry Lemon Bars from the oven and let them cool completely in the pan on a wire rack. This is crucial for the bars to set properly. Resist the temptation to cut into them while they are still warm, as the filling will be too soft. Cooling allows the filling to firm up and makes for cleaner cuts. Cooling completely will typically take at least 2-3 hours at room temperature, or you can speed up the process by refrigerating them once they are slightly cooled.
- Cut and Serve: Once the bars are completely cooled, use the parchment paper overhang to lift them out of the pan. Place them on a cutting board and cut them into squares or bars. For clean cuts, use a sharp knife and wipe it clean between cuts, especially if the filling is still slightly sticky. Dust the bars with powdered sugar just before serving, if desired, for an extra touch of sweetness and visual appeal. Serve chilled or at room temperature. They are delicious on their own or paired with a dollop of whipped cream or a scoop of vanilla ice cream.
Nutrition Facts
Serving Size: 1 bar (based on 24 bars from a 9×13 inch pan)
Calories per Serving: Approximately 220-250 kcal
- Total Fat: 10-12g
- Saturated Fat: 6-7g
Please note: Nutritional values are estimates and can vary based on specific ingredients and portion sizes. For precise nutritional information, use a nutrition calculator with specific brands and measurements.
Preparation Time
Prep Time: 20 minutes
Cook Time: 45-50 minutes
Cooling Time: 2-3 hours (minimum)
This Raspberry Lemon Bar recipe is wonderfully straightforward. The active preparation time is minimal, mainly involving mixing the crust and filling ingredients. The baking time is just under an hour, but the most significant portion of the time is dedicated to cooling. Proper cooling is essential for achieving the perfect texture and ensuring the bars are easy to cut and serve. Consider making these bars ahead of time, as they are perfect for preparing a day before you plan to serve them, allowing ample time for chilling and flavor development.
How to Serve
Raspberry Lemon Bars are incredibly versatile and can be served in numerous delightful ways, making them perfect for any occasion:
- Classic Dessert:
- Serve them chilled or at room temperature as a simple and refreshing dessert after lunch or dinner.
- Dust generously with powdered sugar for an elegant finish.
- Pair with a glass of iced tea, lemonade, or a light white wine for a perfect summer treat.
- Elevated Dessert:
- Serve with a dollop of fresh whipped cream or crème fraîche for added richness and a creamy contrast to the tartness of the bars.
- Accompany with a scoop of vanilla bean ice cream or raspberry sorbet for a more indulgent dessert experience.
- Garnish with fresh raspberries, lemon slices, or mint sprigs for a beautiful presentation.
- Brunch or Tea Party Treat:
- Cut into smaller squares or triangles for a delightful addition to a brunch spread or afternoon tea.
- Arrange them on a tiered serving platter alongside other pastries, scones, and finger sandwiches.
- Serve with hot tea, coffee, or sparkling beverages.
- Picnics and Outdoor Gatherings:
- These bars travel well and are perfect for picnics, potlucks, and outdoor barbecues.
- Pack them in an airtight container to keep them fresh and prevent sticking.
- Their bright, summery flavors are especially enjoyable in warm weather.
- Special Occasions:
- For birthdays, holidays, or special celebrations, these bars can be dressed up with decorative toppings.
- Consider adding a drizzle of melted white chocolate or a scattering of toasted coconut flakes.
- Arrange them artfully on a serving plate for a more festive presentation.
Additional Tips for Perfect Raspberry Lemon Bars
- Use Freshly Squeezed Lemon Juice and Zest: For the most vibrant and authentic lemon flavor, always use freshly squeezed lemon juice and zest. Bottled lemon juice can lack the bright, zesty notes that fresh juice provides. Zesting the lemons before juicing them is easier.
- Cold Butter is Key for a Flaky Crust: Ensure your butter is very cold when making the crust. Cold butter helps create steam during baking, which results in a flaky and tender crust. If your kitchen is warm, you can even chill your flour and powdered sugar before mixing.
- Don’t Overmix the Crust Dough: Overmixing the crust dough can develop the gluten in the flour, leading to a tougher crust. Mix just until the butter is incorporated and the mixture resembles coarse crumbs.
- Pre-bake the Crust Properly: Pre-baking the crust is crucial to prevent a soggy bottom. Bake it until it’s lightly golden around the edges. This creates a sturdy base for the moist lemon filling.
- Don’t Overbake the Filling: Overbaking the lemon filling can result in dry and cracked bars. Bake until the filling is set and no longer jiggly in the center, but still has a slight softness. It will continue to set as it cools.
- Cool Completely Before Cutting: Patience is key! Allow the Raspberry Lemon Bars to cool completely in the pan before attempting to cut them. This allows the filling to firm up, making them easier to slice cleanly and preventing them from crumbling.
- Use Parchment Paper for Easy Removal: Lining your baking pan with parchment paper, with an overhang on the sides, is a game-changer. It makes lifting the bars out of the pan effortless and ensures clean edges.
- Adjust Sweetness to Your Preference: If you prefer a tarter lemon bar, you can slightly reduce the amount of sugar in the filling. Conversely, if you like them sweeter, you can add a bit more sugar. Taste the filling before pouring it over the crust and adjust accordingly.
Frequently Asked Questions (FAQ) About Raspberry Lemon Bars
Q1: Can I use frozen raspberries instead of fresh?
A: Yes, you can use frozen raspberries if fresh ones are not available. However, it’s important to thaw them completely and drain off any excess liquid before folding them into the lemon filling. This will prevent the bars from becoming too watery and ensure the color doesn’t bleed too much.
Q2: How do I store Raspberry Lemon Bars?
A: Raspberry Lemon Bars should be stored in an airtight container at room temperature for up to 3 days, or in the refrigerator for up to a week. Refrigeration is recommended if your kitchen is warm or humid, as it will help maintain their freshness and prevent them from becoming too soft.
Q3: Can I freeze Raspberry Lemon Bars?
A: Yes, these bars freeze beautifully! Once completely cooled and cut, arrange them in a single layer on a baking sheet and freeze until solid. Then, transfer them to an airtight freezer-safe container or bag. They can be frozen for up to 2-3 months. Thaw them in the refrigerator overnight or at room temperature for a few hours before serving.
Q4: My lemon bars are too tart. What did I do wrong?
A: Lemon bars are intended to be tart, but if they are overwhelmingly so, it might be due to using particularly acidic lemons or adding too much lemon juice. Double-check your measurements and consider using slightly less lemon juice next time. You can also increase the sugar slightly to balance the tartness.
Q5: My crust is tough. How can I make it more tender?
A: A tough crust is often a result of overmixing the dough or using too much water. Ensure you are not overmixing the crust dough once the butter is added. Also, make sure your butter is very cold, as warm butter can lead to a tougher crust. Using powdered sugar in the crust also contributes to tenderness.
Q6: Can I make these bars ahead of time?
A: Absolutely! Raspberry Lemon Bars are perfect for making ahead of time. In fact, they often taste even better the next day after the flavors have had time to meld. You can bake them a day or two in advance and store them in the refrigerator until ready to serve.
Q7: Can I use a different type of berry instead of raspberries?
A: Yes, you can experiment with other berries! Blueberries, blackberries, or even sliced strawberries would work well in place of raspberries. Just ensure they are fresh or properly thawed and drained if using frozen berries.
Q8: Why did my lemon filling crack on top?
A: Cracking in the lemon filling can occur if the bars are overbaked or if the oven temperature is too high. Try reducing the baking time slightly and ensure your oven temperature is accurate. Also, avoid sudden temperature changes; let the bars cool gradually in the oven with the door slightly ajar if cracking is a consistent issue.

Raspberry Lemon Bars
Ingredients
- For the Crust:
- All-Purpose Flour: 2 ½ cups – Provides the structure for the crust, creating a sturdy base for the lemon and raspberry filling.
- Powdered Sugar: ½ cup – Adds sweetness and tenderness to the crust, giving it a melt-in-your-mouth texture.
- Salt: ¼ teaspoon – Enhances the flavors of the other ingredients in the crust and filling.
- Unsalted Butter: 1 cup (2 sticks), cold and cubed – Essential for a flaky and buttery crust. Cold butter is key for creating layers and a tender texture.
- For the Filling:
- Granulated Sugar: 1 ¾ cups – Sweetens the filling and balances the tartness of the lemon juice.
- All-Purpose Flour: ¼ cup – Helps to thicken the lemon filling, creating a smooth and cohesive texture.
- Large Eggs: 4 – Provide structure and richness to the filling, binding the ingredients together and adding a creamy consistency.
- Fresh Lemon Juice: ¾ cup (from about 4-5 lemons) – The star of the show! Freshly squeezed lemon juice delivers that bright, tangy flavor that defines lemon bars.
- Lemon Zest: 2 tablespoons (from about 2 lemons) – Amplifies the lemon flavor, adding aromatic oils that enhance the overall citrusy profile.
- Fresh Raspberries: 1 ½ cups – Bring a burst of juicy sweetness and a beautiful color contrast to the lemon bars. Frozen raspberries can be used if fresh are not available, but thaw and drain them well to avoid excess moisture.
- Powdered Sugar: For dusting (optional) – Adds a delicate sweetness and a beautiful finish to the bars.
Instructions
- Preheat the Oven and Prepare the Pan: Preheat your oven to 350°F (175°C). Position a rack in the center of the oven for even baking. Take an 9×13 inch baking pan and line it with parchment paper, leaving an overhang on the sides. This parchment paper sling will make it incredibly easy to lift the finished bars out of the pan later, ensuring clean edges and no sticking. Lightly grease the parchment paper with cooking spray or butter to further prevent sticking and ensure easy removal. Setting up your pan properly at the beginning makes the whole process smoother.
- Make the Crust Dough: In a large mixing bowl, whisk together the all-purpose flour, powdered sugar, and salt until well combined. This dry mixture forms the base of your crust. Adding powdered sugar instead of granulated sugar contributes to a more tender and less grainy crust. The salt is crucial for balancing the sweetness and enhancing all the flavors.
- Cut in the Cold Butter: Add the cold, cubed unsalted butter to the flour mixture. Using a pastry blender or your fingertips, cut the butter into the dry ingredients. The goal is to break down the butter into smaller pieces that are about the size of small peas. If using your fingertips, work quickly to keep the butter cold, as warm butter will result in a tougher crust. You’re looking for a mixture that resembles coarse crumbs. Don’t overmix at this stage; some small butter pieces are desirable for flakiness.
- Press the Crust into the Pan: Transfer the crumbly dough into the prepared baking pan. Using your fingers or the bottom of a measuring cup, firmly press the dough evenly into the bottom of the pan. Ensure the crust is uniformly thick across the entire pan and slightly up the sides to create a neat edge for the filling. A level crust is important for even baking and a professional-looking final product.
- Pre-bake the Crust: Place the pan in the preheated oven and bake the crust for 18-20 minutes, or until it is lightly golden brown around the edges. Pre-baking the crust is essential because it sets the base and prevents it from becoming soggy when the moist lemon filling is added. Keep an eye on it, as oven temperatures can vary. The crust should be just starting to color.
- Prepare the Lemon Filling while the Crust Bakes: While the crust is pre-baking, prepare the lemon filling. In a separate large mixing bowl, whisk together the granulated sugar and all-purpose flour until well combined. The flour in the filling helps to stabilize and thicken the lemon mixture as it bakes, preventing it from being too runny.
- Add Eggs and Lemon Juice: To the sugar and flour mixture, add the large eggs, fresh lemon juice, and lemon zest. Whisk everything together until the filling is smooth and well combined. Ensure there are no lumps of flour or sugar. The mixture should be bright yellow and smell wonderfully lemony. Fresh lemon juice is crucial for the best flavor; bottled lemon juice often lacks the same bright, zesty quality.
- Gently Fold in Raspberries: Once the lemon filling is smooth, gently fold in the fresh raspberries. Distribute them evenly throughout the filling. Be careful not to overmix at this stage, as you want to keep the raspberries intact and prevent them from bleeding too much color into the filling. Gently folding ensures they remain whole and juicy.
- Pour Filling over Pre-baked Crust: Once the crust is lightly golden and has finished pre-baking, carefully remove it from the oven. Pour the raspberry lemon filling evenly over the hot, pre-baked crust. Ensure the filling is spread uniformly to ensure even baking and a consistent texture across the bars.
- Bake the Bars: Return the pan to the oven and bake for another 25-30 minutes, or until the filling is set and no longer jiggly in the center. The edges should be lightly golden, and the center should be firm to the touch but still slightly soft. The baking time can vary depending on your oven, so start checking for doneness around 25 minutes. If the edges are browning too quickly, you can loosely tent the pan with foil for the last part of the baking time.
- Cool Completely: Once baked, remove the Raspberry Lemon Bars from the oven and let them cool completely in the pan on a wire rack. This is crucial for the bars to set properly. Resist the temptation to cut into them while they are still warm, as the filling will be too soft. Cooling allows the filling to firm up and makes for cleaner cuts. Cooling completely will typically take at least 2-3 hours at room temperature, or you can speed up the process by refrigerating them once they are slightly cooled.
- Cut and Serve: Once the bars are completely cooled, use the parchment paper overhang to lift them out of the pan. Place them on a cutting board and cut them into squares or bars. For clean cuts, use a sharp knife and wipe it clean between cuts, especially if the filling is still slightly sticky. Dust the bars with powdered sugar just before serving, if desired, for an extra touch of sweetness and visual appeal. Serve chilled or at room temperature. They are delicious on their own or paired with a dollop of whipped cream or a scoop of vanilla ice cream.
Nutrition
- Serving Size: one normal portion
- Calories: 250
- Fat: 12g
- Saturated Fat: 7g