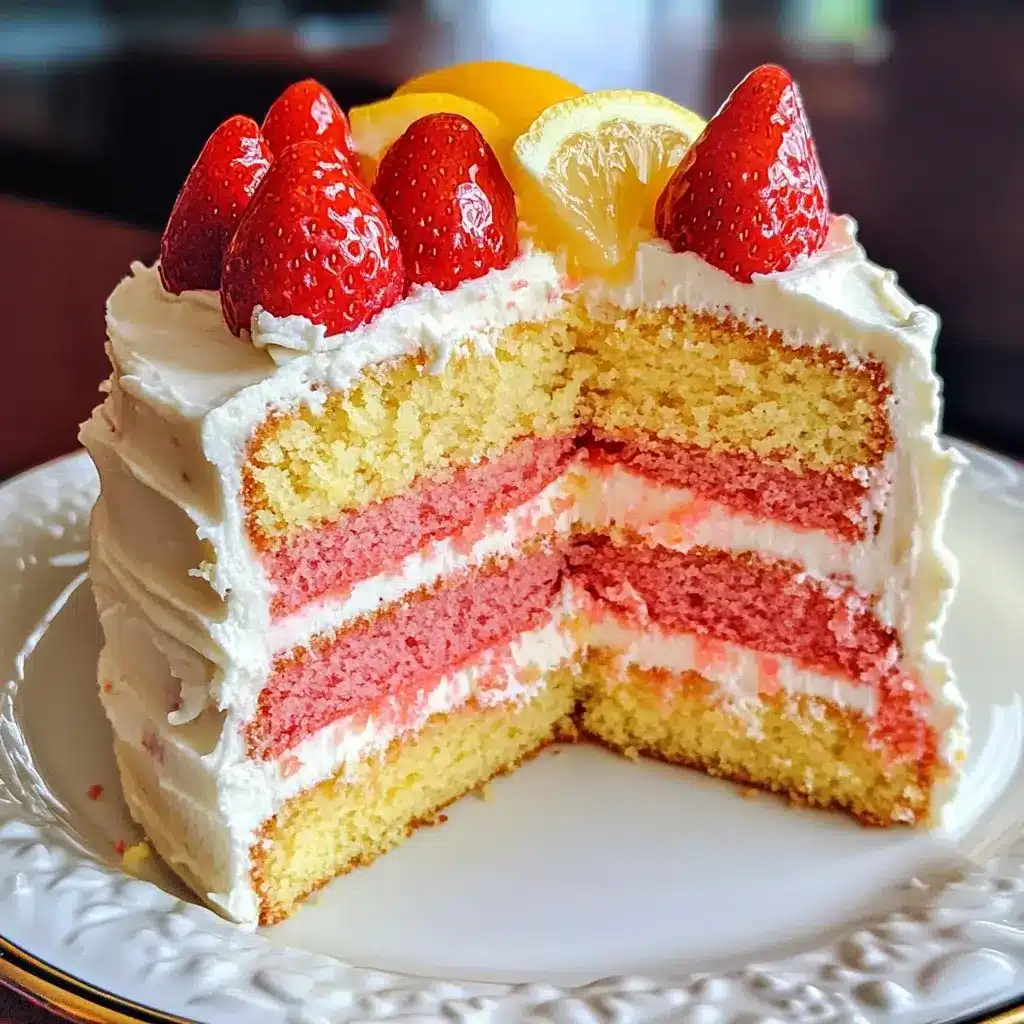
Let me tell you, baking has always been my happy place, a sort of delicious therapy session in my kitchen. And when it comes to cakes, I have a particular fondness for layers – they just feel so celebratory and special, don’t they? This Strawberry Lemon Layer Cake? Oh, it’s become an absolute sensation in our home. From the first time I pulled it, golden and fragrant, from the oven, it was love at first bite. The bright, tangy lemon perfectly complements the sweet, juicy strawberries, creating a flavor explosion that’s both refreshing and comforting. My family devoured it in record time, even my usually picky eaters came back for seconds (and thirds!). It’s the kind of cake that screams summer picnics, garden parties, or just a delightful weekend treat. Trust me, if you’re looking for a cake that’s both impressive and incredibly delicious, this Strawberry Lemon Layer Cake is your answer. It’s become my go-to for bringing smiles and sunshine to any occasion, and I’m so excited to share this recipe with you so you can experience the joy it brings!
Ingredients for Strawberry Lemon Layer Cake
For the Cake:
- All-Purpose Flour: 3 cups, the foundation of our cake, providing structure and a tender crumb.
- Granulated Sugar: 2 cups, for sweetness and moisture, also aiding in browning and tenderness.
- Baking Powder: 3 teaspoons, the leavening agent that makes our cake light and fluffy.
- Baking Soda: 1 teaspoon, another leavening agent, reacting with acidic ingredients for extra lift and a tender texture.
- Salt: 1 teaspoon, enhances the flavors of all other ingredients and balances the sweetness.
- Unsalted Butter, softened: 1 cup (2 sticks), provides richness, flavor, and moisture, contributing to a tender cake.
- Vegetable Oil: ½ cup, adds extra moisture and tenderness, resulting in a cake that stays moist for days.
- Eggs: 4 large, bind the ingredients together, add richness, and contribute to the cake’s structure.
- Buttermilk: 1 cup, adds moisture and tanginess, activating the baking soda for a lighter crumb.
- Lemon Zest: 2 tablespoons, the finely grated outer rind of lemons, infusing the cake with bright, citrusy flavor.
- Lemon Juice: ¼ cup, adds a tangy counterpoint to the sweetness and enhances the lemon flavor.
- Vanilla Extract: 2 teaspoons, enhances the overall flavor profile, adding warmth and depth.
For the Strawberry Filling:
- Fresh Strawberries: 2 cups, hulled and sliced, the star of our filling, providing sweet, fruity flavor and vibrant color.
- Granulated Sugar: ¼ cup, sweetens the strawberries and helps to draw out their juices, creating a syrupy filling.
- Lemon Juice: 1 tablespoon, brightens the strawberry flavor and adds a touch of acidity.
- Cornstarch: 1 tablespoon, thickens the strawberry juices to create a luscious filling consistency.
For the Lemon Buttercream Frosting:
- Unsalted Butter, softened: 1 cup (2 sticks), the base of our buttercream, providing richness and structure.
- Powdered Sugar: 4 cups, sweetens and thickens the frosting, creating a smooth and creamy texture.
- Lemon Zest: 1 tablespoon, enhances the lemon flavor of the frosting, adding aromatic citrus notes.
- Lemon Juice: 3 tablespoons, adds tanginess and thins the frosting to a spreadable consistency.
- Heavy Cream or Milk: 2-4 tablespoons, adjust the consistency of the frosting, making it smoother and easier to spread.
- Pinch of Salt: Balances the sweetness and enhances the lemon flavor in the frosting.
Instructions for Baking Strawberry Lemon Layer Cake
Step 1: Preheat and Prepare Pans
Preheat your oven to 350°F (175°C). Grease and flour three 9-inch round cake pans. You can also line the bottoms with parchment paper for extra insurance against sticking. This preheating step is crucial for even baking. Ensure your oven is at the correct temperature before placing the cake pans inside. Greasing and flouring (or parchment lining) will ensure that your cakes release cleanly from the pans after baking, preventing frustration and cake casualties.
Step 2: Combine Dry Ingredients
In a large bowl, whisk together the all-purpose flour, granulated sugar, baking powder, baking soda, and salt. Whisking is essential to evenly distribute the leavening agents and salt throughout the flour, preventing pockets of baking powder or soda that can lead to uneven rising or salty spots. Make sure to break up any clumps of baking powder or soda for a smooth mixture.
Step 3: Cream Wet Ingredients
In a separate large bowl or the bowl of a stand mixer fitted with the paddle attachment, cream together the softened butter and vegetable oil until light and fluffy. This process, known as creaming, incorporates air into the butter and sugar mixture, which is vital for creating a light and airy cake. Creaming also helps to dissolve the sugar and create a smooth base for the batter. Beat for 2-3 minutes until the mixture is noticeably lighter in color and texture.
Step 4: Incorporate Eggs
Beat in the eggs one at a time, mixing well after each addition. Ensure each egg is fully incorporated before adding the next. This gradual addition of eggs allows them to emulsify properly into the fat and sugar mixture, contributing to a smooth and stable batter. Mix until just combined after each egg; overmixing at this stage can lead to a tougher cake.
Step 5: Add Wet and Dry Ingredients Alternately
In a small bowl, whisk together the buttermilk, lemon zest, lemon juice, and vanilla extract. This combines the liquid ingredients and disperses the lemon zest evenly. Gradually add the wet ingredients to the creamed mixture, alternating with the dry ingredients, beginning and ending with the dry ingredients. Start by adding about one-third of the dry ingredients to the wet mixture and mix until just combined. Then, add half of the wet ingredients, mix, followed by another third of the dry ingredients, mix, the remaining wet ingredients, mix, and finally the last of the dry ingredients. Mix until just combined after each addition. This alternating method prevents overmixing, which can develop gluten in the flour and result in a tough cake. Overmixing at this stage is a common mistake, so mix just until the flour streaks disappear.
Step 6: Divide Batter and Bake
Divide the cake batter evenly among the prepared cake pans. Use a kitchen scale or measuring cups to ensure each pan receives roughly the same amount of batter for even baking and layers of equal thickness. Smooth the tops of the batter in each pan with a spatula. Bake for 25-30 minutes, or until a toothpick inserted into the center comes out clean. Baking time can vary depending on your oven, so start checking for doneness around 25 minutes. The cake layers should be golden brown around the edges and spring back lightly when gently pressed.
Step 7: Cool Cakes
Let the cakes cool in the pans for 10-15 minutes before inverting them onto a wire rack to cool completely. Cooling in the pans allows the cakes to set slightly, making them easier to handle and preventing them from breaking apart when inverted. Cooling completely is crucial before frosting to prevent the frosting from melting and sliding off.
Step 8: Prepare Strawberry Filling
While the cakes are cooling, prepare the strawberry filling. In a medium saucepan, combine the sliced strawberries, granulated sugar, lemon juice, and cornstarch. The cornstarch will thicken the strawberry juices as they heat. Cook over medium heat, stirring constantly, until the mixture thickens and the strawberries soften slightly, about 5-7 minutes. The mixture should be bubbly and have a jam-like consistency. Remove from heat and let cool completely. Cooling the filling is important to prevent it from melting the frosting when assembling the cake.
Step 9: Make Lemon Buttercream Frosting
In a large bowl or the bowl of a stand mixer fitted with the paddle attachment, cream the softened butter until smooth and creamy. This ensures a lump-free frosting base. Gradually add the powdered sugar, one cup at a time, mixing on low speed until incorporated. Start on low speed to prevent powdered sugar from flying everywhere. Once all the powdered sugar is added, increase the speed to medium and beat until light and fluffy. Beat for 2-3 minutes to achieve a smooth and airy frosting.
Step 10: Add Lemon Flavor and Consistency
Add the lemon zest, lemon juice, and a pinch of salt to the buttercream. Beat until well combined. Taste and adjust the lemon juice or powdered sugar to your liking. If the frosting is too thick, add heavy cream or milk, one tablespoon at a time, until you reach your desired consistency. The frosting should be smooth, creamy, and easily spreadable.
Step 11: Assemble the Cake
Once the cakes and strawberry filling are completely cool, it’s time to assemble the cake. Place one cake layer on a serving plate or cake stand. Spread half of the cooled strawberry filling evenly over the top of the cake layer, leaving a small border around the edge. This border will help prevent the filling from oozing out when you add the frosting. Top with the second cake layer and spread the remaining strawberry filling over it. Place the final cake layer on top.
Step 12: Frost the Cake
Frost the entire cake with the lemon buttercream frosting. You can create a simple, smooth frosting or get creative with swirls and decorations using a spatula or piping bag. For a rustic look, leave the frosting slightly swirled. For a more polished look, use a bench scraper or offset spatula to create smooth, even frosting.
Step 13: Chill and Serve
Refrigerate the frosted cake for at least 30 minutes to allow the frosting to set and the flavors to meld. Chilling also makes the cake easier to slice and serve. Before serving, you can garnish the cake with fresh strawberry slices, lemon slices, or a sprinkle of lemon zest. Slice and enjoy this delightful Strawberry Lemon Layer Cake!
Nutrition Facts for Strawberry Lemon Layer Cake
(Approximate values per serving – Servings: 12)
- Calories: 450-550 kcal
- Fat: 20-25g
- Saturated Fat: 12-15g
Please note: Nutritional values are estimates and can vary based on specific ingredients and portion sizes. For precise nutritional information, use a nutrition calculator with the exact brands and quantities of ingredients used.
Preparation Time for Strawberry Lemon Layer Cake
- Prep Time: 45 minutes (includes ingredient measuring, batter preparation, and filling preparation)
- Bake Time: 25-30 minutes
- Cooling Time: 2-3 hours (cake layers and filling must cool completely before frosting)
- Frosting & Assembly Time: 30 minutes
- Total Time: Approximately 4-5 hours (including cooling and chilling time)
This Strawberry Lemon Layer Cake requires a bit of time, but the delicious results are well worth the effort! Plan ahead to allow for cooling and chilling time for the best flavor and texture.
How to Serve Strawberry Lemon Layer Cake
This versatile Strawberry Lemon Layer Cake can be served in numerous delightful ways, making it perfect for any occasion. Here are some ideas to elevate your serving experience:
- Classic Slice:
- Serve chilled slices on dessert plates as a perfect ending to a meal or as a delightful afternoon treat.
- Accompany with a fork and a small dessert napkin.
- With Fresh Fruit:
- Garnish each slice with fresh strawberry slices, lemon wedges, or a mix of berries for added freshness and visual appeal.
- Consider adding a sprig of mint for a touch of elegance and aromatic contrast.
- Alongside Whipped Cream or Ice Cream:
- Serve a dollop of freshly whipped cream or a scoop of vanilla ice cream alongside each slice for extra indulgence.
- Lemon or strawberry flavored ice cream would complement the cake flavors beautifully.
- Pair with Beverages:
- Hot Beverages: Enjoy with a cup of hot coffee, tea (especially Earl Grey or herbal lemon tea), or a latte.
- Cold Beverages: Pair with iced tea, lemonade, sparkling water with lemon and strawberries, or a glass of chilled white wine like Sauvignon Blanc.
- For a celebratory occasion: Serve with a glass of Prosecco or Champagne.
- Dessert Bar Star:
- Make it the centerpiece of a dessert bar, surrounded by other treats like fresh fruit salad, lemon bars, and strawberry shortcakes.
- Offer different toppings like extra strawberry sauce, lemon curd, or chocolate shavings for guests to customize their slices.
- Picnic Perfect:
- Transport slices in airtight containers for a delightful picnic dessert.
- Ensure the cake is well-chilled before transporting to maintain its freshness and frosting integrity, especially in warm weather.
- Elegant Plating:
- Dust plates lightly with powdered sugar before placing a slice of cake for a refined presentation.
- Drizzle a light strawberry sauce or lemon glaze over the plate for an artistic touch.
Additional Tips for the Best Strawberry Lemon Layer Cake
To ensure your Strawberry Lemon Layer Cake turns out perfectly delicious every time, here are some helpful tips and tricks:
- Use Room Temperature Ingredients: Ensure your butter, eggs, and buttermilk are at room temperature before starting. Room temperature ingredients emulsify better, creating a smoother batter and a more tender cake. Cold ingredients can lead to a denser and less evenly textured cake.
- Measure Flour Correctly: Properly measuring flour is crucial for cake texture. Spoon flour into your measuring cup and level it off with a straight edge. Avoid scooping flour directly from the bag, as this can pack it down and result in using too much flour, leading to a dry cake.
- Don’t Overmix the Batter: Overmixing the batter develops gluten, which can make the cake tough. Mix until the ingredients are just combined and no streaks of flour remain. A few lumps are okay. Overmixing is one of the most common mistakes in baking, so be mindful of this step.
- Evenly Divide the Batter: Use a kitchen scale or measuring cups to ensure you divide the batter evenly among the cake pans. This will ensure that the layers bake at the same rate and are of uniform thickness, resulting in a more professional-looking layer cake.
- Don’t Overbake: Overbaking can dry out your cake. Start checking for doneness around 25 minutes with a toothpick. The toothpick should come out clean or with a few moist crumbs attached. The cake should also spring back lightly when gently pressed in the center.
- Cool Cakes Completely Before Frosting: This is essential! Frosting a warm cake will cause it to melt and slide off, creating a sticky mess. Ensure the cake layers are completely cool to the touch before frosting. You can speed up the cooling process by placing the cakes in the refrigerator for a short period.
- Chill the Cake After Frosting: Chilling the frosted cake for at least 30 minutes (or longer) allows the frosting to set, making it easier to slice and serve. It also helps the flavors meld together beautifully, enhancing the overall taste of the cake.
- Make Ahead Options: You can bake the cake layers a day ahead of time. Wrap them tightly in plastic wrap and store them at room temperature or in the refrigerator. You can also make the strawberry filling and buttercream frosting ahead of time and store them in airtight containers in the refrigerator. Bring the frosting to room temperature and re-whip it before using. This helps break down the baking process into manageable steps.
Frequently Asked Questions (FAQ) about Strawberry Lemon Layer Cake
Q1: Can I use frozen strawberries for the filling?
A: While fresh strawberries are best for the filling, you can use frozen strawberries in a pinch. Thaw them completely and drain off any excess liquid before using. Frozen strawberries might release more liquid during cooking, so you may need to cook the filling slightly longer to achieve the desired thickness.
Q2: Can I make this cake gluten-free?
A: Yes, you can adapt this recipe to be gluten-free. Substitute the all-purpose flour with a good quality gluten-free all-purpose flour blend. Ensure the blend contains xanthan gum or guar gum to provide structure. Gluten-free cakes can sometimes be a bit drier, so consider adding an extra tablespoon of oil or buttermilk to the batter.
Q3: Can I make cupcakes instead of a layer cake?
A: Absolutely! This recipe can easily be adapted for cupcakes. Fill cupcake liners about two-thirds full and bake for approximately 18-20 minutes, or until a toothpick inserted into the center comes out clean. The baking time will be shorter for cupcakes, so keep a close eye on them. Frost and fill as desired.
Q4: How do I store leftover Strawberry Lemon Layer Cake?
A: Store leftover cake in an airtight container in the refrigerator for up to 3-4 days. The cake is best enjoyed within this timeframe for optimal freshness and flavor. Bring slices to room temperature for about 15-20 minutes before serving to soften the frosting slightly.
Q5: Can I freeze Strawberry Lemon Layer Cake?
A: Yes, you can freeze frosted or unfrosted cake layers. For frosted cake, freeze individual slices or the whole cake (well-wrapped) for up to 2-3 months. For unfrosted layers, wrap them tightly in plastic wrap and then foil and freeze for up to 3 months. Thaw frozen cake in the refrigerator overnight before serving.
Q6: What if I don’t have buttermilk? Can I use a substitute?
A: Yes, you can make a buttermilk substitute. For 1 cup of buttermilk, combine 1 tablespoon of lemon juice or white vinegar with enough milk to measure 1 cup. Stir and let it sit for 5 minutes to thicken slightly before using. This works as a great substitute in most baking recipes.
Q7: Can I reduce the sugar in this recipe?
A: You can slightly reduce the sugar, but sugar plays a role in both sweetness and the cake’s texture and moisture. Reducing the granulated sugar in the cake batter by ¼ cup should be fine. You can also reduce the powdered sugar in the frosting slightly to your taste preference. However, significant reductions might affect the cake’s texture and overall flavor balance.
Q8: My cake layers are domed. How can I get flatter layers?
A: Domed cake layers are common. To get flatter layers, you can use cake strips (cloth strips soaked in water and wrapped around the cake pans) to promote even baking. Alternatively, after baking, while the cakes are still warm, gently press down on the domes with a flat spatula or clean tea towel to level them. Be careful not to press too hard and break the cake.

Strawberry Lemon Layer Cake
Ingredients
For the Cake:
- All-Purpose Flour: 3 cups, the foundation of our cake, providing structure and a tender crumb.
- Granulated Sugar: 2 cups, for sweetness and moisture, also aiding in browning and tenderness.
- Baking Powder: 3 teaspoons, the leavening agent that makes our cake light and fluffy.
- Baking Soda: 1 teaspoon, another leavening agent, reacting with acidic ingredients for extra lift and a tender texture.
- Salt: 1 teaspoon, enhances the flavors of all other ingredients and balances the sweetness.
- Unsalted Butter, softened: 1 cup (2 sticks), provides richness, flavor, and moisture, contributing to a tender cake.
- Vegetable Oil: ½ cup, adds extra moisture and tenderness, resulting in a cake that stays moist for days.
- Eggs: 4 large, bind the ingredients together, add richness, and contribute to the cake’s structure.
- Buttermilk: 1 cup, adds moisture and tanginess, activating the baking soda for a lighter crumb.
- Lemon Zest: 2 tablespoons, the finely grated outer rind of lemons, infusing the cake with bright, citrusy flavor.
- Lemon Juice: ¼ cup, adds a tangy counterpoint to the sweetness and enhances the lemon flavor.
- Vanilla Extract: 2 teaspoons, enhances the overall flavor profile, adding warmth and depth.
For the Strawberry Filling:
- Fresh Strawberries: 2 cups, hulled and sliced, the star of our filling, providing sweet, fruity flavor and vibrant color.
- Granulated Sugar: ¼ cup, sweetens the strawberries and helps to draw out their juices, creating a syrupy filling.
- Lemon Juice: 1 tablespoon, brightens the strawberry flavor and adds a touch of acidity.
- Cornstarch: 1 tablespoon, thickens the strawberry juices to create a luscious filling consistency.
For the Lemon Buttercream Frosting:
- Unsalted Butter, softened: 1 cup (2 sticks), the base of our buttercream, providing richness and structure.
- Powdered Sugar: 4 cups, sweetens and thickens the frosting, creating a smooth and creamy texture.
- Lemon Zest: 1 tablespoon, enhances the lemon flavor of the frosting, adding aromatic citrus notes.
- Lemon Juice: 3 tablespoons, adds tanginess and thins the frosting to a spreadable consistency.
- Heavy Cream or Milk: 2-4 tablespoons, adjust the consistency of the frosting, making it smoother and easier to spread.
- Pinch of Salt: Balances the sweetness and enhances the lemon flavor in the frosting.
Instructions
Step 1: Preheat and Prepare Pans
Preheat your oven to 350°F (175°C). Grease and flour three 9-inch round cake pans. You can also line the bottoms with parchment paper for extra insurance against sticking. This preheating step is crucial for even baking. Ensure your oven is at the correct temperature before placing the cake pans inside. Greasing and flouring (or parchment lining) will ensure that your cakes release cleanly from the pans after baking, preventing frustration and cake casualties.
Step 2: Combine Dry Ingredients
In a large bowl, whisk together the all-purpose flour, granulated sugar, baking powder, baking soda, and salt. Whisking is essential to evenly distribute the leavening agents and salt throughout the flour, preventing pockets of baking powder or soda that can lead to uneven rising or salty spots. Make sure to break up any clumps of baking powder or soda for a smooth mixture.
Step 3: Cream Wet Ingredients
In a separate large bowl or the bowl of a stand mixer fitted with the paddle attachment, cream together the softened butter and vegetable oil until light and fluffy. This process, known as creaming, incorporates air into the butter and sugar mixture, which is vital for creating a light and airy cake. Creaming also helps to dissolve the sugar and create a smooth base for the batter. Beat for 2-3 minutes until the mixture is noticeably lighter in color and texture.
Step 4: Incorporate Eggs
Beat in the eggs one at a time, mixing well after each addition. Ensure each egg is fully incorporated before adding the next. This gradual addition of eggs allows them to emulsify properly into the fat and sugar mixture, contributing to a smooth and stable batter. Mix until just combined after each egg; overmixing at this stage can lead to a tougher cake.
Step 5: Add Wet and Dry Ingredients Alternately
In a small bowl, whisk together the buttermilk, lemon zest, lemon juice, and vanilla extract. This combines the liquid ingredients and disperses the lemon zest evenly. Gradually add the wet ingredients to the creamed mixture, alternating with the dry ingredients, beginning and ending with the dry ingredients. Start by adding about one-third of the dry ingredients to the wet mixture and mix until just combined. Then, add half of the wet ingredients, mix, followed by another third of the dry ingredients, mix, the remaining wet ingredients, mix, and finally the last of the dry ingredients. Mix until just combined after each addition. This alternating method prevents overmixing, which can develop gluten in the flour and result in a tough cake. Overmixing at this stage is a common mistake, so mix just until the flour streaks disappear.
Step 6: Divide Batter and Bake
Divide the cake batter evenly among the prepared cake pans. Use a kitchen scale or measuring cups to ensure each pan receives roughly the same amount of batter for even baking and layers of equal thickness. Smooth the tops of the batter in each pan with a spatula. Bake for 25-30 minutes, or until a toothpick inserted into the center comes out clean. Baking time can vary depending on your oven, so start checking for doneness around 25 minutes. The cake layers should be golden brown around the edges and spring back lightly when gently pressed.
Step 7: Cool Cakes
Let the cakes cool in the pans for 10-15 minutes before inverting them onto a wire rack to cool completely. Cooling in the pans allows the cakes to set slightly, making them easier to handle and preventing them from breaking apart when inverted. Cooling completely is crucial before frosting to prevent the frosting from melting and sliding off.
Step 8: Prepare Strawberry Filling
While the cakes are cooling, prepare the strawberry filling. In a medium saucepan, combine the sliced strawberries, granulated sugar, lemon juice, and cornstarch. The cornstarch will thicken the strawberry juices as they heat. Cook over medium heat, stirring constantly, until the mixture thickens and the strawberries soften slightly, about 5-7 minutes. The mixture should be bubbly and have a jam-like consistency. Remove from heat and let cool completely. Cooling the filling is important to prevent it from melting the frosting when assembling the cake.
Step 9: Make Lemon Buttercream Frosting
In a large bowl or the bowl of a stand mixer fitted with the paddle attachment, cream the softened butter until smooth and creamy. This ensures a lump-free frosting base. Gradually add the powdered sugar, one cup at a time, mixing on low speed until incorporated. Start on low speed to prevent powdered sugar from flying everywhere. Once all the powdered sugar is added, increase the speed to medium and beat until light and fluffy. Beat for 2-3 minutes to achieve a smooth and airy frosting.
Step 10: Add Lemon Flavor and Consistency
Add the lemon zest, lemon juice, and a pinch of salt to the buttercream. Beat until well combined. Taste and adjust the lemon juice or powdered sugar to your liking. If the frosting is too thick, add heavy cream or milk, one tablespoon at a time, until you reach your desired consistency. The frosting should be smooth, creamy, and easily spreadable.
Step 11: Assemble the Cake
Once the cakes and strawberry filling are completely cool, it’s time to assemble the cake. Place one cake layer on a serving plate or cake stand. Spread half of the cooled strawberry filling evenly over the top of the cake layer, leaving a small border around the edge. This border will help prevent the filling from oozing out when you add the frosting. Top with the second cake layer and spread the remaining strawberry filling over it. Place the final cake layer on top.
Step 12: Frost the Cake
Frost the entire cake with the lemon buttercream frosting. You can create a simple, smooth frosting or get creative with swirls and decorations using a spatula or piping bag. For a rustic look, leave the frosting slightly swirled. For a more polished look, use a bench scraper or offset spatula to create smooth, even frosting.
Step 13: Chill and Serve
Refrigerate the frosted cake for at least 30 minutes to allow the frosting to set and the flavors to meld. Chilling also makes the cake easier to slice and serve. Before serving, you can garnish the cake with fresh strawberry slices, lemon slices, or a sprinkle of lemon zest. Slice and enjoy this delightful Strawberry Lemon Layer Cake!
Nutrition
- Serving Size: one normal portion
- Calories: 550
- Fat: 25g
- Saturated Fat: 15g